7
- 39
3$57(&,&/2
&+$66,63$576
7.1.33 DESMONTAJE BASTIDOR
El desmontaje del bastidor tiene que ser efec-
tuado exclusivamente por un Centro Autoriza-
do o por un Concesionario Oficial
DSULOLD
.
Lea con cuidado 1.4 (PRECAUCIONES E INFORMA-
CIONES GENERALES).
El desmontaje del bastidor es particularmente
complejo, por eso antes de seguir con esta
operación es necesario examinar con mucho
cuidado el vehículo.
En este capítulo los procedimientos están detallados
en orden progresivo secuencial.
Una eventual sobreposición de las operaciones por
efecto de las remisiones a otros capítulos tiene que
interpretarse en sentido lógico, para evitar desmon-
tajes no necesarios de otros componentes.
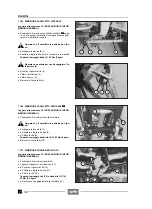
No destornille o manipule por ninguna razón
los dos tornillos de unión del bastidor y las
tuercas correspondientes (véase figura).
X
Desmonte el motor, véase 3.2 (EXTRACCION DEL
MOTOR DEL BASTIDOR) y 3.3 (INSTALACION MO-
TOR SOBRE BASTIDOR).
X
Destornille y quite el tornillo (1).
X
Quite la protección (2).
X
Desconecte los conectores eléctricos en el lado iz-
quierdo del vehículo.
Marque los cables y los tubos para volver a
colocarlos correctamente durante el reensam-
blaje. Para mayores informaciones sobre el
recorrido de los cables y de los tubos véase 8.2 (RE-
CORRIDO, SUJECION, CABLEADO, CABLES Y TU-
BOS).
Suelte los cables y los tubos de las lengüetas
en el bastidor y en el soporte superior amorti-
guador y quítelos de los collares en los com-
ponentes que va a desmontar.
X
Desconecte los conectores eléctricos en el interruptor
de la bomba freno trasero.
X
Desmonte el vástago del sillín junto con la caja del fil-
tro con batería, estribo pasajero, portaequipajes, vano
portadocumentos/kit de herramientas, soporte porta-
matrícula con faro trasero y silenciadores de escape,
véase 7.1.11 (DESMONTAJE VASTAGO SILLIN) (a
partir del punto 9 en adelante).
Suelte todos los cables y los tubos de sus co-
rrespondientes abrazaderas de bloqueo.
Prepare el mismo número de abrazaderas para susti-
tuirlas a las originales durante el reensamblaje.
Prepare la abrazadera ajustable para susti-
tuirla a la original (de tipo especial sin torni-
llo).
X
Corte según el orden la cabeza de las abrazaderas (3-
4-5).
X
Extraiga según el orden el tubo de purga aceite (6) y
los tubos aceite motor (7-8).
X
Suelte de su propio enganche el relé de encendido (9).
X
Desconecte el conector eléctrico (10).
X
Destornille y quite los dos tornillos (11).
X
Extraiga la bobina AT (12).
7.1.33 REMOVING THE FRAME
The frame must be removed only by an au-
thorized centre or by an
DSULOLD
Official Deal-
er.
Read 1.4 (PRECAUTIONS AND GENERAL INFORMA-
TION)carefully.
The removal of the frame is particularly diffi-
cult to carry out, therefore it is necessary to
check the vehicle carefully before proceeding
to this operation.
This chapter describes the relevant procedures pro-
gressively and in sequential order.
Any coincidence of operations in the references to
other chapters must be understood according to a
logic principle, in order to avoid the unnecessary re-
moval of certain components.
Neither unscrew, nor tamper with the two
screws and the relevant nuts that fasten the
frame for any reason whatsoever (see figure).
X
Remove the engine, see 3.2 (REMOVING THE EN-
GINE FROM THE FRAME) and 3.3 (REINSTALLING
THE ENGINE ON THE FRAME).
X
Unscrew and remove the screw (1).
X
Remove the guard (2).
X
Disconnect the electric connectors on the left side of
the vehicle.
Mark cables and pipes to avoid confusing
them during the reassembly.
For further information on the lines of cables
and pipes, see 8.2 (LINES, FIXING, HARNESS OF CA-
BLES AND PIPES).
Release the cables and pipes from the tangs
positioned on the frame and on the shock ab-
sorber upper support and withdraw them from
the collars positioned on the components that must
be removed.
X
Disconnect the electric connectors positioned on the
switch of the rear brake pump.
X
Remove the saddle pillar complete with filter casing
and battery, passenger’s footrest, luggage rack, glove
compartment, number plate holder with rear light and
exhaust silencers, see 7.1.11 (REMOVING THE SAD-
DLE PILLAR) (from point nine onwards).
Release all the cables form the fastening
clamps positioned along them.
Get other clamps to be used for the reassembly.
Get screwdriver-type pipe clamps, to replace the
original ones (special type without screw).
X
Cut the heads of the pipe clamps (3-4-5) in the given
order.
X
Withdraw first the oil breather pipe (6) and then the en-
gine oilpipes (7-8).
X
Release the start relay (9) from its coupling.
X
Disconnect the electric connector (10).
X
Unscrew and remove the two screws (11).
X
Remove the H.T. coil (12).
Содержание Pegaso 650
Страница 1: ......
Страница 3: ...0 4 NOTE NOTES ANMERKUNGEN ...
Страница 4: ...1 1 1 2 3 4 5 6 7 8 INFORMAZIONI GENERALI INFORMACIONES GENERALES GENERAL INFORMATION ...
Страница 42: ......
Страница 69: ...3 1 1 2 3 4 5 6 7 8 MOTORE MOTOR ENGINE ...
Страница 90: ...3 22 MOTORE NOTE NOTAS NOTES ...
Страница 91: ...4 1 1 2 3 4 5 SISTEMA DI ALIMENTAZIONE SISTEMA DE ALIMENTACIÓN FUEL SYSTEM ...
Страница 116: ...4 26 SISTEMA DI ALIMENTAZIONE NOTE NOTAS NOTES ...
Страница 117: ...5 1 1 2 3 4 5 6 7 8 IMPIANTO DI RAFFREDDAMENTO SISTEMA DE REFRIGERACIÓN COOLING SYSTEM ...
Страница 130: ...5 14 IMPIANTO DI RAFFREDDAMENTO SISTEMA DE REFRIGERACIÓN COOLING SYSTEM NOTE NOTAS NOTES ...
Страница 131: ...6 1 6 1 2 3 4 5 6 7 8 IMPIANTO ELETTRICO INSTALACIÓN ELÉCTRICA ELECTRICAL SYSTEM ...
Страница 176: ...IMPIANTO ELETTRICO INSTALACIÓN ELÉCTRICA ELECTRICAL SYSTEM 6 46 NOTE NOTAS NOTES ...
Страница 177: ...7 1 1 2 3 4 5 6 7 8 CICLISTICA PARTE CICLO CHASSIS PARTS ...
Страница 226: ... 67 3 57 2 66 6 3 576 7 50 5827 3267 5 25 58 75 6 5 5 5 ...
Страница 242: ... 67 3 57 2 66 6 3 576 7 66 5 12 17 5 25 5 12 17 52 5217 5 ...
Страница 246: ... 67 3 57 2 66 6 3 576 7 70 5 12 3267 5 25 5 12 75 6 52 5 5 5 ...
Страница 272: ... 67 3 57 2 66 6 3 576 7 96 NOTE NOTAS NOTES ...
Страница 273: ...8 1 1 2 3 4 5 6 7 8 INFORMAZIONI PER LE RIPARAZIONI INFORMACIONES PARA LAS REPARACIONES REPAIRS ...
Страница 301: ...INFORMAZIONI PER LE RIPARAZIONI INFORMACIONES PARA LAS REPARACIONES REPAIRS 8 29 E F E F G H G H ...
Страница 302: ...INFORMAZIONI PER LE RIPARAZIONI INFORMACIONES PARA LAS REPARACIONES REPAIRS 8 30 I L I M L N M N ...
Страница 303: ...INFORMAZIONI PER LE RIPARAZIONI INFORMACIONES PARA LAS REPARACIONES REPAIRS 8 31 O P Q P O R Q R ...
Страница 310: ...INFORMAZIONI PER LE RIPARAZIONI INFORMACIONES PARA LAS REPARACIONES REPAIRS 8 38 NOTE NOTAS NOTES ...
Страница 311: ...INFORMAZIONI PER LE RIPARAZIONI INFORMACIONES PARA LAS REPARACIONES REPAIRS 8 39 ...

