388
C
HAPTER
9: P
ERFORMANCE
R
EPORTING
Table 62
Report Resolutions
Unlike other reports the historical report is not automatically saved to
disk. You cannot launch historical reports from the
Reports
dialog box
under the
Tools > Reports
menu. See
“Creating Reports”
on
page 453
for
further details.
When you view a historical report it is saved under a temporary file that is
removed when 3Com Network Director is closed. If you wish to preserve
a historical report use the Web browser’s
Save As
option.
You can also preserve the data used to generate an individual graph
within a historical report by exporting its data in CSV (comma-separated
value) format. To do this, click the appropriate hot-link below the graph.
This will launch a dialog within 3Com Network Director allowing you to
select the location of the exported data. When this dialog is closed, the
browser window will update to show the result of the export operation.
To return to the historical report, click the Back button in your browser.
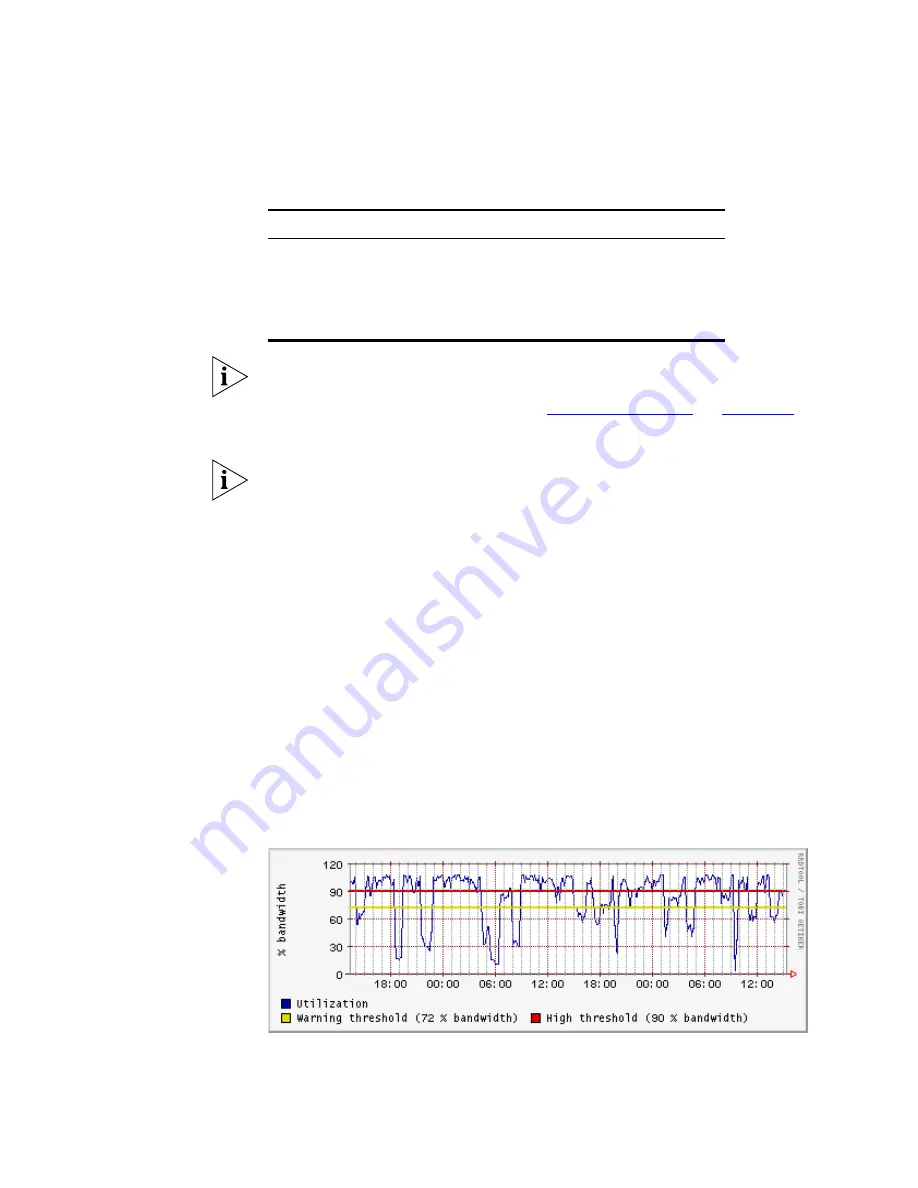
Historical reports will show collected data for most device and link
monitors. If appropriate, the monitor’s current warning and high
thresholds are also displayed on the graph, using yellow and red
horizontal bars:
Figure 194
Historical report Example Showing Thresholds
Resolution
Time span
Daily (5 minute average)
2 days and 2 hours
Weekly (30 minute average)
12.5 days
Monthly (2 hours average)
50 days
Yearly (1 day average)
2 years
Содержание 3C15500 - Network Director - PC
Страница 1: ...http www 3com com Part No DUA1550 0AAA01 Published May 2004 3Com Network Director User Guide 3C15500 ...
Страница 4: ......
Страница 34: ......
Страница 38: ...34 ABOUT THIS GUIDE ...
Страница 50: ...46 CHAPTER 1 GETTING STARTED ...
Страница 64: ...60 CHAPTER 2 PRODUCT ACTIVATION ...
Страница 213: ...Components 209 Figure 75 Export to Visio Dialog Box ...
Страница 220: ...216 CHAPTER 5 WORKING WITH THE MAP Figure 84 Double Clicking on a Router in the Tree ...
Страница 264: ...260 CHAPTER 6 VIEWING DEVICE DETAILS Figure 117 Security Tab for a Device ...
Страница 276: ...272 CHAPTER 6 VIEWING DEVICE DETAILS ...
Страница 322: ...318 CHAPTER 7 MONITORING THE NETWORK ...
Страница 385: ...Examples 381 Figure 189 Attach Alerts Dialog Box ...
Страница 406: ...402 CHAPTER 9 PERFORMANCE REPORTING ...
Страница 431: ...Components 427 History View dialog box Figure 210 History View Dialog Box ...
Страница 440: ...436 CHAPTER 10 RMON Host View dialog box Figure 219 Host View Dialog Box ...
Страница 476: ...472 CHAPTER 11 CREATING REPORTS ...
Страница 502: ...498 CHAPTER 12 CONFIGURING SINGLE DEVICES ...
Страница 526: ...522 CHAPTER 13 VLAN MANAGEMENT Figure 272 Options Dialog Box VLANs Tab ...
Страница 567: ...Components 563 Figure 305 Selecting the Link to the End Station on the Map ...
Страница 626: ...622 CHAPTER 14 BULK CONFIGURATION ...
Страница 684: ...680 CHAPTER 16 UPGRADING DEVICE SOFTWARE ...
Страница 814: ...810 CHAPTER 19 BACKING UP DEVICE CONFIGURATIONS ...
Страница 838: ...834 CHAPTER 20 LIVE UPDATE ...
Страница 894: ...890 APPENDIX G ADDING MAC ADDRESS VENDOR TRANSLATIONS ...


