Chapter 2
______________________________________________________
Zaxcom Fusion User’s Manual
92
Digital Input (#) page
Page purpose:
This page maintains several parameters for each digital input channel.
How to get here:
(
INPUT
key
Analog Inputs Toggle
button {=Digital}
Channel
button
)
(
MENU
key
Input Configure
button
Analog Inputs Toggle
button {=Digital}
Channel
button
)
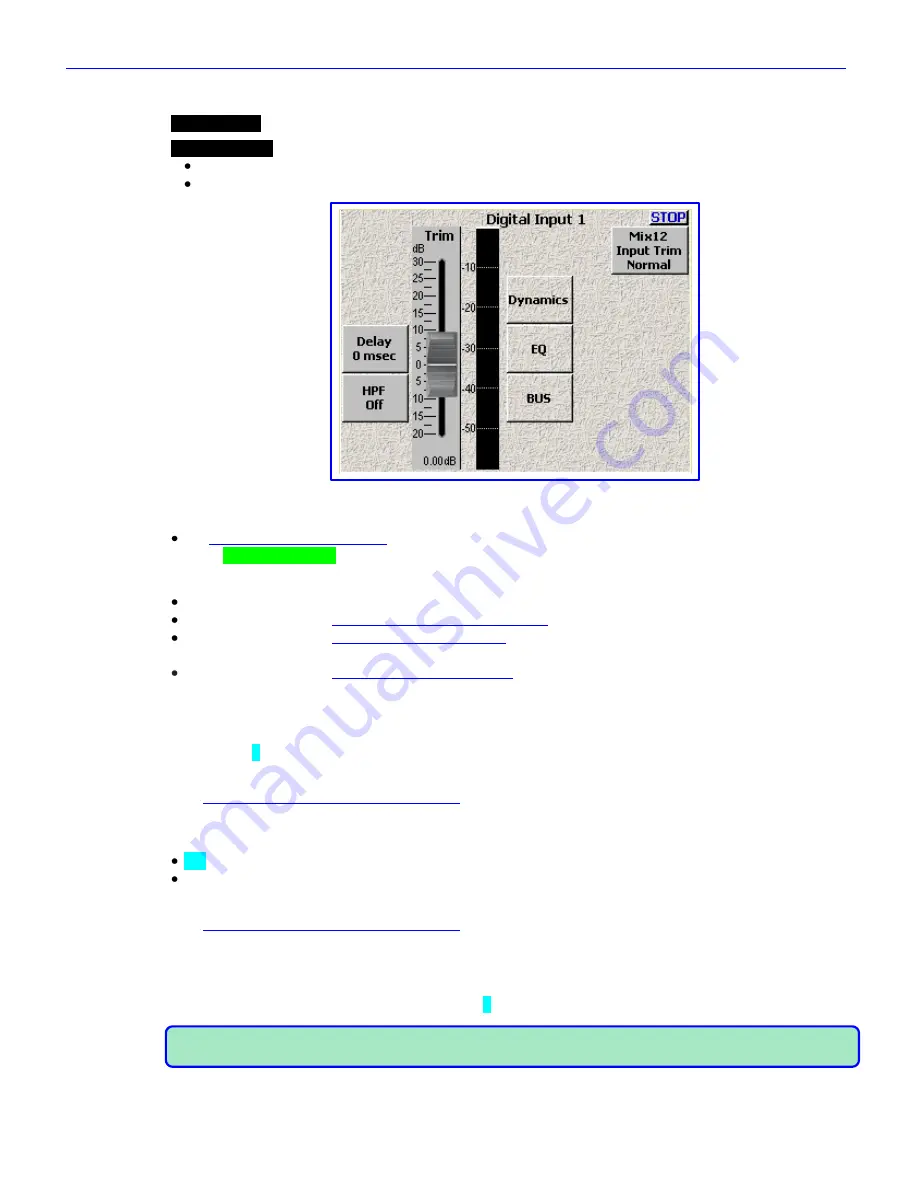
Figure 2-49 Digital Input (#) page
Page Notes
See
– Effects Package and More
{
p.142
} for the theory behind using the Delay processor.
** Coming Soon **
Page Level Shortcuts
1
–
8
keys
– the same as clicking on analog channel buttons 1 – 8.
D
key
– goes to the
Digital Input (#) – Dynamics page
{
p.94
} for the current channel.
E
key
– goes to the
Digital Input (#) – EQ page
{
p.96
} for the current channel.
This functions the same
as the
EQ
key
on the Mix-12.
B
key
– goes to
the
Digital Input (#) – BUS page
{
p.99
}
for the current channel. This functions the same
as the
BUS
key
on the Mix-12.
Delay button
Enter a value for the amount of delay for this input.
(Valid range:
0
–
40 ms
, Value step: 1)
Delay button Shortcuts
See:
Common Data Entry Field Shortcuts List
{
p.146
}
HPF button
Enter a value for the cutoff frequency for the high-pass filter for this input.
Off
(Valid range:
30
–
240 Hz
, Value step: 1)
HPF button Shortcuts
See:
Common Data Entry Field Shortcuts List
{
p.146
}
Input Trimmer graphic fader
Sets the pre-amp level for this channel to optimize this channel‟s performance. If you look at the bottom of the
fader background, you‟ll see the numeric representation of the slider‟s position, within 0.25 dB. This makes it easy
to repeat a setting, if necessary. (Valid range:
-20
–
0
–
+30 dB
, Value step: 0.25)
NOTE:
The scale is
NOT
dBFS and it is
NOT
dBu. It is a purely relative comparison to the input value arriving
at the fader.


