Chapter 4
______________________________________________________
Zaxcom Fusion User’s Manual
134
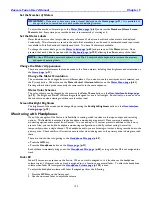
Enabling the High Pass Filter (Analog/Digital)
Setting the High Pass Filter value
To set the Highpass Frequency, perform the following, on the
Input Configure page (Analog Inputs selected)
{
p.80
}:
1.
Press the
High Pass (#) Hz
button
. You are prompted to enter the highpass frequency in Hz.
2.
Enter the frequency using the numeric keys. The valid frequency range is
30 Hz
to
240 Hz
.
Any value outside this range is placed near the closest valid number within this range.
3.
Press
High Pass (#) Hz
button
or the
ENTER
key
to finish entering the Cutoff Frequency.
NOTE:
The Cutoff Frequency value last entered is used as the default value for the next Cutoff Frequency.
Setting the High Pass Filter Frequency on Multiple Channels
To copy the Cutoff Frequency from part #1 to the appropriate channels, perform the following on the
Input
Configure page (Analog Inputs selected)
{
p.80
}:
1.
Press the
High Pass Filter
button
. The button‟s LED indicator flashes green while it is active.
2.
Press the
Channel
button
for the channel to which you want the highpass filter applied.
The HPF indicator on the button changes to the selected Cutoff Frequency.
3.
Repeat #2 for each channel you want to change.
4.
Once the last channel has been changed, press the
High Pass Filter
button
again. The LED stops flashing.
NOTE:
To disable the highpass filter, press the
High Pass Filter
button
on the
Input Configure page (Analog
Inputs selected)
{
p.80
}, and then press the channel(s) you want to disable.
Enabling 48 VDC Phantom Power (Analog Only)
Some microphones require external power to operate. The Fusion supplies the full power and current allowed by
the phantom power specification (48 VDC up to 1.0 A). The Fusion does not supply 12T power, which is required
by some older microphones. If you use microphones requiring 12T power, check with your local audio dealer for
phantom to 12T power converters.
To enable phantom power, perform the following:
1.
Press the
Channel
button
on the
Input Configure page (Analog Inputs selected)
{
p.80
}.
The
Analog Input (#) page
{
p.82
} for that channel appears.
2.
Press the
48V Off
button
. The text turns red and changes to
48V On
indicating it is active.
IMPORTANT:
To protect equipment from damage, the Fusion does not allow you to apply power to any
channel set as a line-level input.
Adjusting the Trim (Analog/Digital)
There are two ways to adjust the input trim on channels. If you have multiple inputs, the
Analog/Digital Input
Trim page
{
p.103
} allows you adjust all of them from a single page. However, if you are making individual
adjustments to channels, the trim can be adjusted using the on-screen fader in the
Analog Input (#) page
{
p.82
}.
Adjusting the Trim using the Analog/Digital Input Trim page
1.
Press the
Adjust Trim
button
on the
Input Configure page (Analog Inputs selected)
{
p.80
}.
The
Analog/Digital Input Trim page
{
p.103
} appears.
2.
Press the meter for the channel you want to adjust.
When a channel is activated,
Trim: ?? dB
changes to
Trim: ?? dB
.
3.
Press the
Less Gain
or
More Gain
button
to adjust the selected channel(s).
4.
Repeat steps 2 and 3 for each additional channel, as appropriate.
All Trim settings can be reset to
0 dB
by pressing the
Clear Trim
button
. A dialog appears after pressing the
Clear Trim
button
requesting confirmation that you want to clear all of the trim settings.
NOTE:
If all channels are going to be set at the same level, you can save time by changing them at the same time.
Press
Select All.
Any change made to the level is applied simultaneously to all of the channels.
Pressing either the
STOP
button
in the upper-right corner of the page or using the
MENU
key
exits the
Analog/Digital Input Trim page
{
p.103
} and returns you to the
Input Configure page (Analog Inputs
selected)
{
p.80
}.


