Chapter 8___
___________________________________________________
Zaxcom Fusion User’s Manual
146
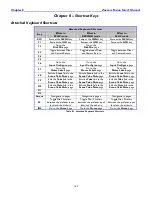
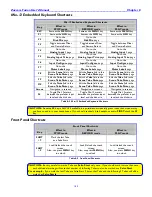
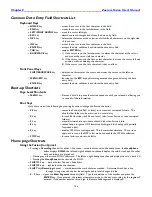
Common Data Entry Field Shortcuts List
Keyboard Keys
HOME
key
– moves the cursor to the first character in the field.
END
key
– moves the cursor to the last character in the field.
LEFT/RIGHT ARROW
keys
– move the cursor left/right.
ESC
key
– discards unsaved changes and closes the data entry field.
DEL
key
– deletes the character at the cursor and left shifts all characters on the right side
of the cursor.
INS
key
– moves the cursor to the first character in the field.
ENTER
key
– accepts the data, validates it and closes the data entry field.
TAB
key
– same as
ENTER
key
BACKSPACE
key
– 1) If the cursor is on the last character, it deletes the character at the cursor
and moves the cursor left one character.
2) If the cursor is not on the first or last character, it moves the cursor left one
position, without deleting the character.
3) If the cursor is on the first character, it has no effect.
Front Panel Keys
SHIFT/BACKSPACE
key
– deletes one character at the cursor and moves the cursor to the left one
character.
MENU/ESC
key
– functions as the
ESC
key
by discarding unsaved changes and closing the data
entry field.
ENTER
key
– accepts the data, validates it and closes the data entry field.
Boot-up Shortcuts
Page Level Shortcuts
MENU
key
– Press and hold it to pause the startup sequence until you release it, allowing you
to read all of the information.
Boot Keys
Hold down one of the following keys during bootup to change the Fusion‟s behavior:
F6
key
– causes the Fusion (v6.06C or later) to reconstruct corrupted folders. This
should allow folders to be mirrored in a normal way.
0
key
– forces 48 kHz mode (in v3.56 and later) (also forces Fusion to read corrupted
folders).
3
key
– may allow immediate spin-down of hard disk when Fusion is idle.
8
key
– causes Fusion to ignore UDF formatted disks (good for dealing with partially
formatted disks).
9
key
– enables 192 kHz recording speed. This is somewhat obsolete. The current
approach is to run the DSP in fast mode and enable the 192 kHz selection.
STOP
key
– forces a factory restore to defaults.
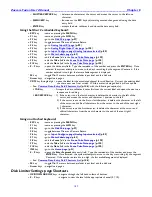
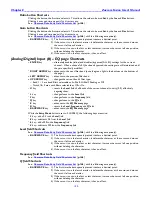
Home page Shortcuts
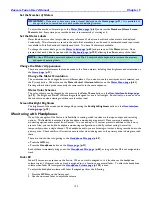
Using the Fusion front panel:
Pressing a
Recording
channel for about 1.5 seconds – solos that channel to the headphones, the
Headphone
button
displays
SOLO
, the left and right headphone channels display the solo‟d track and the other
track audio bars are grayed out.
o
Pressing any other track SOLOs that track. The left and right headphone channels display the solo‟d track‟s #.
o
Pressing the
Headphone
button
, cancels the SOLO.
SHIFT+7
keys
– marks the last Take as a False Start.
SHIFT+9
keys
– lock/unlock the touchscreen.
SHIFT
key
+Recording
channel – arms/disarms the track that was touched. A disarmed track has a line
through it long wise and the bar indicating the audio level changes to blue.
0
–
9
keys
– opens the
Enter Segment
data entry field. Type the remainder of the number and press the
ENTER
key
. Once entered, the system attempts to move to the day‟s recording, by the segment #
entered. If the number entered is too high, the last available segment is displayed.

