16-2
IM AQ1200-01EN
Entering Measurement Core Information
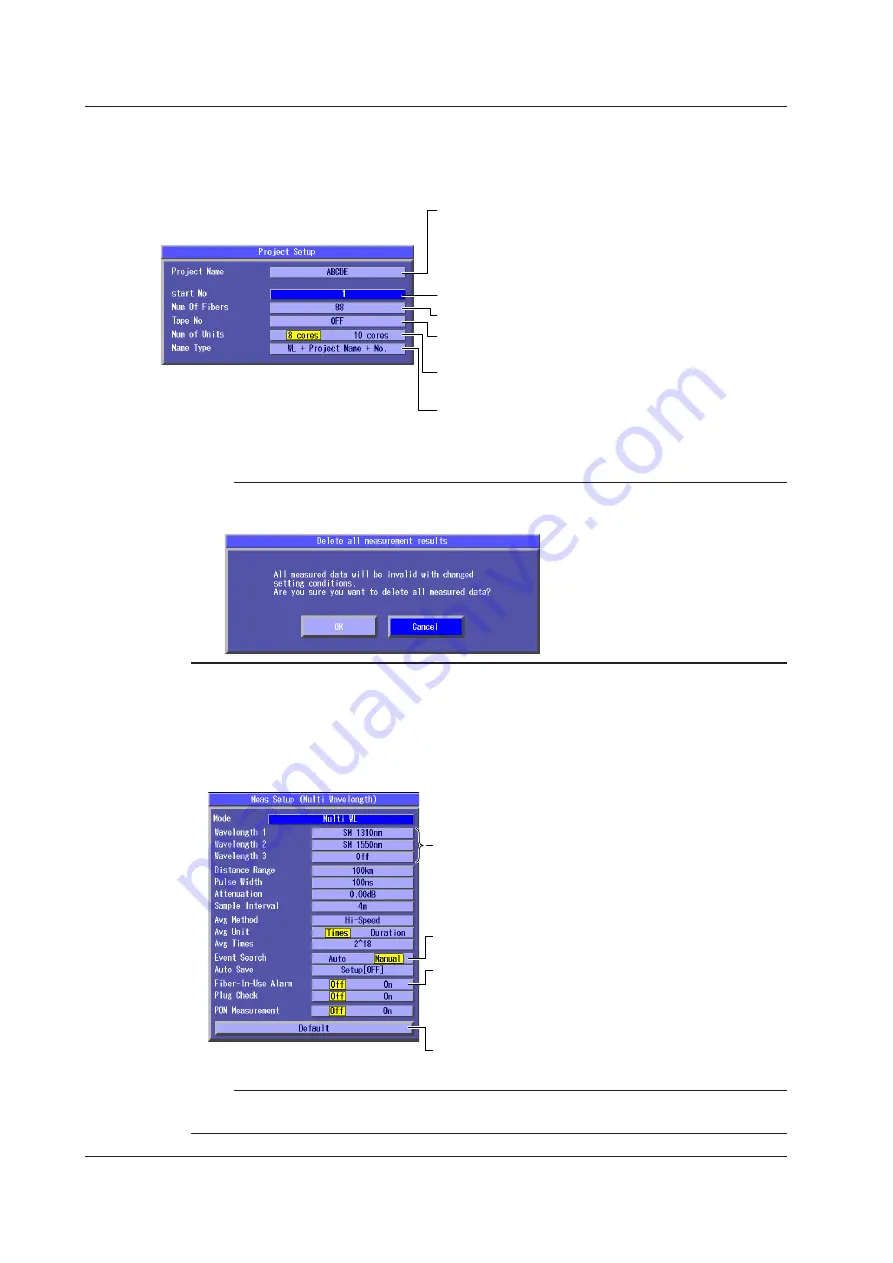
Project Setup Screen
3.
Press
SETUP
and then the
Project Setup
soft key. The following screen appears.
Set the starting core number (1 to 9900)
Set the number of fibers or tapes (1 to 100)
Set the tape number
(OFF, a-b (2), a-c (3), a-d (4), a-e (5), a-f (6), a-g (7), a-h (8)).
Set the number of fibers in each division (8 cores, 10 cores).
You can set this when the tape number is set to OFF.
Set the file name type
(WL + No., No. + WL, Project Name + WL + No., No. +
Project Name + WL, WL + Project Name + No.).
Change the project name.
A character input dialog box will open (see “Creating a New
Project” on the previous page).
If you created a new project in step 2, you do not have to
change the project name here.
Note
If a core number cell on the main view screen has a check mark and a new project has not been created,
changing the measurement core information will cause the following confirmation screen to appear.
Setting Measurement Conditions
Meas Setup (Multi Wavelength) Screen
4.
Press the
Meas Setup
soft key. The following screen appears.
Follow the procedure in section 3.5, “Setting Measurement Conditions.”
Sets automatic saving of the measured results (Off, On)
On: Measured results are automatically saved. After
measurement is complete, the main view screen appears.
Off: Measured results are not automatically saved. You can
continue with the analysis.
Event Search
If the fault event display is turned on, this is set to Auto.
Set the wavelengths.
Set at what wavelength to measure each fiber.
• Measurement of all cores is performed at the
specified wavelength.
• To measure using multiple wavelengths, set
“Wavelength 2” and “Wavelength 3.”
Turns PON measurement on or off
Note
Depending on the measurement conditions that you change, measured data may be cleared. For details, see
“Changing Measurement Conditions” in “Explanation.”
16.1 Creating a New Project


