FWX120 Operation Manual
123
5
Implementing site-to-site VPN connections
Accessing the product
1
Connect the product to the broadband
network.
2
Click “View network status and tasks”
in “Control Panel”.
3
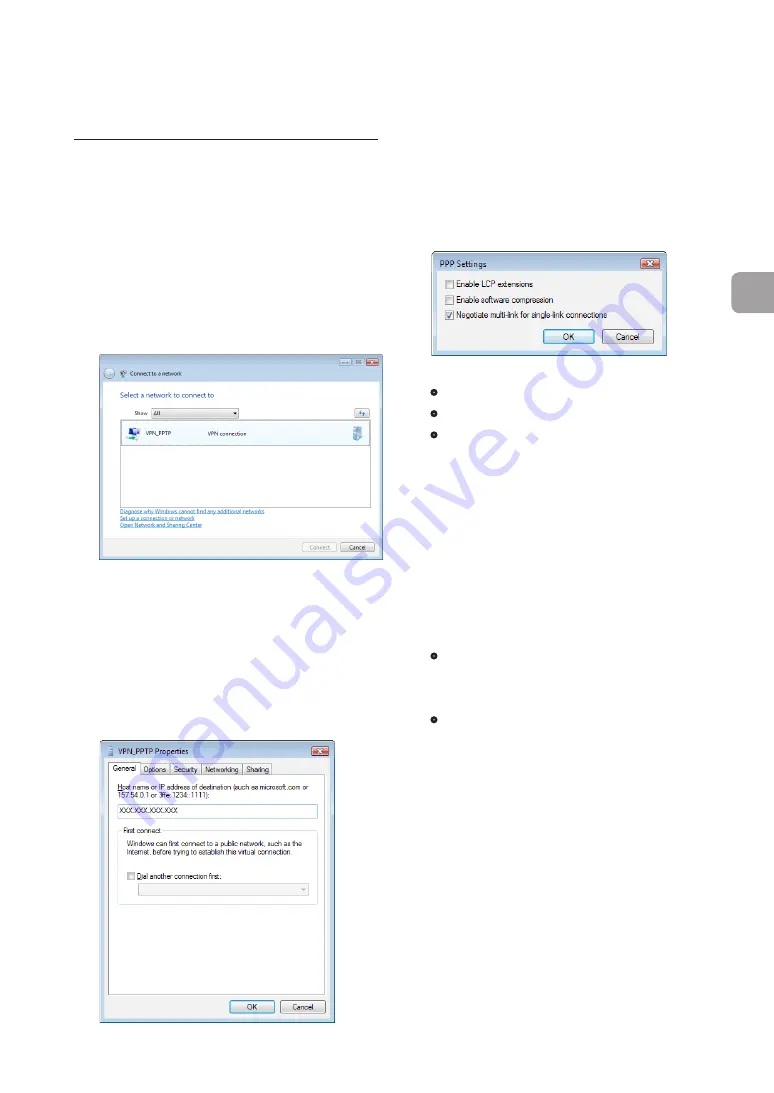
Click “Connect to a network”.
4
Select “VPN_PPTP” icon and then click
“Connect”.
5
Click “Properties”.
6
Click “General” tab and check that
the host address obtained with the
netvolante DNS service or the WAN
IP address of the product has been
entered in “Host name or IP address of
destination”.
7
Click “Options” tab, and then click “PPP
Settings”.
8
Select the check box as shown below
and then click “OK”.
•
Enable LCP extensions:
Unchecked
•
Enable software compression:
Unchecked
•
Negotiate multi-link for single-link
connections:
Checked
9
Click “Security” tab, select “Advanced
(custom settings)” under Security
options, and then click “Settings”.
10
Select the encryption mode.
If you selected “PP” as an encryption mode you
want to use in Step 3 on page 118, select the
encryption mode according to the setting you
made in Step 4 on page 118.
•
If “Non-encrypted access denied” is
selected with the product:
Select “Require
encryption (disconnect if server declines)”.
•
If “Non-encrypted access allowed” is
selected with the product:
Select your
desired encryption level.
If you selected “Anonymous” as an encryption
mode you want to use in Step 3 on page 118,
select your desired encryption level.


