6C13G11
4-6
1
2
3
4
5
6
7
8
9
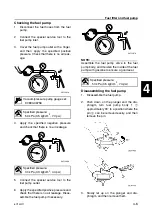
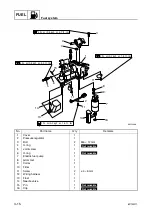
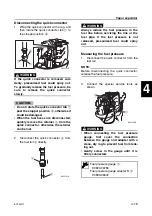
Checking the fuel pump
1.
Disconnect the fuel hoses from the fuel
pump.
2.
Connect the special service tool to the
fuel pump inlet.
3.
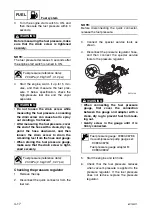
Cover the fuel pump outlet with a finger,
and then apply the specified positive
pressure. Check that there is no air leak-
age.
4.
Apply the specified negative pressure
and check that there is no air leakage.
5.
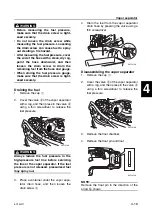
Connect the special service tool to the
fuel pump outlet.
6.
Apply the specified positive pressure and
check that there is no air leakage. Disas-
semble the fuel pump if necessary.
NOTE:
Assemble the fuel pump valve to the fuel
pump body, and moisten the inside of the fuel
pump with gasoline to ensure a good seal.
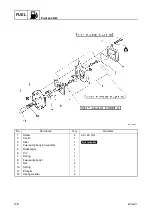
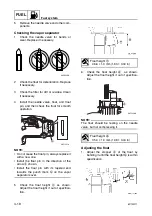
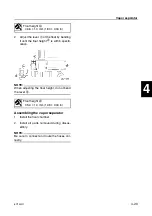
Disassembling the fuel pump
1.
Disassemble the fuel pump.
2.
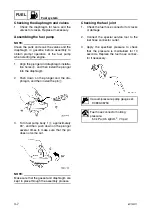
Push down on the plunger and the dia-
phragm, turn fuel pump body 1
1
approximately 90° to a position where the
pin
2
can be removed easily, and then
remove the pin.
3.
Slowly let up on the plunger and dia-
phragm, and then remove them.
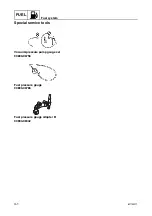
Vacuum/pressure pump gauge set:
90890-06756
Specified pressure:
50 kPa (0.5 kgf/cm
2
, 7.3 psi)
Specified pressure:
30 kPa (0.3 kgf/cm
2
, 4.4 psi)
S6C14050
S6C14060
Specified pressure:
50 kPa (0.5 kgf/cm
2
, 7.3 psi)
S6C14070
Summary of Contents for F50F
Page 1: ...F50F FT50G F60C FT60D SERVICE MANUAL 6C1 28197 3G 11 290551 ...
Page 4: ......
Page 48: ...SPEC Specifications 2 25 6C13G11 MEMO ...
Page 190: ...LOWR Lower unit 6 47 6C13G11 Shimming FT50 FT60 6 ...
Page 195: ...6C13G11 6 52 1 2 3 4 5 6 7 8 9 MEMO Backlash FT50 FT60 ...
Page 221: ...6C13G11 7 24 1 2 3 4 5 6 7 8 9 Steering arm ...
Page 249: ...6C13G11 7 52 1 2 3 4 5 6 7 8 9 MEMO Power trim and tilt electrical system ...
Page 272: ...ELEC Electrical systems 8 21 6C13G11 MEMO ...
Page 301: ...6C13G11 i 5 1 2 3 4 5 6 7 8 9 Index MEMO ...
Page 303: ......
Page 304: ...YAMAHA MOTOR CO LTD Printed in the Netherlands Jul 2004 1 2 1 CR E_2 ...


