256
8.JOB STATUS
5.Print Status Display (Cont.)
8
2
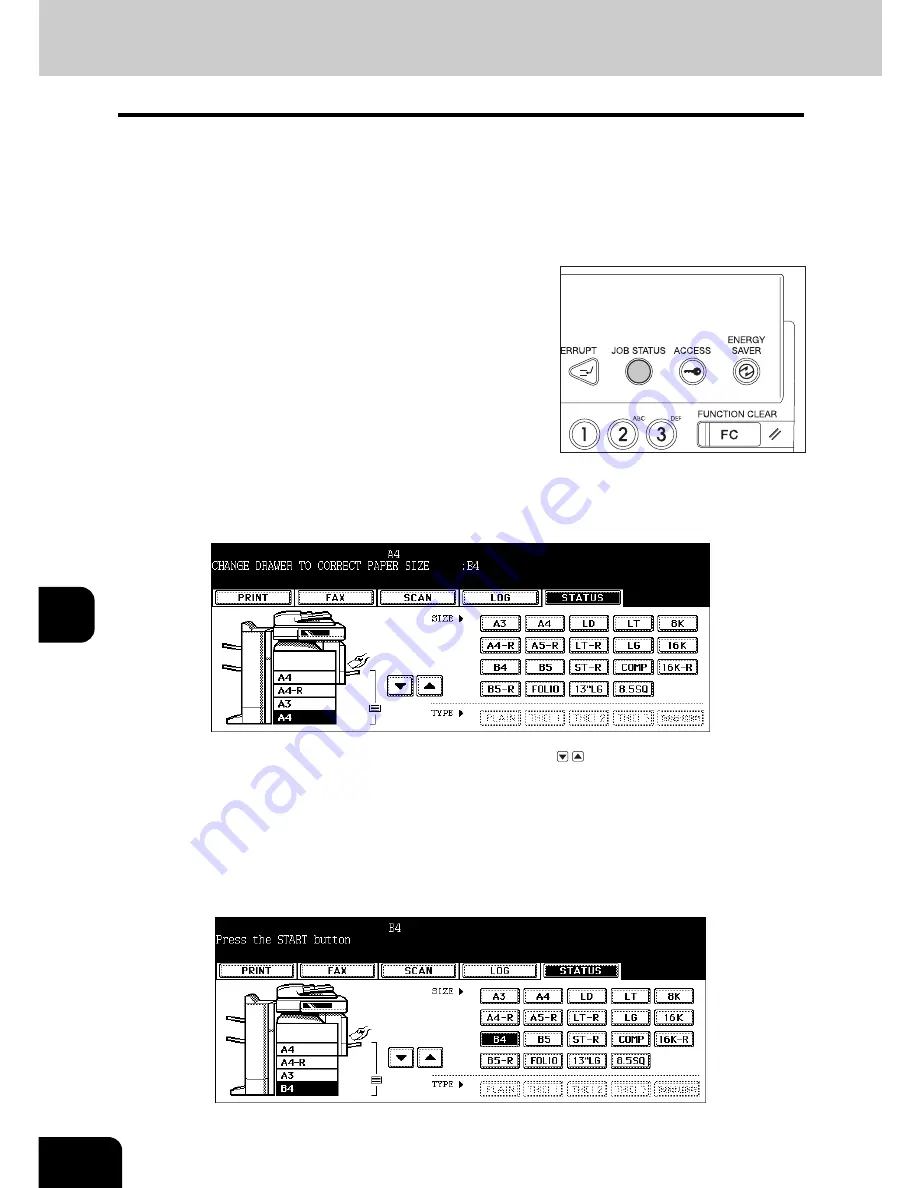
Place the specified size of paper on the bypass tray, and then press
the [START] button.
• Printing is performed. Press the [JOB STATUS] button when printing is completed.
Printing by placing appropriate size of sheets in the drawer
2
Press the drawer button whose size you want to change on the touch
panel.
• You can select the desired drawer with the paper source selection ( / ) buttons.
3
Place paper in the corresponding drawer.
4
Press the paper size button corresponding to the one you have
placed.
1
Press the blinking [JOB STATUS] button.
Summary of Contents for e-STUDIO 352
Page 1: ...MULTIFUNCTIONAL DIGITAL SYSTEMS Operator s Manual for Basic Function ...
Page 2: ......
Page 6: ...4 CONTENTS Cont ...
Page 10: ...8 Toshiba Quality is Second to None Cont For e STUDIO353 453 ...
Page 24: ...22 Environmental Information Cont ...
Page 88: ...86 2 HOW TO MAKE COPIES 4 Proof Copy Cont 2 ...
Page 103: ...101 3 Name of each Inner Finisher optional MJ 5004 MJ 5005 1 2 1 ...
Page 127: ...125 4 4 IMAGE ADJUSTMENT 1 Background Adjustment 126 2 Sharpness 127 ...
Page 130: ...128 4 IMAGE ADJUSTMENT 2 Sharpness Cont 4 ...
Page 135: ...133 5 6 Press the ENTER button Select other copy modes as required 7 Press the START button ...
Page 200: ...198 6 e FILING 8 Appendix Cont 6 ...
Page 270: ...268 8 JOB STATUS 6 Error Code Cont 8 ...
Page 335: ...333 11 11 MAINTENANCE 1 Daily Inspection 334 2 Simple Troubleshooting 336 ...
Page 342: ...340 11 MAINTENANCE 2 Simple Troubleshooting Cont 11 ...
Page 358: ...356 12 SPECIFICATIONS OPTIONS 4 Copying Function Combination Matrix Cont 12 ...
Page 362: ...360 INDEX Cont Z Zoom buttons 97 ...
Page 363: ...DP 3540 4540 OME050098E0 ...


