193
6
6. Printing Stored Documents
Stored documents can be printed out. You can also print out a part of a document and change the setting
in the finishing mode or the like before printing the documents.
Printing the whole document
All pages of the document are printed. If printing multiple copies is desired, see
P.196 “Printing the
stored document after changing the settings”.
2
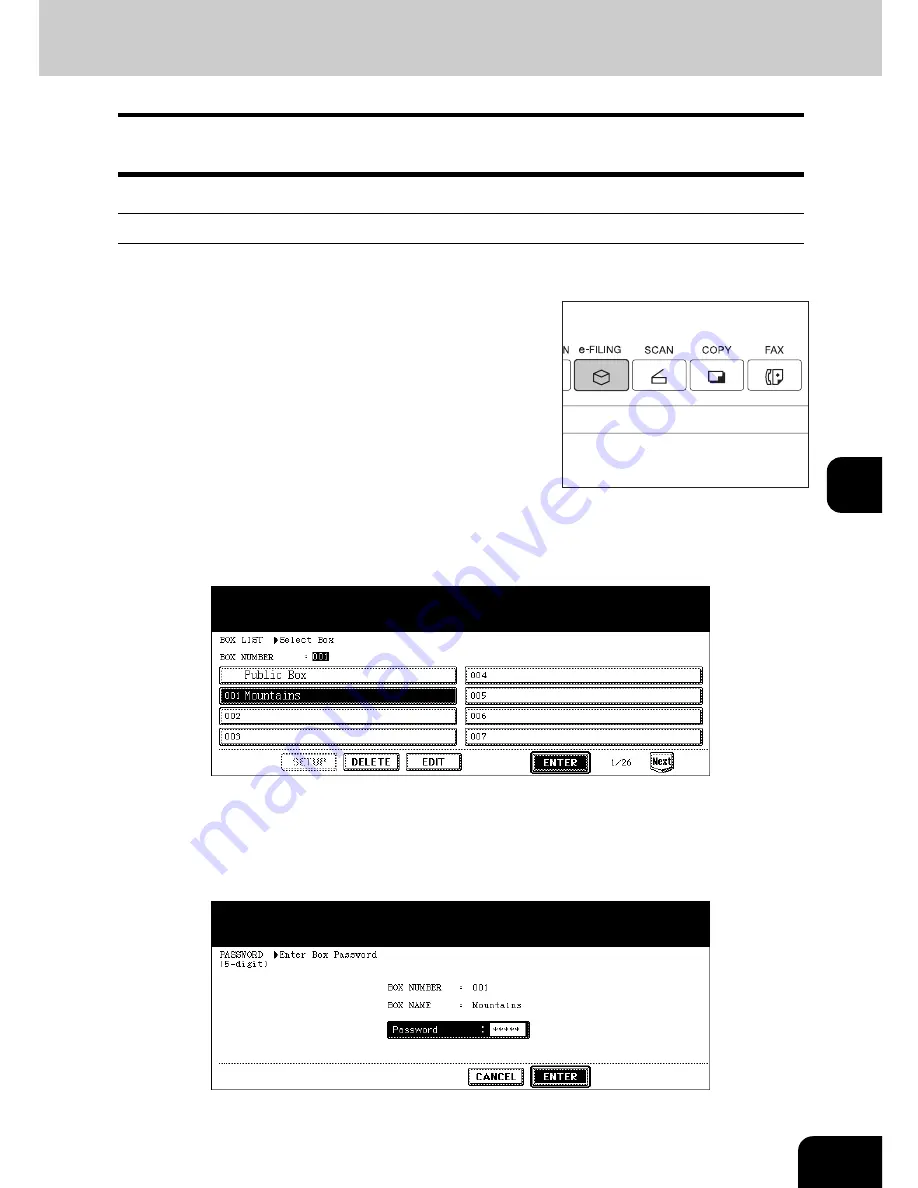
Select the box in which the desired printing document is stored, and
then press the [ENTER] button.
• If the desired box is not displayed on the menu, press the [Prev] or [Next] button to switch the menu.
• To display the applicable menu immediately, key in the box number.
3
Key in the password (5 digits) for the selected box, and then press the
[ENTER] button.
• If no password was set when the box was registered, skip to step 4.
1
Press the [e-FILING] button on the con-
trol panel.
Summary of Contents for E-STUDIO 232
Page 1: ...MULTIFUNCTIONAL DIGITAL SYSTEMS Operator s Manual for Basic Function ...
Page 2: ......
Page 6: ...4 CONTENTS Cont ...
Page 10: ...8 Toshiba Quality is Second to None Cont For e STUDIO233 283 ...
Page 24: ...22 Environmental Information Cont ...
Page 92: ...90 2 HOW TO MAKE COPIES 4 Proof Copy Cont 2 ...
Page 107: ...105 3 Names of each Inner Finisher optional 1 Trays 2 Paper stopper MJ 5004 MJ 5005 1 2 1 ...
Page 130: ...128 3 SETTING OF BASIC COPY MODES 6 Copy Density Adjustment Cont 3 ...
Page 131: ...129 4 4 IMAGE ADJUSTMENT 1 Background Adjustment 130 2 Sharpness 131 ...
Page 134: ...132 4 IMAGE ADJUSTMENT 2 Sharpness Cont 4 ...
Page 139: ...137 5 6 Press the ENTER button Select other copy modes as required 7 Press the START button ...
Page 175: ...173 5 5 Press the ENTER button Select other copy modes as required 6 Press the START button ...
Page 180: ...178 5 USING THE EDITING FUNCTIONS 16 ADF SADF Cont 5 ...
Page 206: ...204 6 e FILING 8 Appendix Cont 6 ...
Page 276: ...274 8 JOB STATUS 6 Error Code Cont 8 ...
Page 285: ...283 9 13Close the front cover ...
Page 304: ...302 9 BLINKING GRAPHIC SYMBOLS 5 Call Service Symbol Cont 9 ...
Page 328: ...326 10 WHEN THIS MESSAGE APPEARS 8 Reboot the machine Cont 10 ...
Page 329: ...327 11 11 MAINTENANCE 1 Daily Inspection 328 2 Simple Troubleshooting 330 ...
Page 336: ...334 11 MAINTENANCE 2 Simple Troubleshooting Cont 11 ...
Page 353: ...DP 2340 2840 OME050120E0 ...


