


161
5
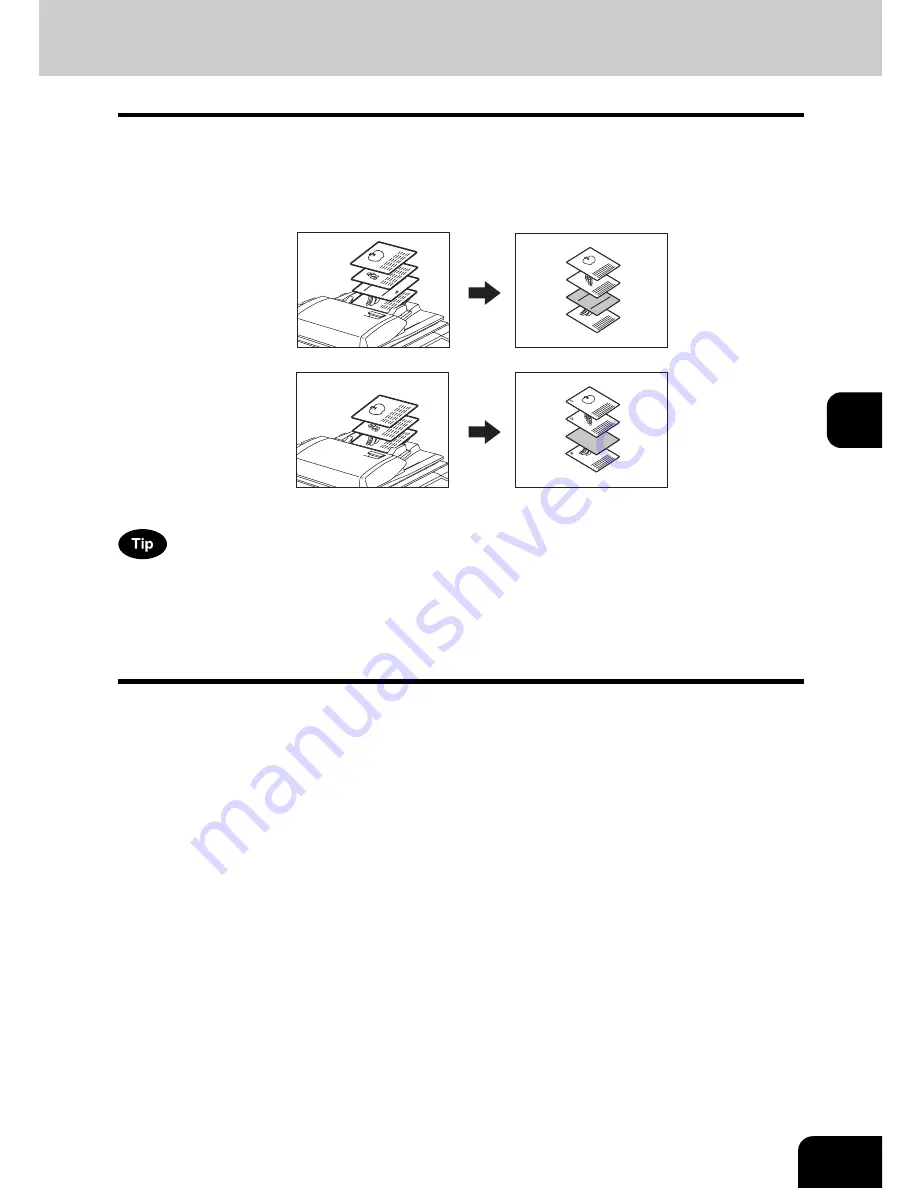
10. SHEET INSERTION
This function allows you to insert special sheets of paper (such as colour paper) into the specified pages. 2
kinds of sheets for insertion are available. Up to 50 pages can be specified for [INSERT SOURCE 1] and
[INSERT SOURCE 2] combined. There are 2 types of sheet insertion modes:
1. Inserting a copied sheet into the specified page ([COPIED])
2. Inserting a blank sheet into the page previous to the specified one ([BLANK])
To make sheet copies, you have to set 2 or 3 drawers (Large Capacity Feeder can also be used) to the
same paper size and orientation (1 or 2 for special insertion sheets and the other for normal sheets of copy
paper).
•
To use this function, you need to install the 2nd drawer (if not equipped).
1
Place the special sheets of paper.
P.56 “Drawer for special uses”
• Place the special sheets of paper on the bypass tray or in the drawer selected for sheet insertion.
• Both special sheets of paper and plain paper should be placed in the same direction and be of the same size.
2
Place plain paper in the drawer(s).
3
Place the original(s).
• Originals should be placed from the first page on the original glass.
REPORT
2003
1
2
3
4
3
2
1
4
REPORT
2003
2
3
1
1
2
Summary of Contents for E-STUDIO 232
Page 1: ...MULTIFUNCTIONAL DIGITAL SYSTEMS Operator s Manual for Basic Function ...
Page 2: ......
Page 6: ...4 CONTENTS Cont ...
Page 10: ...8 Toshiba Quality is Second to None Cont For e STUDIO233 283 ...
Page 24: ...22 Environmental Information Cont ...
Page 92: ...90 2 HOW TO MAKE COPIES 4 Proof Copy Cont 2 ...
Page 107: ...105 3 Names of each Inner Finisher optional 1 Trays 2 Paper stopper MJ 5004 MJ 5005 1 2 1 ...
Page 130: ...128 3 SETTING OF BASIC COPY MODES 6 Copy Density Adjustment Cont 3 ...
Page 131: ...129 4 4 IMAGE ADJUSTMENT 1 Background Adjustment 130 2 Sharpness 131 ...
Page 134: ...132 4 IMAGE ADJUSTMENT 2 Sharpness Cont 4 ...
Page 139: ...137 5 6 Press the ENTER button Select other copy modes as required 7 Press the START button ...
Page 175: ...173 5 5 Press the ENTER button Select other copy modes as required 6 Press the START button ...
Page 180: ...178 5 USING THE EDITING FUNCTIONS 16 ADF SADF Cont 5 ...
Page 206: ...204 6 e FILING 8 Appendix Cont 6 ...
Page 276: ...274 8 JOB STATUS 6 Error Code Cont 8 ...
Page 285: ...283 9 13Close the front cover ...
Page 304: ...302 9 BLINKING GRAPHIC SYMBOLS 5 Call Service Symbol Cont 9 ...
Page 328: ...326 10 WHEN THIS MESSAGE APPEARS 8 Reboot the machine Cont 10 ...
Page 329: ...327 11 11 MAINTENANCE 1 Daily Inspection 328 2 Simple Troubleshooting 330 ...
Page 336: ...334 11 MAINTENANCE 2 Simple Troubleshooting Cont 11 ...
Page 353: ...DP 2340 2840 OME050120E0 ...


