


Operating Instructions Premium HMI
6-9
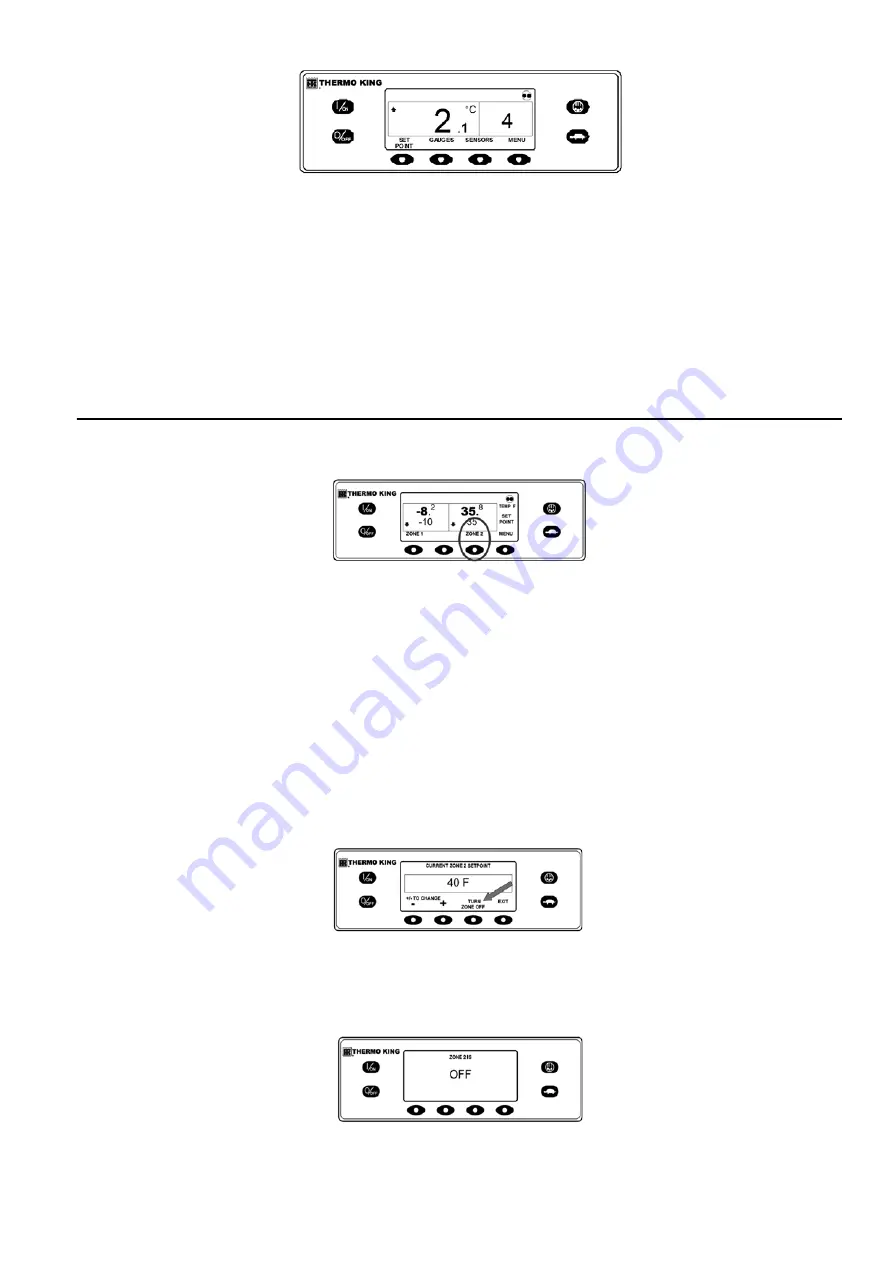
Premium Display, New Setpoint
Important: If the setpoint is changed using the "+" or "-" keys, the change must be confirmed or rejected by pressing the YES
or NO soft key within 10 seconds of changing the setpoint.
• If the YES key is pressed, the setpoint change made with the "+" or "-" key is accepted, the setpoint changes, and the display
returns to the Premium Display.
• If the NO key is pressed the setpoint change made with the "+" or "-" key is not accepted, the setpoint is not changed, and the
display returns to the Premium Display.
If either the YES or NO key is not pressed within 10 seconds of making a change with the "+" or "-" key, the setpoint is not
changed, and the display returns to the Setpoint Display. The display briefly shows [SETPOINT NOT CHANGED] and
Alarm Code 127 Setpoint Not Entered
is set, to indicate that a setpoint change was started but not completed.
Changing the Setpoint (SPECTRUM)
From the Premium Display, press the ZONE soft key for the desired zone.
Zone 2
Turning a Zone On and Off
IMPORTANT: Unlike trailer unit applications, Zone 1 can be turned off without affecting unit operation, so long as at least
one other zone is turned on.
IMPORTANT: At least one zone must be turned on. If all configured zones but one are turned off, the controller will not allow
the last zone to be turned off.
The state of each zone is retained when the unit is turned off and on. For example, on a three zone unit if zones 1 and 2 are
turned off and Zone 3 is turned on and the unit is turned off, the zone states remain as they were. When the unit is turned back
on Zones 1 and 2 will still be off and Zone 3 will still be on.
To turn a zone on or off, press the soft key under the desired zone.
The Zone 2 setpoint display appears as shown below. If the zone is turned on, the third soft key will be labeled TURN ZONE
OFF. If the zone is turned off, the third soft key will be labeled TURN ZONE ON.
Turn Zone OFF
Press the TURN ZONE OFF soft key to turn the zone off.
The display briefly shows PROGRAMMING ZONE ON/OFF – PLEASE WAIT. The display then confirms the new Zone 2
setting for several seconds.
New Zone 2 Setting
The display then returns to the Premium Display showing Zone 2 is off. The setpoint for Zone 2 has been replaced with OFF
as shown below to indicate that the zone is now off.
Summary of Contents for T-1000R
Page 14: ...Safety Precautions 2 6 Warning Decals 2e24151g0 ...
Page 34: ...Maintenance Inspection Schedule 4 10 ...
Page 57: ...Unit Description 5 23 Purge Mode UT Series 1 3 4 5 2 ...
Page 67: ...Unit Description 5 33 Zone 1 Cool and Zone 2 Cool UT SPECTRUM Units ...
Page 69: ...Unit Description 5 35 Purge Mode UT SPECTRUM Units ...
Page 71: ...Unit Description 5 37 Zone 1 Cool and Zone 2 Heat UT SPECTRUM Units ...
Page 72: ...Unit Description 5 38 ...
Page 74: ...Diesel Electric Menu 6 28 Adjust Brightness 6 29 Time 6 30 ...
Page 120: ...Operating Instructions Standard HMI 7 18 ...
Page 152: ...Engine Maintenance 9 14 T Series Fuel and Oil System Components TK 376 ...
Page 154: ...Engine Maintenance 9 16 T Series Fuel and Oil System Components TK 270 ...
Page 156: ...Engine Maintenance 9 18 UT Series Fuel System Components AMA768 ...
Page 172: ...Engine Maintenance 9 34 T Series Engine Mounting Components for 2 Cylinder Engine ...
Page 184: ...Engine Maintenance 9 46 ...
Page 238: ...Refrigeration Maintenance 10 54 ...
Page 246: ...Clutch Maintenance 11 8 ...
Page 258: ...Structural Maintenance 12 12 ...
Page 264: ...Mechanical Diagnosis 13 6 ...
Page 265: ...14 Electric Standby Diagnosis ...
Page 268: ...Electric Standby Diagnosis 14 4 ...
Page 269: ...15 Refrigeration System Diagnosis ...
Page 272: ...Refrigeration System Diagnosis 15 4 ...
Page 280: ...Remote Evaporators 16 8 ...


