background image

-54- 


No. JXC

-OMT0002-C 

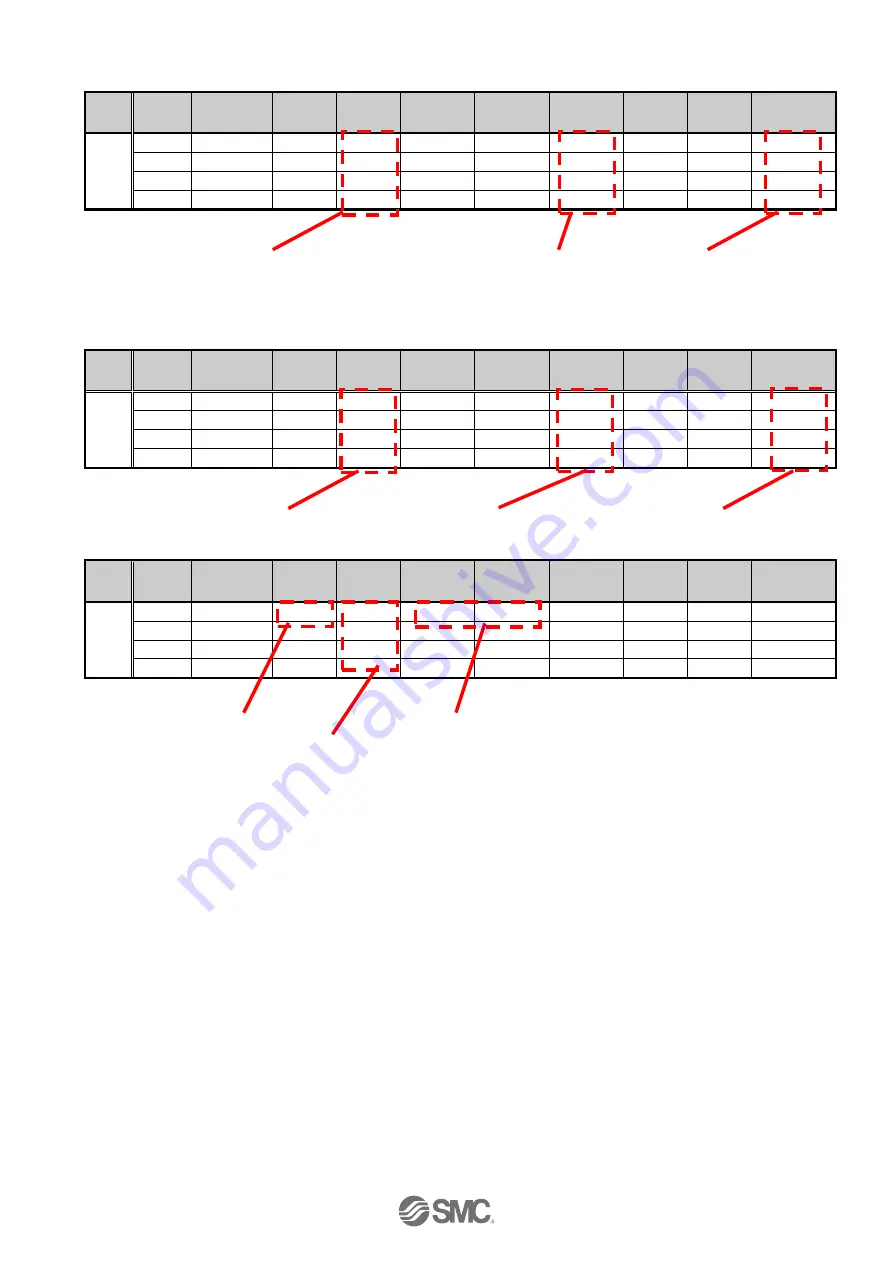
Different settings for each movement mode are shown below. 

(1) ABS 

Step 

No. 

Axis 

Movement 

mode 

Speed 

(mm/s) 

Position 

(mm) 

Acceleration 

(mm/s

2

Deceleration 

(mm/s

2

Pushing 

Selection 

Area 1 

(mm) 

Area 2 

(mm) 

In-position 

(mm) 

Axis 1 

Absolute 

100 

200.00 

1000 

1000 

6.0 

12.0 

0.5 

Axis 2 

Absolute 

50 

100.00 

1000 

1000 

6.0 

12.0 

0.5


Axis 3 

Absolute 

100 

100.00 

1000 

1000 

0.0 

0.0 

5.0 

Axis 4 

Absolute 

50 

50.0 

1000 

1000 

0.0 

0.0 

10.0 


(2) INC 

Step 

No. 

Axis 

Movement 

mode 

Speed 

(mm/s) 

Position 

(mm) 

Acceleration 

(mm/s

2

Deceleration 

(mm/s

2

Pushing 

Selection 

Area 1 

(mm) 

Area 2 

(mm) 

In-position 

(mm) 

Axis 1 

Relative 

100 

200.00 

1000 

1000 

6.0 

12.0 

0.5 

Axis 2 

Relative 

50 

100.00 

1000 

1000 

6.0 

12.0 

0.5


Axis 3 

Relative 

100 

100.00 

1000 

1000 

0.0 

0.0 

5.0 

Axis 4 

Relative 

50 

50.0 

1000 

1000 

0.0 

0.0 

10.0 


(3) LIN-A / LIN-I 

Step 

No. 

Axis 

Movement 

mode 

Speed 

(mm/s) 

Position 

(mm) 

Acceleration 

(mm/s

2

Deceleration 

(mm/s

2

Pushing 

Selection 

Area 1 

(mm) 

Area 2 

(mm) 

In-position 

(mm) 

Axis 1 

LIN-A 

100 

200.00 

1000 

1000 

0.0 

0.0 

0.5 

Axis 2 

LIN-A 

100.00 

0.0 

0.0 

0.5


Axis 3 

LIN-A 

100.00 

0.0 

0.0 

0.5 

Axis 4 

Note2)


Note 1) For LIN-I, the specified target position is a relative position. 

Note 2) For LIN-A and LIN-I, Axis 1 to Axis 3 are based on interpolation. Do not perform a setting 

for Axis 4. 


0:    Positioning operation 
1:    Pushing operation 

Positioning:    In-position 
Pushing:    Max.pushing distance 

Positioning:    Target position (Absolute position) 
Pushing:    Position of pushing start (Absolute position) 


0:    Positioning operation 
1:    Pushing operation 

Positioning:    In-position 
Pushing:    Max.pushing distance 

Positioning:    Target position (Relative position) 
Pushing:    Position of pushing start (Relative position) 
 

Composite speed 

Target position (Absolute position) 

Note 1


Composite acceleration and deceleration speed 

Summary of Contents for JXC93 Series

Page 1: ...No JXC OMT0002 C Product name 4 axis Step Motor Controller EtherNet IPTM type MODEL Series Product Number JXC93 Series...

Page 2: ...actuator 14 2 Setting parameters 17 3 Step data settings 19 3 7 Check using JOG operation 20 1 Change to Remote mode 20 2 Return to origin 21 3 JOG or Inching 22 3 8 Operation test using Test Drive 2...

Page 3: ...44 1 PLC input port signals from the controller to PLC 44 2 PLC output port signals from the PLC to controller 44 8 2 Signals 44 1 PLC input port signals from the controller to PLC 44 2 PLC output po...

Page 4: ...3 2 Alarms and countermeasures 86 14 Common Precautions for wiring and cable 94 15 Electric Actuators Common Precautions 95 15 1 Design and Selection 95 15 2 Mounting 96 15 3 Handling Precautions 96 1...

Page 5: ...series 108 Supplement 1 3 Initial setting of LES H series 109 Supplement 1 4 Initial setting of LEP series 109 Supplement 1 5 Initial setting of LEFB series 110 Supplement 1 6 Initial setting of LER s...

Page 6: ...possibility of equipment failure when configuring the equipment 2 Only personnel with appropriate training should operate machinery and equipment The product specified here may become unsafe if handl...

Page 7: ...s clearly our responsibility a replacement product or necessary parts will be provided This limited warranty applies only to our product independently and not to any other damage incurred due to the f...

Page 8: ...es are possible to return to origin using one return to origin signal SETUP from EtherNet IP The order of the return to origin operation is possible to specify by parameters It is possible to set 512...

Page 9: ...tuator Slider Type LEF Series Electric Slide Table LES LESH Series Electric Rotary Table LER Series Note1 Electric Actuator Miniature Type LEPY LEPS Series Electric Gripper 2 Finger Type 3 Finger Type...

Page 10: ...onnector Accessory Applicable wire size AWG20 0 5mm2 2 3 Product configuration Structure of the controller Note 1 Connected actuators should be ordered separately Note 2 PLC Ethernet cable with catego...

Page 11: ...is used for the first time after purchase do not upload the default values in the controller Please download the information which has been set by the controller setting software and use it 3 1 Checki...

Page 12: ...r supply Start up of controller setting software and Alarm check 1 Supplying power After supplying power for the motor control and motor drive turn on the power supply for the main control LED and swi...

Page 13: ...PC is confirmed The screen below will be displayed when the communication is established correctly However when the setting software is started for the first time this window will not appear When powe...

Page 14: ...ot able to communicate with the controller Please check the following Check that power is supplied to the controller at the correct voltage Check that the controller and the PC are connected to each o...

Page 15: ...ed actuator have been changed it is necessary to review the set parameters and step data It is possible to display parameters and step data as shown below 1 Select the actuator Select View V at the to...

Page 16: ...auses could be a No applicable stroke Input the part number without the stroke Select the closest model to the actuator being used with a stroke which is longer than that of the actuator being used Ex...

Page 17: ...Actuator selection window The values input here are for display only and are not written to the controller Display the parameters for all axes Select the Execute button The parameters are copied to t...

Page 18: ...imultaneously by setting the same order number Basic parameter Undefined No 11 1 to 4096 Define the Electronic Gear Undefined No 11 Electronic gear numerator Undefined No 12 Electronic gear denominato...

Page 19: ...arameter window will be written to the controller Writing is completed when the progress bar disappears and then the setting software is ready to operate It is necessary to turn off the power to the c...

Page 20: ...e list Enter the necessary numerical data according to the selected movement mode The setting is different depending on the movement mode Refer to section 9 4 Step Data for details After setting the s...

Page 21: ...ode Confirm that the Servo is ON Confirm SVRE ON in the status window Select View V at the top of the main window and select Status The Status window will be displayed When the Servo is ON the SVRE bo...

Page 22: ...ng The teaching window will be displayed Select the Return to Origin tab Select Return to Origin or All axes Return to Origin When the return to origin setting is completed SETON is ON Confirm that th...

Page 23: ...tuator travels at the speed or distance according to the connected actuator setting Caution When perform return to origin operation JOG function and Inching function for the first time make sure that...

Page 24: ...test drive list window The table below shows details of the items required Items Details No Line number Step No Step number to be executed The set line is deleted by entering 1 Wait time Wait time aft...

Page 25: ...tarts Confirm that SETON is ON refer to section 3 7 2 Return to origin Test drive starts by pressing the Go button based on the test drive list Test drive is completed when the correct operation is co...

Page 26: ...status Status PWR Green LED is ON Power is supplied ALM OFF No alarm is generated MS Green LED is ON Operating normally NS Green LED is ON EtherNet IP communication is established Refer to 4 2 Parts D...

Page 27: ...Alarm status NS EtherNet IP communication status MS Controller status L A Data transmission status 100 EtherNet IP communication speed Lock control With forced lock release terminal Note3 Cable lengt...

Page 28: ...negotiation Communication method Full duplex Half duplex automatic negotiation Setup file EDS file Occupied area Input 16 bytes Output 16 bytes IP address setting range Manual setting by switches Fro...

Page 29: ...Axis 1 Connect the actuator cable 10 MOT1 Motor power connector 6 pins 11 ENC2 Encoder connector 16 pins Axis 2 Connect the actuator cable 12 MOT2 Motor power connector 6 pins 13 CI 1 2 Motor control...

Page 30: ...Recoverable error Red LED is ON Unrecoverable error LED Details P2 100 EtherNet IP communication speed OFF 10Mbps Orange LED is ON 100Mbps P2 L A Data transmission status OFF Communication is not est...

Page 31: ...30 No JXC OMT0002 C 4 4 Dimensions 1 Direct mounting 2 DIN rail mounting...

Page 32: ...iate tightening torque 3 0Nm Secure the DIN rail mounting bracket using the holding screws M5 x 14 1 place on one side 2 places on both sides Tighten for approximately 2 threads Do not tighten complet...

Page 33: ...shakeproof washer as shown below and tighten the screw Caution The cable with crimped terminal and shakeproof washer must be prepared by the user The controller must be connected to Ground to reduce n...

Page 34: ...sh the space more than 100mm between the front of the controller and a door lid so that the connectors are possible to connect and disconnect Leave enough space between the controllers so that the ope...

Page 35: ...when power is supplied to the controller again The controller deletes the information of IP address when the power supply is removed Disable DHCP Controller does not acquire an IP address from the DH...

Page 36: ...oad the EDS file designated for this controller by the URL shown below It is possible to download by the URL shown below the icons designated for this controller For the setting using EDS file please...

Page 37: ...is shown below Refer to the Operation Manual of the RSLogix5000TM for the detailed operation This figure shows the display of Rockwell Automation software RSLogix5000TM Select EtherNet IPTM module in...

Page 38: ...at of Connection Parameters 3 IP Address Enter the IP address setting for the JXC93 4 Assembly Instance Perform setting as shown below Item Decimal Comm Format Data SINT Input 100 Output 150 Configura...

Page 39: ...he following specifications to be prepared by the user Item Specifications Applicable wire size Single Stranded wire AWG16 1 25mm2 The rated temperature of the insulation coating should be 60o C or mo...

Page 40: ...tor insert only the stripped Terminal Function Functional explanation C24V Motor control power supply Power supply side for motor control EMG1 EMG3 Stop Release the stop status of Axis 1 or Axis 3 Nor...

Page 41: ...m power consumption of the actuator specifications 2 Connector CI3 4 must be connected even when Axis 3 and 4 are not used If not a Modbus Error alarm will be generated 3 The motor power and motor con...

Page 42: ...r there are multiple controllers with different power supplies connect a relay B contact between the motor drive and motor control power supply and the EMG terminal of the motor control power supply c...

Page 43: ...upply and the M24V terminal of the motor drive power connector and the EMG terminal of the motor control power supply connector The actuator may make unexpected movement 2 Do not perform a return to o...

Page 44: ...herNet IP communication connector EtherNet IP communication connector P1 and P2 specifications are shown below Terminal Function Functional explanation 1 TX Sending 2 TX Sending 3 RX Receiving 4 5 6 R...

Page 45: ...eserve 8 2 Signals 1 PLC input port signals from the controller to PLC Signal name Description BUSY1 Busy signal for Axis X After the start of operation of the actuator the signal is ON until the comp...

Page 46: ...rea range AND of AREA1 to AREA4 The Bit No is output during step data in extended mode Note3 SETON Return to origin completion signal SETON turns on when all axes have completed the return to origin o...

Page 47: ...ter completion of the SETUP operation SETON and INP will be turned ON HOLD Pause of operation All axes in operation are paused If HOLD is ON during operation the speed decreases at maximum deceleratio...

Page 48: ...ow shows the changes in the signal with respect to the state of the controller BUSY INP SVRE Lock SETON OUT0 to 8 Controller powered down SVOFF with no motion OFF OFF OFF Lock OFF OFF Controller power...

Page 49: ...bove the trigger level value during the pushing operation INP will be turned ON Setting per step data is not possible X Pushing speed Note1 The movement speed for the pushing operation Setting per ste...

Page 50: ...f acceleration or deceleration Unit mm s2 Any value greater than the Max ACC DEC value cannot be entered in the step data This setting also defines the deceleration when the actuator is stopped by the...

Page 51: ...Electronic Gear numerator 1 Electronic Gear denominator 1 is recommended If other values are entered vibration or noise of the actuator could result When 0 is set it is recognized as 1 When a value gr...

Page 52: ...This is a fixed value for this controller Do not change the setting ORIG speed Note1 The allowable speed to move to the origin XX ORIG ACC DEC Note1 The acceleration and deceleration when moving to t...

Page 53: ...1 to Axis 4 Set the axis to be used ENC 1 MOT to ENC 4 MOT Movement mode 7 types Refer to the table on the right Set the mode of movement to the target position Movement mode Pushing operation Detail...

Page 54: ...d by the Position and then performs a pushing action with a force not greater than the set force Area 1 Step data Area 2 from Stroke in the basic parameters The setting to define the conditions where...

Page 55: ...0 1 0 0 0 0 10 0 3 LIN A LIN I Step No Axis Movement mode Speed mm s Position mm Acceleration mm s2 Deceleration mm s2 Pushing Selection Area 1 mm Area 2 mm In position mm 0 Axis 1 LIN A 100 200 00 10...

Page 56: ...setting for Axis 3 and 4 5 SYN I Step No Axis Movement mode Speed mm s Position mm Acceleration mm s2 Deceleration mm s2 Pushing Selection Area 1 mm Area 2 mm In position mm 0 Axis 1 SYN I 100 100 00...

Page 57: ...it pauses for a short time The controller recognizes the position as the end of travel limit of the actuator Then the actuator moves at a low speed in the direction opposite to the Return to origin d...

Page 58: ...election Area 1 mm Area 2 mm In position mm 1 Axis 1 Absolute 100 50 00 1000 1000 0 0 0 0 5 Axis 2 Absolute 100 50 00 1000 1000 0 0 0 0 5 Axis 3 Absolute 100 50 00 1000 1000 0 0 0 0 5 Axis 4 Absolute...

Page 59: ...Load 100mm End position 50mm 60mm Axis 1 Actuator 0mm Origin position M Motor Load 100mm End position 50mm 60mm Axis 3 Actuator 0mm Origin position M Motor Load 100mm End position 50mm 60mm Axis 2 Ac...

Page 60: ...the position set in Step Data No 1 is completed 9 Select Step No 2 Turn the IN0 OFF and the IN1 ON 10 Turn ON DRIVE input Start moving to 10mm from the current position 11 Step No 2 is turned ON OUT1...

Page 61: ...he profile parameters and continues even after the INP is ON It is regarded that the pushing operation is completed successfully when two of the conditions below are satisfied Condition 1 TheBUSY is O...

Page 62: ...profile parameter for a specified time the INP will be turned ON again b Movement of the workpiece in the direction opposite to the pushing direction The actuator is pushed back since the reaction fo...

Page 63: ...Deceleration mm s2 Pushing Selection Area 1 mm Area 2 mm In position mm 1 Axis 1 Absolute 100 100 00 1000 1000 1 0 0 5 0 Axis 2 Absolute 100 100 00 1000 1000 1 0 0 5 0 Axis 3 Absolute 100 100 00 1000...

Page 64: ...g force 7 INP is turned ON 8 BUSY is turned OFF The move to the position set in Step No 1 is completed 9 Select Step No 2 Turn the IN0 OFF and the IN1 ON 10 Turn the DRIVE ON Start moving to the posit...

Page 65: ...used If the electronic Gear is not set the step data operation may not be performed Refer to section 3 6 Parameters and Step data for the calculation of the electronic Gear Caution The speed of the a...

Page 66: ...de Speed mm s Position mm Acceleration mm s2 Deceleration mm s2 Pushing Selection Area 1 mm Area 2 mm In position mm 1 Axis 1 LIN A 100 100 00 1000 1000 0 0 0 5 Axis 2 LIN A 100 00 0 0 0 5 Axis 3 Axis...

Page 67: ...on set in Step Data No 1 is completed 9 Select Step No 2 Turn the IN0 OFF and the IN1 ON 10 Turn the DRIVE ON Start moving to a point at 100mm on Axis 1 and 50mm on Axis 2 11 Step No 2 is turned ON OU...

Page 68: ...circular interpolation of Axis 3 and 4 cannot be used Set the target position on the arc composed by the current position and centre coordinate When the target position does not exist on the arc compo...

Page 69: ...lated error in the achieved position due to the motor resolution Use the instruction ABS once or twice every 2 or 3 times of using mode CIR R L for correcting the positional accuracy Caution The follo...

Page 70: ...m s of composite speed Step No 3 Centre position 0mm on Axis 1 0mm on Axis 2 Step Data Setting Example Step No Axis Movement mode Speed mm s Position mm Acceleration mm s2 Deceleration mm s2 Pushing S...

Page 71: ...turned OFF OUT1 is turned ON 12 INP is turned OFF 13 BUSY is turned ON 14 DRIVE is turned OFF 15 INP is turned ON 16 BUSY is turned OFF The move to the position set in Step No 3 is completed 17 Select...

Page 72: ...t speed The speed of the slave axis is controlled to tune with the actual speed of the main axis So if the external force is removed after the condition in which the main axis continues failing to res...

Page 73: ...Operation Example Speed tuning control starts when a specified speed difference is generated At this time due to the speed difference there is a certain specified deviation in the position of the mai...

Page 74: ...od appropriate to the application Stop using the EMG signal If the EMG signal is turned OFF during operation the actuator will decelerate and stop the servo will turn OFF which means the stopped posit...

Page 75: ...e ALARM turns ON ESTOP is turned ON c SVON is turned ON d SVRE is turned ON INP is turned ON The time taken for SVRE and INP to turn on depends on the actuator type and the operating conditions When p...

Page 76: ...get position during a positioning the positioning operation will be completed INP ON BUSY OFF If an operation instruction follows this the positional offset from the target position of the previous op...

Page 77: ...he pushing operation an alarm 0 149 Failed to achieve set position in set time limit will be generated 2 If an operation is instructed after the pushing operation is completed d above a positional off...

Page 78: ...will turn ON b The RESET is turned ON c As ALARM is ON OUTx is OFF The alarm is deactivated Input Output Speed HOLD operation during positioning Current step data No Previous step data No Slow down st...

Page 79: ...N during a movement operation when the BUSY is ON b The BUSY is OFF and OUTx is OFF The actuator will stop Input Output Speed Current step data No Previous step data No Slow down starting point The IN...

Page 80: ...d The stop EMG input is turned ON The stop release command e The ESTOP will turn ON SVRE is turned ON The actuator with lock will be unlocked Input Output Speed ALARM is displayed in negative logic Wh...

Page 81: ...operation will start i The AREA for step data No 2 will turn ON at 170mm from the origin point j The AREA for step data No 2 will turn OFF at 130mm from the origin point k The BUSY will turn OFF and I...

Page 82: ...Cable length 1 5m Electric wire size Stranded wire AWG20 0 5mm2 O D of sheath 1 76 mm Wire sheath colour 24V Brown 24 0V Blue 12 2 DIN rail mounting bracket JXC Z1 Included with the controller Descrip...

Page 83: ...type cable S Standard cable Cable type Signal name Terminal number A B 1 A A 1 B B 2 B A 2 COM A COM B 3 COM B A 3 Vcc B 4 GND A 4 A B 5 A A 5 B B 6 B A 6 Cable colour Terminal number Brown 2 Red 1 Or...

Page 84: ...B 6 B A 6 Cable colour Terminal number Brown 2 Red 1 Orange 6 Yellow 5 Green 3 Blue 4 Cable colour Terminal number Brown 12 Black 13 Red 7 Black 6 Orange 9 Black 8 3 Red 4 Black 5 Brown 1 Blue 2 Shie...

Page 85: ...JXC W1 2 PC Controller Operating environment Compatible OS Note1 Windows 7 32bit or 64bit Microsoft NET Framework 2 0 is necessary Windows 8 1 32bit or 64bit Microsoft NET Framework 3 5 is necessary...

Page 86: ...classified into 4 groups When an alarm is generated it is output in signals OUT0 to 3 Refer to the table below for PLC input port signals according to the alarm groups Alarm group PLC Input port sign...

Page 87: ...d Also make sure that the load speed acceleration and deceleration are within the range of the actuator Parameter is not registered 0 901 E Turn off the main control and motor control power supplies D...

Page 88: ...ormality is found in the Modbus communication to the controller There is a possibility that the motor control power supply Cl 1 2 and Cl 3 4 is OFF or a malfunction occurred due to noise Countermeasur...

Page 89: ...er value is wrong 1 049 B RESET is ON Details The parameter is incorrect for the following parameter assignable range Settable range 1 Stroke Stroke 2 Parameter Max pushing force maximum pushing force...

Page 90: ...oller parameter model and the actual actuator model may not match Check the parameters Also the motor shaft may be loose Please refer to the actuator operation manual If the ORIG mode is 2 3 Return to...

Page 91: ...has been off since the Return to origin operation started or the end position is detected after the sensor ON is detected and before the Return to origin operation is completed 2 Sensor B contact The...

Page 92: ...troller will check the lower limit of the motor power supply voltage only when the servo is ON Countermeasure Check the voltage supplied to the controller motor power supply M24V Caution If the power...

Page 93: ...rotection type a voltage drop may occur during acceleration deceleration which will generate an alarm Details The alarm may be caused by regenerative power depending on the method of operation of the...

Page 94: ...compatible with the controller Current sensor abnormality has occurred 1 195 E Turn off the main control and motor control power supplies Details An abnormality with the current sensors is detected w...

Page 95: ...rotating or applying an external force to the cable Also avoid operating at sharp angles Risk of electric shock broken wires contact failure and loss of control of the product can occur 8 Fix the mot...

Page 96: ...l emergency stop of the whole system 7 Consider the action when operation is restarted after an emergency stop or abnormal stop of the whole system Design the system so that human injury or equipment...

Page 97: ...act on the actuator due to vibration generated at the stroke end which can damage the actuator In such a case install a support bracket to suppress the vibration of the actuator body or reduce the spe...

Page 98: ...person is performing work decide on the procedures signals measures for emergency and how to start the operation after the measures taken Also designate a person to supervise work other than those per...

Page 99: ...ive cover when the product is used in an environment directly exposed to foreign matter such as dust cutting chips and spatter Play or increased sliding resistance can result 4 Provide a protective co...

Page 100: ...work piece when the power is removed 3 Measures against drops means preventing a work piece from dropping due to its weight when the product operation is stopped and the power supply is turned off 4 D...

Page 101: ...e 2 Do not operate beyond the specifications Fire malfunction or actuator damage can result Check the specifications before use 3 Install an emergency stop circuit Install an emergency stop outside of...

Page 102: ...oduct in an area where it could be exposed to dust metallic powder machining chips or splashes of water oil or chemicals A failure or malfunction can result 10 Do not use the product in an area where...

Page 103: ...ce If the mounting surface is distorted or not flat excessive force may be applied to the housing etc causing malfunction 16 4 Wiring Warning 1 Do not damage the cable or apply a heavy object or pinch...

Page 104: ...ction Ground resistance 100 or less 3 The grounding point should be as near as possible to the controller to keep the cable length short 4 In the unlikely event that malfunction is caused by the groun...

Page 105: ...ectly Check the operation of a single actuator of the controller with a test run Refer to this Operation Manual and take appropriate measures 3 9 EtherNet IP communication setting and checking Communi...

Page 106: ...ual Refer to this manual and take appropriate measures 13 Alarm detection Incorrect wiring Check that the wiring is connected correctly Refer to this manual to confirm wiring and check for broken wire...

Page 107: ...ter SVON is ON and SVRE is ON When the power is supplied it may take up to 20 seconds from servo ON to SVRE ON depending on the actuator position or conditions Send an operation only when the SVRE is...

Page 108: ...m the PLC to the controller Leave an interval of 15ms or more recommendation is 30 ms between signals and maintain the state of the signal for 15ms or more recommendation is 30 ms because PLC processi...

Page 109: ...peed tuning control 22 12 6 26 13 7 34 17 9 34 17 9 Supplement 1 2 Initial setting of LEFS series Model LEFS16 LEFS25 Lead symbol A B H A B Lead mm 10 5 20 12 6 Stroke mm 500 500 500 600 700 800 600 7...

Page 110: ...del LES H 8 LES H 16 LES H 25 Lead symbol J K J K J K Lead mm 8 4 10 5 16 8 Max speed mm s 400 200 400 200 400 200 Min speed mm s Independent and interpolation 20 10 20 10 20 10 Min speed mm s Speed t...

Page 111: ...Lead mm 12 8 12 8 12 7 5 Max speed mm s 420 280 420 280 420 280 Min speed mm s Independent and interpolation 30 20 30 20 30 20 Min speed mm s Speed tuning control 38 25 38 25 38 25 Supplement 1 7 Ini...

Page 112: ...ing control 7 8 8 8 Model LEHS10 LEHS20 LEHS32 LEHS40 Lead symbol K Lead mm 255 76 3 355 235 56 4 196 235 40 5 875 235 40 5 875 Max speed mm s 70 80 100 120 Min speed mm s Independent and interpolatio...

Page 113: ...2016 No JXC OMT0002 C Revised 10 6 Speed tuning control Feb 2019 Rivised Synchronous to speed tuning control 4 14 1 Sotokanda Chiyoda ku Tokyo 101 0021 JAPAN Tel 81 3 5207 8249 Fax 81 3 5298 5362 URL...

Reviews: