To change the default name, type a new name with a length of 22 characters or less.
Under [Type], click the down-arrow button for the desired alarm OUT number and, from the pull-down menu, select the polarity of the alarm output signal.
Setting options:
NO (Normal Open):
The terminal is normally open and a signal is output if closed.
NC (Normal Close):
The terminal is normally closed and a signal is output if opened.
Under [Duration], click the down-arrow button for the desired alarm OUT number and, from the pull-down menu, select the duration of the alarm output signal.
Setting options:
1 TIME: Alarm signal is output once.
5 Sec to 10 Min: Specify the alarm output time as a numeric value.
Continue: Alarm output continues until stopped.
Follow the same procedure (Steps
to
) to configure settings for all alarm OUT numbers.
: Resets the all settings on the tab to the defaults.
Cancels all settings on the tab and restores the previous conditions.
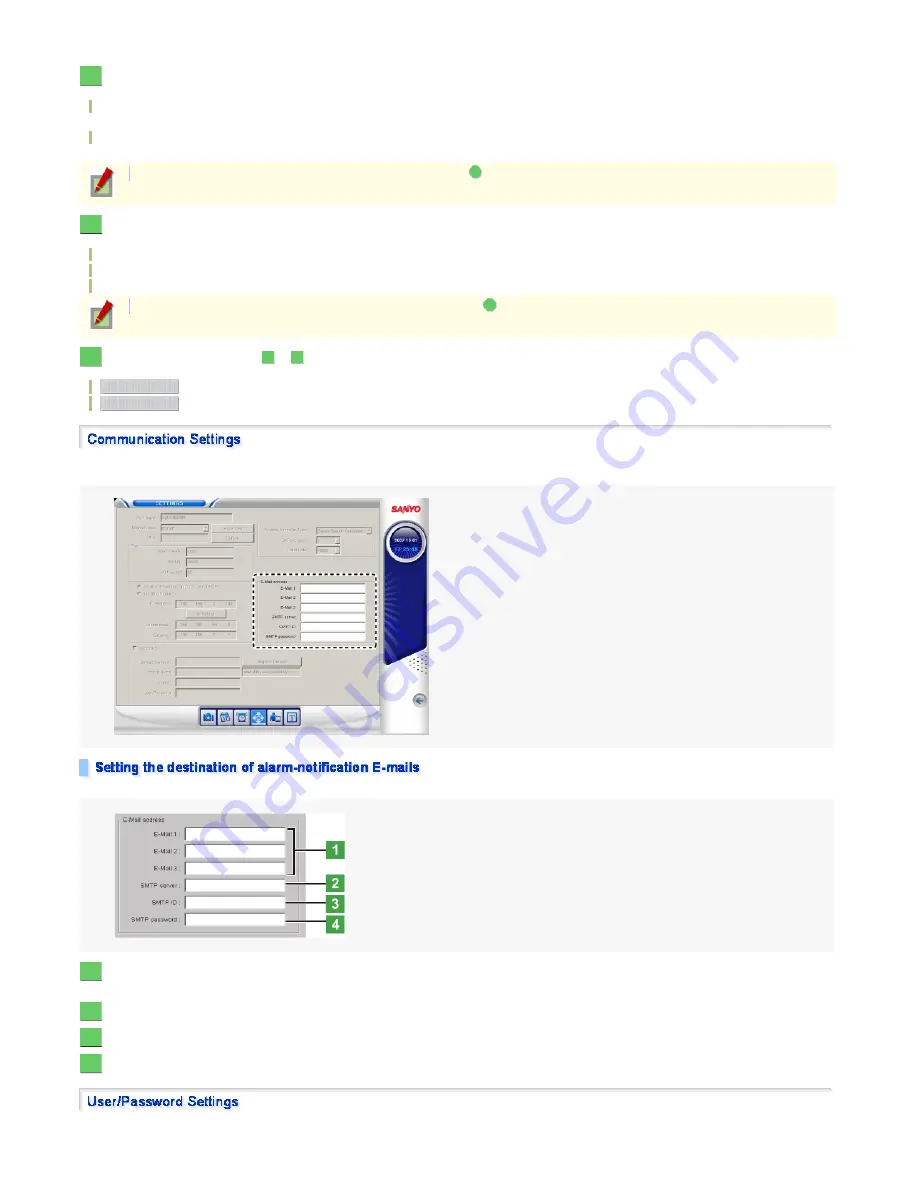
Click the [Communication] setting button to display the Communication settings.
You can set the destination of alarm-notification E-mails via the network.
To send the alarm-notification E-mail, follow the steps below.
In each [E-Mail] field, type the address to which you want to send an E-mail if an alarm occurs.
You can enter up to three E-mail addresses.
In the [SMTP server] field, type the domain name or IP address of the SMTP server.
In the [SMTP ID] field, type an authentification ID as needed.
In the [SMTP PASSWORD] field, type an authentification password as needed.
Click the [User/Password] setting button to display the User/Password settings.
You can change the user name, password, and operating authority of each registered user.
3
To apply the same setting to all alarm OUT numbers, under [Type], select "All"
from the pull-down menu.
A
4
To apply the same setting to all alarm OUT numbers, under [Duration], select "All"
from the pull-down menu.
B
5
2
4
Default
Reset
1
2
3
4
135/182
ページ
2008/10/27


