background image

SAMSUNG 


   MMC PROGRAMS  


COMBINED SYSTEMS PROGRAMMING MANUAL 


     FEBRUARY 2004


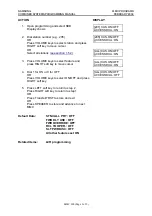
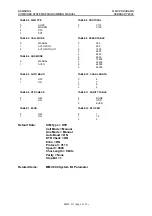
MMC 301 (Page 2 of 2) 

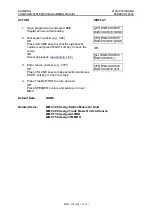
4.  Enter night class of service (e.g., 05) 

OR 
Press VOLUME keys to scroll through classes of 
service and press RIGHT soft key to return to step 2 
to enter other stations 
OR 
Press VOLUME keys to scroll through classes of 
service and press LEFT soft key to return to step 3  
 

[205] STN COS 
DAY:05  NIGHT:05 

5.  Press Transfer/TRSF to save and exit 

OR 
Press SPEAKER to save and advance to next MMC 


Default Data: 

  Day class 

= COS 01 (or 1) 


  Night class  = COS 01 (or 1) 


Related Items:  

See 

Related Items

, below 


Q

  For 

i

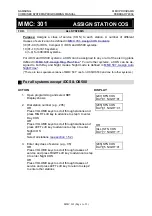
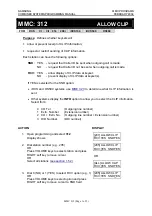
DCS & OS500 systems  


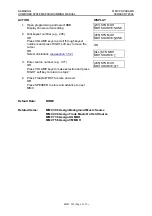
ACTION DISPLA

1.  Open programming and select 

301 

Display shows  
 

[201]     STN COS 
1:01      2:01      3:01 

2.  Dial station number (e.g., 205) 

OR 
Press VOLUME keys to scroll through stations and 
press RIGHT soft key  
OR 
Select all stations

 (see section 1.5.2)


[205]     STN COS 
1:01      2:01      3:01 
 
OR 
[ALL]     STN COS 
1:01      2:01      3:01 
 

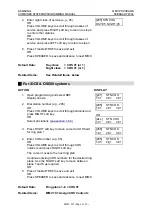
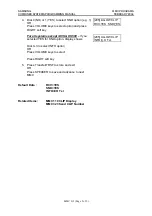
3.  Press RIGHT soft key to move cursor to COS field 

for ring plan 1 
 

[205]     STN COS 
1:01      2:01      3:01 

4.  Enter COS number (e.g. 05) 

OR 
Press VOLUME keys to scroll through COS  
numbers and press RIGHT soft key 

The cursor moves to the next ring plan 

Continue entering COS numbers for the desired ring 
plans. Use the RIGHT soft key to move between 
plans 1 and 6 as required. 
OR 

[205]     STN COS 
1:05      2:01      3:01 

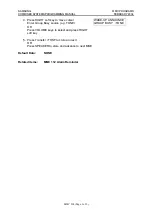
5.  Press Transfer/TRSF to save and exit 

OR 
Press SPEAKER to save and advance to next MMC 


Default Data: 

  Ring plans 1–6 = COS 01  


Related Items:  

MMC 701 Assign COS Contents 

Summary of Contents for DCS

Page 1: ...Combined Systems Programming Manual for DCS DCS Compact DCS Compact II DCS 816 DCS 408 DCS 408i iDCS100 iDCS500 OfficeServ500 ...

Page 2: ...Disclaimer Samsung Business Communications is not responsible for errors or problems arising from customers not installing programming or operating their Samsung systems as described in this manual Copyright 2004 Samsung Business Communications All rights reserved No part of this manual may be reproduced in any form or by any means graphic electronic or mechanical including recording taping photoc...

Page 3: ...1995 Inc A1 A2 1998 EN61000 3 3 1995 EN61000 4 2 1995 Inc A1 1998 EN61000 4 3 1996 Inc A1 1998 EN61000 4 4 1995 EN61000 4 5 1995 EN61000 4 6 1996 EN61000 4 8 1993 EN61000 4 11 1994 AS NZS3548 1995 EN60950 1992 A1 A2 A3 A4 A11 Manufacturer Samsung Electronics Co Ltd 259 Gongdan Dong Gumi City Kyungbuk Korea 730 030 Tae eok Jang General Manager place and date of issue name and signature of authorize...

Page 4: ...0 3 2 1995 Inc A1 A2 1998 EN61000 3 3 1995 EN61000 4 2 1995 Inc A1 1998 EN61000 4 3 1996 Inc A1 1998 EN61000 4 4 1995 EN61000 4 5 1995 EN61000 4 6 1996 EN61000 4 8 1993 EN61000 4 11 1994 AS NZS3548 1995 EN60950 1992 A1 A2 A3 A4 A11 Manufacturer Samsung Electronics Co Ltd 259 Gongdan Dong Gumi City Kyungbuk Korea 730 030 Tae eok Jang General Manager place and date of issue name and signature of aut...

Page 5: ...1998 A1 2001 A2 2003 EN61000 3 2 2000 EN61000 3 3 1995 A1 2001 EN61000 4 2 1995 A1 1998 A2 2001 EN61000 4 3 2002 EN61000 4 4 1995 A1 2001 A2 2001 EN61000 4 5 1995 EN61000 4 6 1996 A1 2001 EN61000 4 11 1994 A1 2001 EN60950 1999 Corr Jan 2000 Manufacturer Samsung Electronics Co Ltd 259 Gongdan Dong Gumi City Kyungbuk Korea 730 030 Tae eok Jang General Manager place and date of issue name and signatu...

Page 6: ... 2001 EN61000 3 2 1995 Inc A1 A2 1998 EN61000 3 3 1995 EN61000 4 2 1995 Inc A1 1998 EN61000 4 3 1996 Inc A1 1998 EN61000 4 4 1995 EN61000 4 5 1995 EN61000 4 6 1996 EN61000 4 8 1993 EN61000 4 11 1994 AS NZS3548 1995 EN60950 1992 A1 A2 A3 A4 A11 Manufacturer Samsung Electronics Co Ltd 259 Gongdan Dong Gumi City Kyungbuk Korea 730 030 Tae eok Jang General Manager place and date of issue name and sign...

Page 7: ... 2001 EN61000 3 2 1995 Inc A1 A2 1998 EN61000 3 3 1995 EN61000 4 2 1995 Inc A1 1998 EN61000 4 3 1996 Inc A1 1998 EN61000 4 4 1995 EN61000 4 5 1995 EN61000 4 6 1996 EN61000 4 8 1993 EN61000 4 11 1994 AS NZS3548 1995 EN60950 1992 A1 A2 A3 A4 A11 Manufacturer Samsung Electronics Co Ltd 259 Gongdan Dong Gumi City Kyungbuk Korea 730 030 Tae eok Jang General Manager place and date of issue name and sign...

Page 8: ...A2 2003 EN61000 3 2 2000 EN61000 3 3 1995 A1 2001 EN61000 4 2 1995 A1 1998 A2 2001 EN61000 4 3 2002 EN61000 4 4 1995 A1 2001 A2 2001 EN61000 4 5 1995 EN61000 4 6 1996 A1 2001 EN61000 4 11 1994 A1 2001 EN60950 1 2001 1 st Edition and or EN60950 1 2001 Manufacturer Samsung Electronics Co Ltd 259 Gongdan Dong Gumi City Kyungbuk Korea 730 030 Tae eok Jang General Manager place and date of issue name a...

Page 9: ... A14 2000 RTTE TBR4 November 1995 incorporating TBR4 A1 December 1997 EN61000 3 3 1995 EN61000 4 2 1995 98 EN61000 4 3 1996 EN61000 4 4 1995 EN61000 4 5 1995 EN61000 4 6 1996 LVD EN60950 2000 IEC 60950 Third Edition 1999 EN61000 4 11 1994 AS NZS3548 1995 Manufacturer Samsung Electronics Co Ltd 259 Gongdan Dong Gumi City Kyungbuk Korea 730 030 Tae eok Jang General Manager place and date of issue na...

Page 10: ... 4 3 Station Level 1 3 1 5 Keysets Used for Programming 1 3 1 5 1 Soft Keys 1 4 1 5 2 Other Keys 1 4 1 6 Programming Procedures 1 6 1 6 1 Precautions When Programming 1 6 1 6 2 Opening System or Customer Level Programming 1 7 1 6 3 Opening Station Level Programming 1 7 1 6 4 Programming DCS 408 and 408i Systems 1 7 2 Program MMC List and Default Data 2 1 2 1 Program MMC List 2 1 2 2 Default Data U...

Page 11: ...em for example the number of trunk group members card port numbers and so on see section 2 3 System Configuration Quick Reference in Part 2 1 2 Systems Covered in this Manual This manual describes the MMC programming required for the Samsung telephone sys tems listed in the following table The table includes the name by which each system is referred to in this manual to avoid using the full name e...

Page 12: ...ts Each MMC Man Machine Code is assigned a 3 digit code 100 101 and so on These MMCs are used to view create or change customer data on a display keyphone This is called KMMC programming For example MMC 601 is used to create a station group system speed dial numbers are entered in MMC 705 and key functions are assigned to individual keyphones or keysets using MMC 722 Note PCMMC programming not cov...

Page 13: ... passcode to access station pro grams data for all stations can be viewed or changed Changes can be made either sys tem wide or to selected keysets The system administrator should also refer to the Samsung System Administration Guide for their telephone system if this is available Accessible MMCs at this level are designated by the installer 1 4 3 Station Level The system administrator or keyset u...

Page 14: ... TRANSFER Enter programming mode or store data and exit programming mode A F A F Special functions as described below Tip Many MMCs allow you to select options quickly by dialling codes from the keypad Alterna tively you can press the VOLUME keys to scroll through and select options Use whichever method you prefer Because dialling codes for options may vary between systems it has not been practica...

Page 15: ... C D E F 15 16 17 18 19 20 A B C D E F 8 9 10 11 12 13 DS ITP 5021D DS 5038S KEYSET DS ITP 5014D DS 5014S KEYSET 24B KEYSET 12B KEYSET 6B KEYSET Call 1 Call 2 Call 1 Call 2 1 13 1 SAMSUNG INTRODUCTION COMBINED SYSTEMS PROGRAMMING MANUAL FEBRUARY 2004 DS 5007S KEYSET Call 1 Call 2 A B C D E F 1 2 3 4 5 6 DS ITP 5012L large LCD keysets display the relevant keys A F on the LCD ...

Page 16: ... programming If you pick up the handset while programming or the telephone plug is pulled out any new data shown in the LCD are saved IMPORTANT When installing and programming a default system for the first time You should select the correct software version for your country e g UK before you can do any other programming via either a keyphone KMMC programming or a PC PCMMC programming To select th...

Page 17: ...ed in this manual as a guide although it is advisable to refer to the Samsung keyset or phone user guide provided with your keyset phone to program it correctly 1 6 4 Programming DCS 408 and 408i Systems Although the 408 is physically similar to the 408i in appearance they operate differently and may have different programming requirements and features For example the 408i supports ISDN whereas th...

Page 18: ...RVICE TYPE 220 ISDN SERVICE TYPE 221 EXTENSION TYPE Hotel Application 222 FAX PAIR Hotel Application 224 WAKE UP ANNOUNCEMENT Hotel Application 300 CUSTOMER ON OFF PER STATION 301 ASSIGN STATION COS 302 PICKUP GROUPS 303 ASSIGN BOSS SECRETARY 304 ASSIGN STATION TRUNK USE 305 ASSIGN FORCED CODE 306 HOT LINE 308 ASSIGN BACKGROUND MUSIC SOURCE 309 ASSIGN STATION MUSIC ON HOLD 310 LCR CLASS OF SERVICE...

Page 19: ...SLATION 715 PROGRAMMED STATION MESSAGE 716 UK LCR OPTION 717 UCD AGENT ID iDCS OS500 PIN CODE Compact I 718 MY AREA CODE 719 IDLE DISPLAY OS500 720 COPY KEY PROGRAMMING 721 SAVE STATION KEY PROGRAMMING 722 STATION KEY PROGRAMMING 723 SYSTEM KEY PROGRAMMING 724 DIAL NUMBERING PLAN 725 SMDR OPTIONS 726 VM AA OPTIONS 727 SYSTEM VERSION DISPLAY 728 CLIP TRANSLATION TABLE 730 AA GAIN 731 AA RAM CLEAR 7...

Page 20: ...S 834 VoIP OPTION 835 VoIP DSP OPTIONS 836 VoIP GK OPTIONS 837 SIP OPTIONS OS500 838 PRIVATE IP OS500 840 IP SET INFORMATION OS500 841 SYSTEM IP OPTIONS OS500 845 WLI PARAMETER OS500 846 WIP INFORMATION OS500 847 WLI RESET OS500 848 WLAN IP MAC OS500 849 WLAN CONFIGURATION OS500 850 SYSTEM RESOURCE DISPLAY 851 ALARM REPORT 852 ASSIGN SYSTEM ALARMS 853 MAINTENANCE BUSY 854 DIAGNOSTIC TIME 855 DISPL...

Page 21: ...Y Y Y Y NONE 105 STATION SPEED DIAL Y Y Y Y Y Y Y Y NONE 106 STATION SPEED DIAL NAME Y Y Y Y Y Y Y Y NONE 107 KEY EXTENDER Y Y Y Y Y Y Y Y NONE 108 STATION STATUS Y Y Y Y Y Y Y Y SEE MMC 108 109 DATE DISPLAY Y Y Y Y Y Y Y Y COUNTRY WESTERN CLOCK 24 HOUR DISPLAY LOWERCASE 110 STATION ON OFF Y Y Y Y Y Y Y Y SEE MMC 110 111 KEYSET RING TONE Y Y Y Y Y Y Y Y SELECTION 5 112 ALARM REMINDER Y Y Y Y Y Y Y...

Page 22: ... Y Y Y ALARMS SET TO NOTSET 117 TEXT MESSAGE N N N N N N N Y NONE 118 CONFERENCE GROUP N N N N N N N Y NONE 119 CLIP DISPLAY Y Y Y N Y Y Y Y NUMBER FIRST 120 LARGE OPTION N N N N N N N Y IDLE DISP CALENDAR DS KEY DSP TEL NO DIAL MODE ENBLOCK CONV DISP SOFT MENU FIRST 121 KEYSET LANGUAGE Y Y Y Y Y Y Y Y ENGLISH 122 SPOT INFOSPD N N N N N Y N Y 0300 mS 125 EXECUTIVE STATE N N N N N N N Y NONE ...

Page 23: ...TYPE Y Y Y Y Y Y Y Y NO BARGE IN 207 ASSIGN VM AA PORT Y Y Y Y Y Y Y Y NORMAL PORT 208 ASSIGN RING TYPE Y Y Y Y Y Y Y Y ICM RING 209 ASSIGN ADD ON MODULE Y Y Y N N Y Y Y NONE FOR MASTER 210 CUSTOMER ON OFF Y Y Y Y Y Y Y Y SEE MMC 210 211 DOOR RING ASSIGNMENT Y Y Y Y Y Y Y Y STATION GROUP 500 or 50 212 ALARM RINGING STATION Y 1 Y N N N N Y N ALL SENSORS RING 500 213 ALARM MESSAGE Y 1 Y N N N N Y N ...

Page 24: ...R OFF OTHERS SET ON 301 ASSIGN STATION COS Y Y Y Y Y Y Y Y COS 1 302 PICKUP GROUPS Y Y Y Y Y Y Y Y ALL STATIONS GROUP 1 303 ASSIGN BOSS SECRETARY Y Y Y Y Y Y Y Y NONE 304 ASSIGN STATION TRUNK USE Y Y Y Y Y Y Y Y DIAL YES ANS YES 305 ASSIGN FORCED CODE Y Y Y Y Y Y Y Y NONE 306 HOT LINE Y Y Y Y Y Y Y Y NONE 308 ASSIGN BACKGROUND MUSIC SOURCE Y Y Y Y Y Y Y Y NONE 309 ASSIGN STATION MUSIC ON HOLD Y Y ...

Page 25: ... NON DISPLAY 323 SEND CLIP NUMBER N N N N N Y Y Y NONE 400 CUSTOMER ON OFF PER TRUNK Y Y Y Y Y Y Y Y SEE MMC 400 401 C O PBX LINE Y Y Y Y Y Y Y Y ALL TRUNKS C O LINE 402 TRUNK DIAL TYPE Y Y Y Y N Y Y Y ALL TRUNKS DTMF 403 TRUNK TOLL CLASS Y Y Y Y Y Y Y Y ALL TRUNKS F STN 404 TRUNK NAME Y Y Y Y Y Y Y Y NO NAMES ENTERED 405 TRUNK NUMBER Y Y Y Y Y Y Y Y NO NUMBERS ENTERED 406 TRUNK RING ASSIGNMENT Y ...

Page 26: ...PTIONS Y Y Y N Y Y Y Y SEE MMC 419 420 PRI OPTIONS Y 1 Y N N N Y Y Y SEE MMC 420 421 MSN DIGIT Y Y Y N Y Y Y Y NONE 422 ASSIGN TRUNK COS Y Y Y Y Y Y Y Y COS 1 423 S T MODE Y Y Y N Y Y Y Y TRUNK 424 S0 MAPPING Y Y Y N Y Y Y Y NONE 426 TRUNK GAIN CONTROL Y 1 Y Y Y Y Y Y Y RX 0 0 dB TX 0 0 dB 427 R2MFC SIGNAL NOT USED IN UK 428 ASSIGN TRUNK TRUNK USE Y 1 Y Y N N Y Y Y DIAL YES 433 TRUNK COST RATE Y Y...

Page 27: ...Y SEE MMC 510 511 MW LAMP CAD Y 1 Y N N N Y Y Y ON 1000MS OFF 1000MS 512 ASSIGN HOLIDAY Y 1 Y Y Y Y Y Y Y SEE MMC 512 513 HOTEL TIMERS Y 1 Y N N N Y Y Y NONE 514 TONE SOURCE N N N N N Y N Y TONE 515 DAYLIGHT ASSIGNMENT N N N N N Y Y Y NONE 600 ASSIGN OPERATOR GROUP Y Y Y Y Y Y Y Y 500 or 50 601 ASSIGN STATION GROUP Y Y Y Y Y Y Y Y SEE MMC 601 602 STATION GROUP NAME Y Y Y Y Y Y Y Y NONE 603 ASSIGN ...

Page 28: ...OLL DENY TABLE Y Y Y Y Y Y Y Y ALL ENTRIES 0 703 TOLL ALLOWANCE TABLE Y Y Y Y Y Y Y Y ALL ENTRIES 0 704 ASSIGN WILD CHARACTER Y Y Y Y Y Y Y Y X ALL 1 Y Z ALL 0 705 ASSIGN SYSTEM SPEED DIAL Y Y Y Y Y Y Y Y NONE 706 SYSTEM SPEED DIAL BY NAME Y Y Y Y Y Y Y Y NO NAMES 707 AUTHORISATION CODE Y Y Y Y Y Y Y Y NONE 708 ACCOUNT CODE Y Y Y Y Y Y Y Y NONE 709 TOLL PASS CODE Y Y Y Y Y Y Y Y NONE 710 LCR DIGIT...

Page 29: ...2 STATION KEY PROGRAMMING Y Y Y Y Y Y Y Y SEE MMC 722 723 SYSTEM KEY PROGRAMMING Y Y Y Y Y Y Y Y SEE MMC 723 724 DIAL NUMBERING PLAN Y Y Y Y Y Y Y Y SEE MMC 724 725 SMDR OPTIONS Y Y Y Y Y Y Y Y SEE MMC 725 726 VM AA OPTIONS Y Y Y Y Y Y Y Y SEE MMC 726 727 SYSTEM VERSION DISPLAY Y Y Y Y Y Y Y Y INSTALLED CARD VERSIONS 728 CLIP TRANSLATION TABLE Y Y Y N Y Y Y Y NONE 730 AA GAIN Y 1 Y Y N N Y Y Y 0 0...

Page 30: ...SABLE 745 BSI CARRIER Y Y N N N Y Y Y 1111111111 746 COSTING DIAL PLAN N N N N N Y Y Y NONE 747 RATE CALCULATION TABLE Y Y N N N Y Y Y NONE 750 VM CARD RESTART Y 1 Y N N N Y Y Y DOWNLOAD YES CARD RESTART NO 751 ASSIGN MAILBOX Y 1 Y N N N Y Y Y ALL STN YES ALL GRP NO 752 AUTO RECORD Y 1 Y N N N Y Y Y MB NONE PORT NONE CALL I 753 WARNING DESTINATION Y 1 Y N N N Y Y Y DEST 500 754 VM HALT Y 1 Y N N N...

Page 31: ... Y Y Y Y Y Y Y SEE MMC 805 806 CARD PRE INSTALL Y Y Y N N Y Y Y NONE 807 VOLUME CONTROL Y Y Y Y Y Y Y Y SEE MMC 807 808 T1 TRUNK CODING NOT USED IN UK 809 SYSTEM MMC LANGUAGE Y 1 Y Y Y Y Y Y Y ENGLISH 810 HALT PROCESSING Y Y Y N N Y Y Y NONE 811 RESET SYSTEM Y Y Y Y Y Y Y Y NONE 812 SELECT COUNTRY Y Y Y Y Y Y Y Y NONE 813 HOTEL OPERATION N N N N N Y Y Y DISABLE 815 CUSTOMER DATABASE COPY N N N N N...

Page 32: ... N N Y Y Y SEE MMC 831 832 VoIP CODE N N N N N Y Y Y SEE MMC 832 833 VoIP IP ADDRESS N N N N N Y Y Y TB 00 ENTRY 00 1 1 1 1 OTHERS 0 0 0 0 834 VoIP OPTIONS N N N N N Y Y Y SEE MMC 834 835 VoIP DSP OPTIONS N N N N N Y Y Y SEE MMC 835 836 VoIP GK OPTIONS N N N N N Y Y Y SEE MMC 836 837 SIP OPTIONS N N N N N N N Y SEE MMC 837 840 IP SET INFORMATION N N N N N N N Y SEE MMC 840 841 SYSTEM IP OPTIONS N ...

Page 33: ...CE BUSY N N N N N Y Y Y ALL IDLE 854 DIAGNOSTIC TIME N N N N N Y Y Y NONE 855 DISPLAY SYSTEM OPTIONS N N N N N Y N Y NONE 856 PROGRAMMING LOGS N N N N N Y Y Y NONE 858 ASSIGN SYSTEM EMERGENCY ALARM N N N N N Y Y Y ALL ALARMS OFF 859 HARDWARE VERSION DISPLAY N N N N N Y N Y FOLLOWS H W VERSIONS 860 UCD VIEW SERVICE N N N N N Y Y Y UCD VIEW SERVICE DISABLE SEND AGENT STATE YES 861 SYSTEM OPTIONS N N...

Page 34: ... 2 371 3701 3706 371 2 371 3 CALL keys max 8 8 5 4 2 8 8 8 Classes of Service COS 30 30 30 10 4 30 30 30 CLIP Translation Table max entries 250 250 200 200 408 N A 408i 100 1500 400 350 2000 1000 Daughterboards keyset KSU Any DLI Motherboard N A N A Any 8DLI Motherboard Any 8DLI DDI Translation Table max entries 200 200 200 50 408 N A 408i 20 999 400 500 2000 1000 DECT ports no of 48 24 24 N A N A...

Page 35: ...r of 30 30 20 10 4 50 30 20 80 40 Station Group members sequential distributed ring 48 30 30 16 8 48 32 48 Station Group members unconditional ring 32 30 10 16 8 32 32 32 Station Group numbers 500 529 500 529 500 519 500 509 50 53 500 549 500 529 500 519 500 579 500 539 Trunk Groups number of 11 11 11 4 2 50 11 11 30 Trunk Group members no of 80 10 40 10 4 99 40 99 Trunk Group numbers 9 80 89 9 80...

Page 36: ...rent the figures in brackets are for S and M version systems Station Group Numbers Values shown are for a 3 digit configured system or 2 digit for 408 If system is configured for 4 digit group numbers values are 5000 5xxx 1 Misc 2 card 381 4 AA card 381 6 both cards installed 381 90 2 UCD Group can be created from any Station Group 501 529 CI or last 10 Station Groups 520 529 DCS 3 UCD Group can o...

Page 37: ...lling number plans can be changed by the system installer using MMC 724 so make sure you are aware of all dialling plans for your system To identify which MMCs apply to your system either refer to the MMC lists at the be ginning of this manual or locate the relevant MMC page below and refer to the header check box beneath the title The procedure described for each MMC assumes you are the installer...

Page 38: ...or receiving calls ACTION DISPLAY 1 Open programming and select 100 Display shows 201 STN LOCK UNLOCKED 2 Dial station number e g 205 OR 205 STN LOCK UNLOCKED Press VOLUME keys to select station and use RIGHT soft key to move cursor OR Select all stations see section 1 5 2 ALL STN LOCK 3 Enter 0 to unlock 1 to lock out or 2 to lock all e g 1 205 STN LOCK LOCKED OUT OR Press VOLUME keys to make sel...

Page 39: ...asscodes cannot be used for toll restriction override DISA access or the walk ing class of service function ACTION DISPLAY 1 Open programming and select 101 Display shows 201 PASSCODE PASSCODE 6666 2 Dial keyset number e g 205 OR 205 PASSCODE PASSCODE 6666 Press VOLUME keys to scroll through keyset numbers and press RIGHT soft key to move the cursor right 3 Press HOLD to reset passcode 205 PASSCOD...

Page 40: ...WD DND allows you to select a forward destination for stations that is automatically selected when a sta tion is put in DND mode iDCS and OS500 systems only iDCS500 and iDCS100 systems also provide network only forwarding options CFU Call Forward All CFNR Call Forward No Response CFB Call Forward Busy CFB CFNR both options activated together provided destinations are already entered for each Netwo...

Page 41: ...ediately made active OR Press VOLUME keys to select YES or NO and press RIGHT soft key to return to step 2 6 Press Transfer TRSF to store and exit OR Press SPEAKER to store and advance to next MMC Default Data All stations 0 Forward Cancel Related Items MMC 301 Assign Station COS MMC 501 System Wide Timers MMC 502 Station Wide Timers MMC 701 Assign COS Contents MMC 722 Station Key Programming MMC ...
Page 42: ...S or SEND key or lifts the handset 2 VOICE ANNOUNCE The keyset will not ring After a short attention tone callers can make an announcement but the ANS RLS or SEND key or handset must be used to an swer calls To answer C O calls automatically on iDCS500 and OS500 systems also set ON the option AUTO ANS CO in MMC 110 ACTION DISPLAY 1 Open programming and select 103 Display shows 201 ANS MODE RING MO...

Page 43: ...upper and lower case text Refer to section 1 5 2 in Part 1 for key descriptions Tip When the character you want is on the same key as the previous character you typed in press the VOLUME UP key to move the cursor to the right then select the character The key can be used for the following special characters in sequence of key presses space _ ACTION DISPLAY 1 Open programming and select 104 Display...

Page 44: ...atically insert the separator The following keys can also be used B Insert a flash code F C Insert a pause code P D Insert a pulse tone conversion code C E Mask unmask following digits shows as or F Enter name for speed dial bin see MMC 106 Refer to section 1 5 2 in Part 1 for key descriptions ACTION DISPLAY 1 Open programming and select 105 Display shows 201 SPEED DIAL 00 2 Dial station number e ...

Page 45: ...me to enter a name OR Press the LEFT soft key to return to step 3 and enter new speed dial no OR Press the RIGHT soft key to return to step 2 and enter new station number OR Press Transfer TRSF to save and exit OR Press SPEAKER to save and advance to next MMC Default Data None Related Items MMC 106 Station Speed Dial Name MMC 606 Assign Speed Block ...

Page 46: ...ction 1 5 2 in Part 1 for key descriptions Tip When the character you want is on the same key as the previous character you typed in press the VOLUME Up key to move the cursor to the right then select the character The key can be used for the following special characters in sequence of key presses space _ ACTION DISPLAY 1 Open programming and select 106 Display shows 201 SPEED NAME 00 2 Dial stati...

Page 47: ...SAMSUNG MMC PROGRAMS COMBINED SYSTEMS PROGRAMMING MANUAL FEBRUARY 2004 MMC 106 Page 2 of 2 Default Data None Related Items MMC 105 Station Speed Dial MMC 606 Assign Speed Block ...

Page 48: ...107 Display shows 201 EXT MAST 01 CALL1 OR OR For 408 and 408i systems display shows 21 EXT EXTEND 01 DT71 2 Dial keyset number e g 205 OR 205 EXT MAST 01 CALL1 Press VOLUME keys to scroll through keyset numbers and press RIGHT soft key to move the cursor 3 Enter key number e g key 18 OR 205 EXT MAST 18 DS DS_ Press VOLUME keys to scroll through and select key and use RIGHT soft key to move the cu...

Page 49: ...Pickup N A Station no iDCS500 L only Station no FWRD Call Forward 0 5 0 5 0 5 0 5 0 4 6 9 4 0 5 GPIK Group Pick Up 01 20 01 20 01 08 01 04 01 99 iDCS500 01 20 iDCS100 01 99 IG In Out Group Station group number MMPG Meet Me Page 0 9 4 0 9 4 0 4 5 4 0 2 5 4 0 9 4 0 9 4 MS Manual Signalling N A Stn or stn grp no iDCS500 L only Station or station group no MW Message Waiting N A Stn or Stn Grp no iDCS5...

Page 50: ...CS CII 816 408 408i iDCS OS500 SP UCD Supervisor UCD group number N A UCD group number SPD Speed Dial Personal System 00 49 500 999 00 49 500 799 00 49 500 699 00 49 500 999 00 49 500 999 or 050 999 VG VM group message Station group number VM VM Memo Station or station group number VT VM Transfer VM AA group number ...

Page 51: ...04 PICKUP GROUP None 01 99 PICKUP GROUP None 01 20 PICKUP GROUP None 01 99 PICKUP GROUP None 01 20 SGR None Station Group Number SGR None Station Group Number SGR None Station Group Number SGR None Station Group Number SGR None Station Group Number SGR None Station Group Number SGR Station Group Number BOSS SECR None BOSS SECR BOSS SECR None BOSS SECR BOSS SECR None BOSS SECR BOSS SECR None BOSS S...

Page 52: ...s VOLUME keys to scroll through status displays and press RIGHT soft key to return to step 2 4 Press Transfer TRSF to exit OR Press SPEAKER to advance to next MMC Default Data Port No Follows hardware position Type Follows phone type Tenant Number 1 Pickup Group 01 SGR None Boss Secr None Page None Day COS No 01 or 1 Night COS No 01 or 1 COS all ring plans 01 iDCS OS500 only Related Items MMC 301 ...

Page 53: ...s Mar ACTION DISPLAY 1 Open programming and select 109 Display shows 201 DAY FORMAT COUNTRY WESTERN 2 Dial keyset number e g 205 OR 205 DAY FORMAT COUNTRY WESTERN Press VOLUME keys to select keyset and press RIGHT soft key to move cursor OR Select all stations see section 1 5 2 ALL DAY FORMAT COUNTRY 3 Dial 0 2 to select option e g Country OR 205 DAY FORMAT COUNTRY WESTERN Press VOLUME keys to scr...

Page 54: ...nging call after lifting the handset CALL COST If enabled ON LCD shows real time call cost based on Me tering Pulses arrived See AUTO TIMER option AUTO CAMPON If enabled ON station will automatically camp on to dialled extension without the user pressing the CAMP ON key iDCS500 L and OS500 systems only AME BGM Determines whether a station using Answering Machine Emu lation will hear their personal...

Page 55: ...OS500 systems only ENBLOCK 2LCD Enables Enbloc dialling for 2 Line LCD phones OS500 sys tems only ACTION DISPLAY 1 Open programming and select 110 Display shows 201 STN ON OFF AUTO HOLD OFF 2 Dial station number e g 205 OR 205 STN ON OFF AUTO HOLD OFF Press VOLUME keys to select keyset and press RIGHT soft key to move cursor OR Select all stations see section 1 5 2 ALL STN ON OFF AUTO HOLD 3 Press...

Page 56: ...BGM Off AUTO TIMER On AME PSWD CODE Off HEADSET USE Off DISP SPDNAME Off HOT KEYPAD On CID REVW ALL On KEY TONE On SECURE OHVA On PAGE REJOIN On NOT CONT CID Off RING PREF On AUTO ANS CO Off CALL COST Off AUTO ANS NET Off AUTO CAMPON Off ELBLOCK 2LCD Off Related Items MMC 301 Assign Station COS MMC 701 Assign COS Contents ...
Page 57: ...lect 111 Display shows 201 RING TONE SELECTION 5 2 Dial keyset number e g 205 OR 205 RING TONE SELECTION 5 Press VOLUME keys to select station and press RIGHT soft key to move cursor OR Select all stations see section 1 5 2 ALL RING TONE SELECTION 3 Dial 1 8 to select ring tone OR 205 RING TONE SELECTION 6 Press VOLUME keys to select ring tone and press RIGHT soft key to move cursor 4 Press Transf...

Page 58: ...gramming and select 112 Display shows 201 ALM CLK 1 HHMM ÎNOTSET 2 Dial station number e g 205 OR 205 ALM CLK 1 HHMM ÎNOTSET Press VOLUME keys to select station and press RIGHT soft key to move cursor 3 Dial alarm number e g 2 OR 205 ALM CLK 2 HHMM ÎNOTSET Press VOLUME keys to select alarm and press RIGHT soft key to move cursor OR Press LEFT soft key to return to step 2 4 Enter alarm time in 24 h...

Page 59: ...for key descriptions Tip When the character you want is on the same key as the previous character you typed in press the VOLUME Up key to move the cursor to the right then select the character The key can be used for the following special characters in sequence of key presses space _ ACTION DISPLAY 1 Open programming and select 113 Display shows 201 VIEW MEMO 1 2 Dial the keyset number e g 205 OR ...

Page 60: ...kground music volume There are 16 volume levels level 1 is the lowest and level 16 the highest 5 PAGE VOLUME Set a level for listening volume for internal page through the speaker when your keyset is idle and BGM is turned on There are 16 volume levels level 1 is the lowest and level 16 the highest iDCS and OS500 only ACTION DISPLAY 1 Open programming and select 114 Display shows 201 STN VOLUME RI...

Page 61: ...COMBINED SYSTEMS PROGRAMMING MANUAL FEBRUARY 2004 MMC 114 Page 2 of 2 Default Data Ring Volume 4 Off Hook Ring Volume 4 Handset Volume 4 Speaker Volume 13 BGM Volume 13 Page Volume 13 Related Items MMC 111 Keyset Ring Tone ...

Page 62: ...ws 201 PGMMSG 00 CANCEL PGM MSG 2 Dial keyset number e g 205 OR 205 PGMMSG 00 CANCEL PGM MSG Press VOLUME keys to select station and press RIGHT soft key to move cursor OR Select all stations see section 1 5 2 ALL PGMMSG 3 Dial 01 20 to select message number OR 205 PGMMSG 05 PAGE ME Press VOLUME keys to select message and press RIGHT soft key to return to step 2 OR Select 00 to cancel a previously...

Page 63: ...e message is MEETING press the number 6 once to get the letter M Now press the number 3 twice to get the letter E Continue selecting characters from the keypad to complete your message Press the programma ble A key to toggle between upper and lower case text Refer to section 1 5 2 in Part 1 for key descriptions Tip When the character you want is on the same key as the previous character you typed ...

Page 64: ...y from above list for alarm type e g 2 DAILY 205 ALM REM 2 HHMM 1300Î DAILY OR Press VOLUME keys to select alarm type and press RIGHT soft key to move cursor 6 Enter message using above method and press RIGHT soft key to return to step 2 205 ALM REM 2 Meeting 7 Press Transfer TRSF to store and exit OR Press SPEAKER to store and advance to next MMC Default Data Alarms set to NOTSET Related Items No...

Page 65: ...you want is on the same key as the previous character you typed in press the VOLUME Up key to move the cursor to the right then select the character The key can be used for the following special characters in sequence of key presses space _ ACTION DISPLAY 1 Open programming and select 117 Display shows 201 TXTMSG 01 Blank Message 2 Dial keyset number e g 205 OR 205 TXTMSG 01 Blank Message Press VO...

Page 66: ...er to section 1 5 2 in Part 1 for key descriptions Tip When the character you want is on the same key as the previous character you typed in press the VOLUME Up key to move the cursor to the right then select the character The key can be used for the following special characters in sequence of key presses space _ ACTION DISPLAY 1 Open programming and select 118 Display shows 202 GRP 1 NAME 2 Dial ...

Page 67: ...er e g MBR1 use the dial keypad and include an access code for 205 GRP 1 MBR1 9 123456789 external numbers the hyphen is entered automati cally Press RIGHT soft key 6 Press Transfer TRSF to store and exit OR Press SPEAKER to store and advance to next MMC Default Data None Related Items MMC 612 Group Conference Station ...

Page 68: ...if set in MMC 728 ACTION DISPLAY 1 Open programming and select 119 Display shows 201 CLIP DISP NUMBER FIRST 2 Enter keyset number e g 204 OR Press VOLUME keys to scroll through stations and press RIGHT soft key to select a station OR 204 CLIP DISP NUMBER FIRST Select all stations see section 1 5 2 ALL CLIP DISP 3 Dial display option 0 1 or 2 e g 2 Press VOLUME keys to select option and press RIGHT...

Page 69: ...ssed while on a call AOM KEY FIRST If selected extensions assigned to keys are displayed when SCREEN key is pressed while on a call ACTION DISPLAY 1 Open programming and select 120 Display shows 201 IDLE DISP CALENDAR 2 Enter keyset number e g 204 OR Press VOLUME keys to scroll through stations and press RIGHT soft key to select a station OR 204 IDLE DISP CALENDAR Select all stations see section 1...

Page 70: ... PROGRAMS COMBINED SYSTEMS PROGRAMMING MANUAL FEBRUARY 2004 MMC 120 Page 2 of 2 Default Data IDLE DISP CALENDAR DS KEY DSP TEL NUMBER DIAL MODE ENBLOCK CONV DISP SOFT MENU FIRST Related Items MMC 719 Idle Display ...

Page 71: ...AY SPANISH USA DANISH FRENCH CANADA DUTCH ACTION DISPLAY 1 Open programming and select 121 Display shows 201 LANGUAGE ENGLISH 2 Dial keyset number e g 205 OR Press VOLUME keys to select keyset and press RIGHT soft key OR Select all stations see section 1 5 2 205 LANGUAGE ENGLISH ALL LANGUAGE 3 Press VOLUME keys to select language and press RIGHT soft key 205 LANGUAGE GERMAN 4 Press Transfer TRSF t...

Page 72: ...y associated with the EasySet and Easylink applica tions available from Samsung Contact your dealer for more details ACTION DISPLAY 1 Open programming and select 122 Display shows 201 CALL SPEED 03 2 Dial keyset number e g 205 OR Press VOLUME keys to select keyset and press RIGHT soft key OR Select all stations see section 1 5 2 205 CALL SPEED 03 _ ALL CALL SPEED 03 _ 3 Enter value 03 10 two digit...

Page 73: ...executive IN STATE OUT Enter additional information for current status executive OUT ANS MODE Set answer mode for executive secretary calling Ring Auto Answer Voice Announce Refer to MMC 103 for a description of answer modes Text messages are written using the keypad Each key press moves the cursor and en ters the selected character For example press the number 6 once to get the letter M or the nu...

Page 74: ... keys to select option e g EXEC STATUS and press RIGHT soft key 205 EXEC STATE IN THE ROOM 4 Dial message number 0 9 OR Press VOLUME keys to select message and press RIGHT soft key 205 EXEC STATE ON VACATION 5 Select the next option if required For example set additional messages for display using STATE IN or STATE OUT or set answer mode by selecting ANSWER MODE 6 Press Transfer TRSF to store and ...

Page 75: ...installer in MMC 802 Customer Access MMC Number ACTION DISPLAY 1 Press Transfer TRSF 200 Display shows ENABLE CUS PROG PASSCODE _ 2 Enter passcode ENABLE CUS PROG PASSCODE 6666 Correct code shows ENABLE CUS PROG DISABLE Incorrect code shows ENABLE CUS PROG PASSWORD ERROR 3 Dial 1 for ENABLE or 0 for DISABLE OR Press VOLUME keys to select ENABLE or DIS ABLE and press RIGHT soft key ENABLE CUS PROG ...

Page 76: ..._ 2 Enter new passcode maximum four digits CUST PASSCODE NEW CODE 6666 3 Re enter new passcode for verification CUST PASSCODE VERIFY 6666 If verification is successful you see this display and you should now go to step 4 CUST PASSCODE VERIFY SUCCESS OR If verification fails you see this display and the system returns to step 2 CUST PASSCODE VERIFY FAILURE 4 Press Transfer TRSF to store and exit OR...

Page 77: ...00 OR CHANGE PASSCODE RING PLAN 0000 2 Press VOLUME keys to make selection Press RIGHT soft key to move cursor to passcode entry CHANGE PASSCODE ALARM CLR 8765 3 Enter new passcode via digits from keypad CHANGE PASSCODE ALARM CLR 9999 4 Press RIGHT soft key to return to step 2 to change other passcodes OR Press Transfer TRSF to store and exit OR Press SPEAKER to store and advance to next MMC Defau...

Page 78: ...Station group number STATION GROUP Ring over page number RING PAGE Common bell number COMMON BELL Note Only one of the above options can be selected If the ability to ring more than one item e g all four external page zones is required a station group containing all four zone codes must be created ACTION DISPLAY 1 Open programming and select 203 Display shows current assignment ASSIGN UA PORT NONE...

Page 79: ...380x 363 365 3991 ACTION DISPLAY 1 Open programming and select 204 Display shows current setting 3801 COM BELL CONTINUOUS OR 363 COM LD BELL CONTINUOUS 2 Dial common bell number OR Press VOLUME keys to make selection of common bell numbers and press RIGHT soft key to advance cursor 3 Dial 0 for continuous or 1 for interrupted operation OR Press VOLUME keys to scroll through options Press RIGHT sof...

Page 80: ...card assigned in MMC 219 Common Relay Service Type OS500 Misc card Each Misc card has one loud bell output these outputs are given a Directory Number of 3995 L or 2995 S M as a default value to enable them to be assigned The loud bell will follow the ring cadence of the designated station Only a station can be assigned to control the loud bell a station group cannot be assigned ACTION DISPLAY 1 Op...

Page 81: ...n s barge in status 1 WITH TONE Barge in will have an intrusion tone and display at the barged in on station 2 WITHOUT TONE There is no barge in tone or display at the barged in on station and the barging in station will be muted ACTION DISPLAY 1 Open programming and select 206 Display shows BARGE IN TYPE NO BARGE IN 2 Dial 0 2 to select barge in type e g 2 OR Press VOLUME keys to select barge in ...

Page 82: ...ram and are protected against tones Note This MMC is not used to assign voice mail card ports Voice mail card ports are assigned as voice mail ports automatically when the system detects a Cadence SVMi 4 SVMi 8 or SVMi 16 card ACTION DISPLAY 1 Open programming and select 207 Display shows 209 VMAA PORT NORMAL PORT 2 Dial station number e g 205 OR Press VOLUME keys to select station and press RIGHT...

Page 83: ... single line port and stop voice mail integration OPTIONS 0 ICM RING 1 C O RING 2 DATA RING ACTION DISPLAY 1 Open programming and select 208 Display shows 209 RING TYPE ICM RING 2 Dial SLT station number e g 205 OR Press VOLUME keys to select station and press RIGHT soft key to move cursor 205 RING TYPE ICM RING 3 Dial 0 1 or 2 to select port type e g 2 OR Press VOLUME keys to select option and pr...

Page 84: ...rogramming and select 209 Display shows first AOM 301 AOM MASTER MASTER NONE 2 Dial AOM number OR Press VOLUME keys to scroll through AOM numbers and press RIGHT soft key to move the cursor 301 AOM MASTER MASTER NONE 3 Enter keyset number e g 201 OR Press VOLUME keys to select station numbers 301 AOM MASTER MASTER 201 4 Press Transfer TRSF to store and exit OR Press SPEAKER to store and advance to...

Page 85: ...e and exit OR Press SPEAKER to store and advance to next MMC Default Data DISA PSWD On SGR INC BUSY Off AUTO CLEANED Off LCR ENABLE On TRSF CANCEL Off REDIAL REVW Off SMDI VMS SET Off RECALL DISC Off ISDN KEYFAC Off PERI UCD SET Off ARD TONE CHK On CHK SPV TRK Off PERI UCD RPT Off VPN ENABLE Off PRE FWD BUSY On CID CODE INS Off ISDNTRK BUSY Off ORG DIAL LOG On DISA MOH Off IN TOLL CHK Off TIE TRSF...

Page 86: ...ll Not used in UK 408i only DISA MOH An additional option that can be presented to outside DISA callers a vari able indication provided by an MOH source instead of a fixed DISA dial tone TRANSFER MOH Callers who have been transferred from an extension or UCD group or AA group will hear MOH until answered by the called extension instead of ring back tone DSP SSPDNAME LCD displays programmed name of...

Page 87: ...an timer First Digit timer in MMC 501 SL SELF RING When ON generates a 10 second ring when a single line phone dials its own number and hangs up testing SGR INC BUSY When ON generates busy tone when all station group members are busy for a group call TRSF CANCEL When OFF an SLT will be able to handle two calls simultaneously using hookflash to toggle between them When ON an SLT will be able to con...

Page 88: ...r for ward to voice mail If this option is OFF the call may only be forwarded to the mailbox of the first station iDC500 L only TRK MONITOR If ON the system will monitor the trunk supervision signalling That is if a dis connection signal is received from the exchange the call will be cleared and the extension will go back on hook VOIP MFRALOC If ON this allocates a DTMF receiver for a VOIP tandem ...

Page 89: ... analogue trunk such as disconnect clear or polarity reversal PRE FWD BUSY Enables preset forward for busy stations ORG DIAL LOG If ON all dialled digits including errors are saved TIE TRSF RCL If ON no answer recall is available for calls transferred to tie line VOIP REALRBT Enables ring back tone provided by system on VoIP calls PROG 2 ALERT Converts a received Progress message to an Alert messa...

Page 90: ...interface module you see DOOR NOT EXIST 2 Dial doorphone number e g 210 OR Press VOLUME keys to scroll through door phone numbers and use the RIGHT soft key to move cursor OR Select all stations see section 1 5 2 210 DOOR RING D 500 N 500 3 Enter day selection e g 301 OR Press VOLUME keys to make selection and press RIGHT soft key 210 DOOR RING D 301 N 500 4 Enter night selection e g 302 OR Press ...

Page 91: ...LS to select all door phones 210 DOOR RING 1 500 2 500 3 Press RIGHT soft key to move cursor Enter ring plan 1 selection e g 301 OR Press VOLUME keys to make selection and press RIGHT soft key 210 DOOR RING 1 301 2 500 4 Enter ring plan 2 selection e g 302 OR Press VOLUME keys to make selection and press RIGHT soft key Repeat this step for each ring plan 1 6 required 210 DOOR RING 1 301 2 302 5 Pr...

Page 92: ...y assigning a direct pickup key with this device as the extender If the alarm is unanswered by the door ring time out ringing will cease but the display will remain until cleared by dialling the alarm clear feature code and passcode default 8765 Q For DCS and CII systems ACTION DISPLAY 1 Open programming and select 212 Display shows first sensor e g 3501 3501 ALARM RING D 500 N 500 2 Dial sensor n...

Page 93: ...0 3 Press RIGHT soft key to move cursor Enter destination for ring plan 1 e g 205 OR Press VOLUME key to make selection and press RIGHT soft key to advance cursor 352 ALARM RING 1 205 2 500 4 Enter destination for ring plan 2 e g 205 OR Press VOLUME key to make selection and press RIGHT soft key to advance cursor Repeat this step for each ring plan 1 6 required 352 ALARM RING 1 205 2 205 5 Press T...

Page 94: ...art 1 for key descriptions Tip When the character you want is on the same key as the previous character you typed in press the VOLUME UP key to move the cursor to the right then select the character The key can be used for the following special characters in sequence of key presses space _ ACTION DISPLAY 1 Open programming and select 213 Display shows e g 351 for Compact II 351 ALARM NAME 2 Dial A...

Page 95: ...DCS OS500 ACTION DISPLAY 1 Open programming and select 214 Display shows DISA ALARM RING D 500 N 500 2 Enter day destination e g 212 OR Press VOLUME keys to make selection and press RIGHT soft key to advance cursor DISA ALARM RING D 212 N 500 3 Enter night destination e g 205 OR Press VOLUME keys to make selection and press RIGHT soft key to return to step 2 DISA ALARM RING D 212 N 205 4 Press Tra...

Page 96: ...s VOLUME keys to make selection and press RIGHT soft key to advance cursor DISA ALARM RING 1 212 2 500 3 Enter destination for ring plan 2 e g 205 OR Press VOLUME keys to make selection and press RIGHT soft key Repeat this step for all ring plans 1 6 required DISA ALARM RING 1 212 2 205 4 Press Transfer TRSF to store and exit OR Press SPEAKER to store and advance to next MMC Default Data Station G...

Page 97: ...r 358 If only one channel is assigned the even number 3552 or 3554 356 or 358 will not appear in MMC 216 Options 0 2CH 7USER 20BIN 7 USERS 1 1CH 5USER 40BIN 5 USERS ACTION DISPLAY 1 Open programming and select 215 Display shows e g 355 355 VDIALER OPTN 2CH 7USER 20BIN 2 Enter Voice Dialler number OR Press VOLUME keys to make selection Press RIGHT soft key to move cursor 355 VDIALER OPTN 2CH 7USER ...

Page 98: ...1 NONE 2 Enter Voice Dialler number e g 356 OR Press VOLUME key to make selection and press RIGHT soft key to move cursor 356 VDIALER USER USER 1 NONE 3 Enter user number 1 7 1 5 dependent on number of users allowed via MMC 215 e g 5 OR Press VOLUME keys to make selection Press RIGHT soft key to move cursor 356 VDIALER USER USER 5 NONE 4 Enter station number e g 205 OR Press VOLUME keys to make se...

Page 99: ...inished Select one of the following options AUTO PRINT OFF Automatic print feature is disabled DAILY HHMM A report is printed at the programmed time each day Enter the time in 24 hour clock format e g HHMM 2359 is 11 59pm EVERY HOUR MM A traffic report will be printed every hour at the programmed minutes past the hour e g MM 30 is 30 minutes past the hour THREE TIME SHIFT Up to three separate Star...

Page 100: ...ss VOLUME keys to select MANUAL or AUTO and press RIGHT soft key TRAFFIC REPORT AUTO PRINT OPT 3 Press VOLUME keys to select option and press RIGHT soft key TRAFFIC REPORT DAILY HHMM _ 4 Enter time e g 23 59pm TRAFFIC REPORT DAILY HHMM 2359 5 Press Transfer TRSF to store and exit OR Press SPEAKER to store and advance to next MMC Default Data No report Related Items MMC 804 System I O Parameter ...

Page 101: ...ove Purpose This MMC is related to 131 Cable Wireless service Used to select Call Cost Option ACTION DISPLAY 1 Open programming and select 217 Display shows CCC OPTION OPTION NONE 2 Use VOLUME keys to scroll through options CCC OPTION OPTION STATION 3 Press TRANSFER to store and exit OR Press SPEAKER to store and advance to next MMC Default Data NONE Related Items MMC 313 Assign PIN Code ...

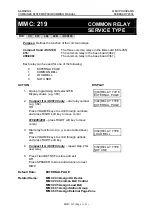
Page 102: ...363 RELAY TYPE EXTERNAL PAGE 2 Compact II iDCS100 only dial relay number e g 364 OR Press VOLUME keys to scroll through numbers and press RIGHT soft key to move cursor 816 408 408i press RIGHT soft key to move cursor 364 RELAY TYPE EXTERNAL PAGE 3 Dial relay function 0 3 e g 2 see table above OR Press VOLUME keys to scroll through options and press RIGHT soft key 364 RELAY TYPE LOUD BELL 4 Compact...

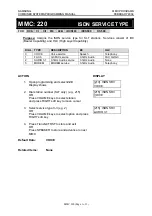
Page 103: ... 1kHz Audio FAX G2 G3 2 AUDIO 3 1 3 1kHz Audio service 3 1kHz Audio None 3 MODEM MODEM service 3 1kHz Audio Telephony ACTION DISPLAY 1 Open programming and select 220 Display shows 213 ISDN SRV VOICE 2 Dial station number SLT only e g 215 OR Press VOLUME keys to select station and press RIGHT soft key to move cursor 215 ISDN SRV VOICE 3 Select service type 0 3 e g 2 OR Press VOLUME keys to select ...

Page 104: ...NO SMOKING When a station is designated as this type it will appear in room status and check in fea tures as a non smoking room 3 MEETING ROOM Stations designated as Meeting Rooms will have the same attributes as guest rooms with regard to cleaning and occupied status but will not show up while scrolling through room status lists 4 ADMINISTRATOR Only stations designated as Administrator stations c...

Page 105: ...STEMS PROGRAMMING MANUAL FEBRUARY 2004 MMC 221 Page 2 of 2 4 Press Transfer TRSF to store and exit OR Press SPEAKER to store and advance to next MMC Default Data NORMAL STATION Related Items MMC 207 Assign VM AA Port MMC 222 Fax Pair ...

Page 106: ...hich is already assigned as a fax station in MMC 221 ACTION DISPLAY 1 Open programming and select 222 Display shows 201 FAX PAIR NONE 2 Dial guest extension number e g 205 and press RIGHT soft key to move cursor 205 FAX PAIR NONE OR Press VOLUME keys to select 3 Dial fax station number e g 301 OR 205 FAX PAIR 301 Press VOLUME keys to select fax station and press RIGHT soft key to move cursor 4 Pre...

Page 107: ...e of the pre recorded messages 49 64 GROUP BUSY Determines which tone source will be connected when all AA group members are busy This destination can be NONE TONE or external music on hold If NONE is set dial tone is connected if TONE is set hold tone is connected Note This feature can be accessed without an AA card installed However rather than providing a wake up message you can play only music...

Page 108: ...s RIGHT soft key to move cursor Enter Group Busy source e g TONE WAKE UP ANNOUNCE GROUP BUSY TONE OR Press VOLUME keys to select and press RIGHT soft key 5 Press Transfer TRSF to store and exit OR Press SPEAKER to store and advance to next MMC Default Data NONE Related Items MMC 112 Alarm Reminder ...

Page 109: ...T PASSCODE ON requires passcode when invoking night service INTRCOM SMDR or STN CALL PRT OFF the station will not print internal calls on SMDR FWD DLY USE ON calls will overflow to the Forward No Answer destination when the Forward No Answer timer expires even when the Forward No Answer feature is not activated at the called party extension Set the Forward No Answer destination in MMC 102 Call For...

Page 110: ... OFF ACCESS DIAL ON 3 Press VOLUME keys to select feature and press RIGHT soft key to move cursor ALL CUS ON OFF ACCESS DIAL ON 4 Dial 1 for ON or 0 for OFF OR Press VOLUME keys to select ON OFF and press RIGHT soft key ALL CUS ON OFF ACCESS DIAL OFF 5 Press LEFT soft key to return to step 2 Press RIGHT soft key to return to step 1 OR Press Transfer TRSF to store and exit OR Press SPEAKER to store...

Page 111: ...ate versions of MMC 507 one for iDCS OS500 and one for other systems Q For all systems except iDCS OS500 ACTION DISPLAY 1 Open programming and select 301 Display shows 201 STN COS DAY 01 NIGHT 01 2 Dial station number e g 205 OR Press VOLUME keys to scroll through stations and press RIGHT soft key to advance to step 3 to enter Day COS OR Press VOLUME keys to scroll through stations and press LEFT ...

Page 112: ...programming and select 301 Display shows 201 STN COS 1 01 2 01 3 01 2 Dial station number e g 205 OR Press VOLUME keys to scroll through stations and press RIGHT soft key OR Select all stations see section 1 5 2 205 STN COS 1 01 2 01 3 01 OR ALL STN COS 1 01 2 01 3 01 3 Press RIGHT soft key to move cursor to COS field for ring plan 1 205 STN COS 1 01 2 01 3 01 4 Enter COS number e g 05 OR Press VO...

Page 113: ...PICKUP GRP 01 2 Dial station number e g 205 OR Press VOLUME keys to select station number and press RIGHT soft key OR Select all stations see section 1 5 2 205 PICKUP GRP PICKUP GRP 01 OR ALL PICKUP GRP PICKUP GRP 3 Dial pickup group number e g 04 OR Press VOLUME keys to select group number 205 PICKUP GRP PICKUP GRP 04 4 Press RIGHT soft key to return to step 2 to enter more stations OR Press LEFT...

Page 114: ...mming and select 303 Display shows If you want to set up the boss stations for a selected secretary station press the F key to change the display to SECR STN The following example describes setting up secretary stations for a selected boss station but the procedure is the same for both BOSS STN NONE SECR 1 NONE 2 Dial BOSS station number e g 205 OR Press VOLUME keys to select station and press RIG...

Page 115: ...S YES 2 Dial the station use group number e g 001 OR Press VOLUME keys to select station and press RIGHT soft key 001 USE 301 DIAL YES ANS YES 3 Dial the trunk use group number e g 302 OR Press VOLUME keys to select trunk and press RIGHT soft key 001 USE 302 DIAL YES ANS YES 4 Press VOLUME keys to select YES or NO option OR Dial 1 for YES or 0 for NO and press RIGHT soft key to move cursor to ANS ...

Page 116: ...n include digits 0 9 and FEATURE KEYS DIAL DCS CII 816 408 408i iDCS OS500 0 NONE NONE 1 AUTHORIZE CODE AUTHORIZE CODE 2 ACCOUNT CODE ACCT VERIFIED 3 ACCT NO VERIFIED ACTION DISPLAY 1 Open programming and select 305 Display shows 201 FORCD CODE NONE 2 Dial station number e g 205 OR Press VOLUME keys to select station and press RIGHT soft key to move cursor OR Select all stations see section 1 5 2 ...

Page 117: ...t a pulse tone conversion code C E Used to mask unmask following digits shows as or Refer to section 1 5 2 in Part 1 for key descriptions ACTION DISPLAY 1 Open programming and select 306 Display shows Press RIGHT soft key to advance cursor 201 HOT LINE NONE 2 Enter station number e g 201 OR Press VOLUME keys to make selection and press RIGHT soft key 201 HOT LINE NONE 3 Enter station number to aut...

Page 118: ... the base board switch select internal external the other external source is provided on the Misc card The default directory number of a BGM source is 371 372 iDCS500 Six possible music selections depending on the number of Misc daughterboards installed The default directory number of a BGM source is 370x OS500 S M Two possible music selections on the Misc daughterboard The default directory numbe...

Page 119: ...to move the cursor OR Select all stations see section 1 5 2 205 BGM SOURCE BGM SOURCE NONE OR ALL BGM SOURCE BGM SOURCE 3 Enter source number e g 3701 OR Press VOLUME keys to make selection and press RIGHT soft key to return to step 2 205 BGM SOURCE BGM SOURCE 3701 4 Press Transfer TRSF to store and exit OR Press SPEAKER to store and advance to next MMC Default Data NONE Related Items MMC 309 Assi...

Page 120: ... a Misc card is installed One music source is provided on the base board switch select internal external the other external source is provided on the Misc card The default directory number of an MOH source is 371 372 iDCS500 Two external music sources are provided per Misc daughterboard installed The default directory number of a BGM source is 370x OS500 S M Two possible music selections on the Mi...

Page 121: ...ey to move the cursor OR Select all stations see section 1 5 2 205 STN MOH MOH SOURCE NONE OR ALL STN MOH MOH SOURCE 3 Enter source number e g 371 OR Press VOLUME keys to make selection and press RIGHT soft key to return to step 2 205 STN MOH MOH SOURCE 371 4 Press Transfer TRSF to store and exit OR Press SPEAKER to store and advance to next MMC Default Data NONE Related Items MMC 308 Assign Backg...

Page 122: ...10 Display shows 201 LCR CLASS LCR CLASS 1 2 Dial station number e g 205 OR Press VOLUME keys to select station and press RIGHT soft key to move cursor OR Select all stations see section 1 5 2 205 LCR CLASS LCR CLASS 1 OR ALL LCR CLASS LCR CLASS 3 Dial 1 8 to select class type e g 3 OR Press VOLUME keys to select class type and press RIGHT soft key to return to step 2 205 LCR CLASS LCR CLASS 3 4 P...

Page 123: ... 10 e g 01 OR Press VOLUME keys to make selection and press RIGHT soft key to move cursor 257 SIM PARA CALL MODE AWITH Refer to Table 1 for your selected option and go to the table indicated e g Table 3 to enter required value e g 0 using dial keypad or by pressing VOLUME keys Press RIGHT soft key to move cursor 257 SIM PARA CALL MODE MANUAL 4 Repeat step 3 for all required options 00 10 in Table ...

Page 124: ...BLE 0 300 1 600 2 1200 3 2400 4 4800 5 9600 6 19200 7 38400 8 48000 9 56000 TABLE 5 AUTO BAUD 0 OFF 1 ON TABLE 10 CHAR LENGTH 0 8 1 7 2 6 3 5 TABLE 6 DTR CHECK 0 OFF 1 ON TABLE 11 PARITY TABLE 0 NONE 1 ODD 2 EVEN TABLE 7 ECHO 0 OFF 1 ON TABLE 12 STOP BIT 0 1 1 1 5 2 2 Default Data SIM Type DTE Call Mode Manual Ans Mode Manual Auto Baud ON DTR Check ON Echo ON Protocol V110 Speed 9600 Char Length 8...

Page 125: ...n iDCS and OS500 systems use MMC 323 to determine what CLIP information is sent Other systems display the INFO option to allow you to select the CLIP information Select from 0 CO Tel Outgoing line number 1 Extn Number Extension number 2 CO Extn No Outgoing line number Extension number 3 DID Number DDI number ACTION DISPLAY 1 Open programming and select 312 Display shows 201 ALLOW CLIP RCV YES SND ...

Page 126: ...LLOW CLIP RCV YES SND YES For all systems except iDCS OS500 If you selected YES for SND option display shows Dial 0 3 to select INFO option OR Press VOLUME keys to select Press RIGHT soft key 205 ALLOW CLIP INFO C O Tel 5 Press Transfer TRSF to store and exit OR Press SPEAKER to save and advance to next MMC Default Data RCV YES SND YES INFO CO Tel Related Items MMC 119 CLIP Display MMC 323 Send CL...

Page 127: ... code used when dialling out on a Cable Wireless Network ACTION DISPLAY 1 Open programming and select 313 Display shows 201 PIN CODE PIN CODE NONE 2 Dial the station number e g 205 OR Press VOLUME keys to select station and press RIGHT soft key to advance to step 3 205 PIN CODE PIN CODE NONE 3 Enter the pin code serial number 1 2 3 or 4 e g 1 205 PIN CODE PIN CODE 1 4 Press Transfer TRSF to store ...

Page 128: ... 501 FEATURE KEYS 0 NONE 1 CONFIRM TONE 2 DISCONNECT ACTION DISPLAY 1 Open programming and select 314 Display shows 201 CO CONFIRM NONE 2 Dial station number e g 205 OR Press VOLUME keys to select station and press RIGHT soft key to move cursor 205 CO CONFIRM NONE 3 Dial a feature option 0 2 e g 1 OR Press VOLUME keys to select option and press RIGHT soft key to return to step 2 205 CO CONFIRM CON...

Page 129: ...iDCS 18D for an iDCS 28D keyset and vice versa 2 You can exchange a DCS 48B AOM for an iDCS 64B or DS 5064B AOM and vice versa 3 Refer to the table below to determine which devices can be exchanged Attempting to exchange incompatible devices will result in an error message display INVALID DATA Note 1 If you are exchanging a Euro 12B and 24B keyset be aware that the 12B keyset will assume the key a...

Page 130: ...O NO NO NO NO 64B AOM NO NO NO NO YES YES NO NO NO NO NO NO NO NO NO NO iDCS 28D NO NO NO NO NO NO YES YES NO NO NO NO NO NO NO NO iDCS 18D NO NO NO NO NO NO YES YES NO NO NO NO NO NO NO NO iDCS 8D NO NO NO NO NO NO NO NO YES NO NO NO NO NO NO NO DS 5012L NO NO NO NO NO NO NO NO NO YES NO NO NO NO NO NO DS 5014D NO NO NO NO NO NO NO NO NO NO YES NO NO NO NO NO DS 5021D NO NO NO NO NO NO NO NO NO N...

Page 131: ... RELOCATION EXT EXT 2 Dial the original station number e g 205 OR Press VOLUME keys to select station and press RIGHT soft key SET RELOCATION EXT205 EXT_ 3 Dial the new location s station number e g 210 SET RELOCATION EXT205 EXT210 4 Press Transfer TRSF to store and exit OR Press SPEAKER to store and advance to next MMC Default Data None Related Items None ...

Page 132: ...select 316 Display shows 201 CPY USABLE FROM NONE 2 Enter destination station number e g 205 OR Press VOLUME keys to make selection and press RIGHT soft key to move cursor OR Select all stations see section 1 5 2 205 CPY USABLE FROM NONE 3 Enter the source station number e g 210 OR Press VOLUME keys to make selection and press RIGHT soft key to move cursor 205 CPY USABLE FROM 210 4 Press Transfer ...

Page 133: ...up 004 1 Open programming and select 317 Display shows 001 USE 001 DIAL YES 2 Dial the first station use group number e g 001 OR Press VOLUME keys to select group and press RIGHT soft key OR Select all station use groups see section 1 5 2 001 USE 001 DIAL YES 3 Dial the second station use group number e g 004 OR Press VOLUME keys to select group and press RIGHT soft key 001 USE 004 DIAL YES 4 Dial...

Page 134: ... cadences 1 Calls from the programmed station or trunk will ring SLTs with the intercom ring cadence 2 Calls from the programmed station or trunk will ring SLTs with the CO ring ca dence 3 Calls from the programmed station or trunk will ring SLTs with the DOOR ring cadence 4 Calls from the programmed station or trunk will ring SLTs with the ALARM ring cadence 5 Calls from the programmed station or...

Page 135: ...SAMSUNG MMC PROGRAMS COMBINED SYSTEMS PROGRAMMING MANUAL FEBRUARY 2004 MMC 318 Page 2 of 2 Default Data T F STN C F STN Related Items None ...

Page 136: ...SAMSUNG MMC PROGRAMS COMBINED SYSTEMS PROGRAMMING MANUAL FEBRUARY 2004 MMC 319 Page 1 of 1 MMC 319 BRANCH GROUP Not Used in the UK EU ...

Page 137: ...once more be in effect Preset FNA time follows the Station No Answer Forward timer MMC 502 Refer also to the Preset Busy option in MMC 210 ACTION DISPLAY 1 Open programming and select 320 Display shows 201 PRESET FNA NONE OPT BOTH 2 Dial station number e g 205 OR Press VOLUME keys to select station and press RIGHT soft key to move cursor OR Select all stations see section 1 5 2 205 PRESET FNA NONE...

Page 138: ...ng to camp on a call or voice announce to the other when the latter is busy ACTION DISPLAY 1 Open programming and select 321 Display shows 201 KTS TYPE NON DISPLAY 2 Dial station number e g 205 OR Press VOLUME keys to select station and press RIGHT soft key to move cursor OR Select all stations see section 1 5 2 205 KTS TYPE NON DISPLAY 3 Press VOLUME keys to select DISPLAY or NON DISPLAY and pres...

Page 139: ...n the system uses the number for the trunk entered in MMC 405 Trunk Number as the CLIP number to send ACTION DISPLAY 1 Open programming and select 323 Display shows 201 SEND CLIP 1 2 Dial station number e g 205 OR Press VOLUME keys to select station and press RIGHT soft key to move cursor 205 SEND CLIP 1 3 Dial table number e g 2 OR Press VOLUME keys to select table and press RIGHT soft key 205 SE...

Page 140: ...lude CLI the CLI number of the forwarding station is sent to the external forward destination Set ON Only the CLI number of the forwarding station is sent to the external forward destination REPEAT CLI When a Trunk to Trunk call is made the incoming CLI will be used as the outgoing CLI Note 1A2 Emulate means that other stations up to a total of four can join an existing trunk conversation by press...

Page 141: ...ress VOLUME keys to select ON OFF and press RIGHT soft key to return to step 2 704 TRK ON OFF TRK FORWARD OFF 5 Press Transfer TRSF to store and exit OR Press SPEAKER to store and advance to next MMC Default Data 1A2 EMULATE Off TRUNK INC DND Off TRUNK FORWARD On LCR ALLOW Off EFWD EXT CLI On REPEAT CLI On Related Items None ...

Page 142: ...BX mode Options are 0 CO LINE 1 PBX LINE ACTION DISPLAY 1 Open programming and select 401 Display shows 701 PBX LINE CO LINE 2 Dial trunk number e g 704 OR Press VOLUME keys to scroll through trunk num bers and press RIGHT soft key to move cursor OR Select all trunks see section 1 5 2 704 PBX LINE CO LINE OR ALL PBX LINE 3 Dial 1 for PBX or 0 for C O OR Press VOLUME keys to scroll through options ...

Page 143: ...1 DIAL TYPE DTMF TYPE 2 Dial trunk number e g 704 OR Press VOLUME keys to scroll through trunk numbers and press RIGHT soft key to move the cursor OR Select all trunks see section 1 5 2 704 DIAL TYPE DTMF TYPE OR ALL DIAL TYPE 3 Dial 1 for PULSE or 0 for DTMF e g 1 OR Press VOLUME keys to scroll through options Press RIGHT soft keys to return to step 2 704 DIAL TYPE DIAL PULSE TYPE 4 Press Transfe...

Page 144: ... F Follow toll class F 7 CLS G Follow toll class G 8 CLS H Follow toll class H All restricted Q For all systems except iDCS OS500 ACTION DISPLAY 1 Open programming and select 403 Display shows 701 TOLL CLASS D F STN N F STN 2 Dial trunk number e g 704 OR Press VOLUME keys to scroll through trunk numbers and press RIGHT soft key to move the cursor OR Select all trunks see section 1 5 2 704 TOLL CLA...

Page 145: ...toll class for ring plan 1 e g 2 for CLS B OR Press VOLUME keys to scroll through toll classes and use RIGHT soft key to move the cursor 704 TOLL CLASS 1 CLS B 2 F STN 4 Enter toll class for ring plan 2 e g 2 OR Press VOLUME keys to scroll through toll classes and press RIGHT soft key Continue entering classes for ring plans 3 6 704 TOLL CLASS 1 CLS B 2 CLS B 5 Press Transfer TRSF to store data an...

Page 146: ...on 1 5 2 in Part 1 for key descriptions Tip When the character you want is on the same key as the previous character you typed in press the VOLUME UP key to move the cursor to the right then select the character The key can be used for the following special characters in sequence of key presses space _ ACTION DISPLAY 1 Open programming and select 404 Display shows 701 TRUNK NAME 2 Dial trunk e g 7...

Page 147: ... used for the following special characters in sequence of key presses space _ ACTION DISPLAY 1 Open programming and select 405 Display shows 701 CO TEL NO 2 Dial trunk number e g 704 OR Press VOLUME keys to select trunk and press RIGHT soft key to move the cursor 704 CO TEL NO _ 3 Enter the identifying trunk number 704 CO TEL NO 3054264100 4 Press RIGHT soft key to return to step 2 OR Press Transf...

Page 148: ...al trunk number e g 704 OR Press VOLUME keys to scroll through trunk numbers and press the RIGHT soft key to move the cursor 704 TRK RING D 500 N 500 3 Dial station number or station group number for day e g 205 OR Press VOLUME keys to select station number or station group number and press RIGHT soft key to move cursor 704 TRK RING D 205 N 500 4 Dial station number or station group number for nig...

Page 149: ...ation group number and press RIGHT soft key to move cursor 704 TRK RING 1 205 2 500 4 Dial station number or station group number for ring plan 2 e g 501 OR Press VOLUME keys to select station number or station group number and press RIGHT soft key to move cursor Continue to select destinations for ring plans 3 6 If you do not select destinations for ring plans 2 6 the destination for ring plan 1 ...

Page 150: ...and select 407 Display shows 701 TRK RELS RELEASE Y 1 N 0 2 Dial trunk number e g 704 OR Press VOLUME keys selected trunk and press RIGHT soft key OR Select all trunks see section 1 5 2 704 TRK RELS RELEASE _Y 1 N 0 OR ALL TRK RELS RELEASE _Y 1 N 0 3 Dial 1 for YES or 0 for NO e g 1 System returns to step 2 704 TRK RELS RELEASE Y 1 N 0 4 Press Transfer TRSF to store and exit OR Press SPEAKER to st...

Page 151: ...d is installed One music source is provided on the base board switch select internal external the other external source is provided on the Misc card The default directory number of a music source is 371 372 iDCS500 Six possible music selections depending on the number of Misc daughterboards installed The default directory number of a BGM source is 370x OS500 S M Two possible music selections on th...

Page 152: ...and press RIGHT soft key to move cursor OR Select all trunks see section 1 5 2 704 TRK MOH MOH SOURCE TONE OR ALL TRK MOH MOH SOURCE 3 Enter source number e g 3701 OR Press VOLUME keys to select option Press RIGHT soft key to return to step 2 above 704 TRK MOH MOH SOURCE 3701 4 Press Transfer TRSF to store and exit OR Press SPEAKER to store and advance to next MMC Default Data TONE Related Items M...

Page 153: ...r Compact II 701 TRK STATUS PORT NO EX1 01 2 Enter trunk number e g 704 OR Press VOLUME keys to make selection and press RIGHT soft key to advance cursor 704 TRK STATUS PORT NO EX1 04 3 Enter desired option 00 19 from table OR Press VOLUME keys to make selection 704 TRK STATUS 1A2 EMULATE OFF 4 Press Transfer TRSF to store and exit OR Press SPEAKER to store and advance to next MMC Default Data Fol...

Page 154: ...Type DTMF Dial Pulse Dial Type DTMF Dial Pulse 06 Dial Type DTMF Dial Pulse Day Toll Restriction Ring Plan Toll Restriction 1 07 Day Toll Restriction Night Toll Restriction Ring Plan Toll Restriction 2 08 Night Toll Restriction Day Ring Destination Ring Plan Toll Restriction 3 09 Day Ring Destination Night Ring Destination Ring Plan Toll Restriction 4 10 Night Ring Destination MOH Source Ring Plan...

Page 155: ...sible Note In order to use DISA the caller must first dial a valid station number followed by a four digit passcode This passcode is defined in MMC 101 Change User Passcode DISA users MUST change this passcode as the default number cannot be used Q For all systems except iDCS OS500 DISA can be made available in day mode night mode or both FEATURE KEYS 0 NORMAL No DISA service 1 DAY DISA is availab...

Page 156: ...lect trunk and press RIGHT soft key OR Select all trunks see section 1 5 2 704 123456 DISA LINE 000000 OR ALL 123456 DISA LINE 000000 3 Press VOLUME keys to move to required ring plan 1 6 Use UP to move right DOWN to move back Dial 1 to select the ring plan or 0 to deselect and press RIGHT soft key to return to step 2 704 123456 DISA LINE 001000 4 Press Transfer TRSF to store and exit OR Press SPE...

Page 157: ...SAMSUNG MMC PROGRAMS COMBINED SYSTEMS PROGRAMMING MANUAL FEBRUARY 2004 MMC 411 Page 1 of 1 MMC 411 ASSIGN E1 SIGNAL TYPE Not Used in UK EU ...

Page 158: ... START 3 NO ANSWER BACK 4 DIRECT BACK ACTION DISPLAY 1 Open programming and select 412 Display shows 701 TRK SIGNAL IMMEDIATE START 2 Enter desired trunk number e g 705 OR Press VOLUME keys to make selection and press RIGHT soft key to move cursor OR Select all trunks see section 1 5 2 705 TRK SIGNAL IMMEDIATE START 3 Enter desired trunk type selection from above list e g 2 OR Press VOLUME keys to...

Page 159: ...ay shows 701 CTYPE AP N AT N AA Y VM N 2 Enter desired trunk number e g 705 OR Press VOLUME keys to make selection and press RIGHT soft key to move cursor OR Select all trunks see section 1 5 2 705 CTYPE AP N AT N AA Y VM N 3 Press RIGHT soft key to move cursor to required option e g VM Dial 1 for Y Yes to select or 0 for N No OR Press VOLUME keys to make selection and press RIGHT soft key 705 CTY...

Page 160: ... clears the call If the trunk is desig nated as PRS detection the call duration timer will be started and the results printed on the SMDR record PRS detection is also essential for dropping a trunk to trunk conversa tion which is unsupervised by an internal party ACTION DISPLAY 1 Open programming and select 414 Display shows 701 TRK PRS NONE 2 Enter desired trunk number e g 705 OR Press VOLUME key...

Page 161: ...t These records will also be stored in the station review list Note In order for these abandoned call records to print on SMDR use MMC 725 SMDR Options and set Option 11 Abandon Call to YES ACTION DISPLAY 1 Open programming and select 415 Display shows 701 TRK ABNDN REPORT YES 2 Dial trunk number e g 705 OR Press VOLUME keys to select trunk and use LEFT or RIGHT soft key to move cursor 705 TRK ABN...

Page 162: ...d select 416 Display shows 701 TIE XLATE UNUSE DID TRANS 2 Enter desired trunk number e g 705 OR Press VOLUME keys to make selection and press RIGHT soft key to move cursor OR Select all trunks see section 1 5 2 705 TIE XLATE UNUSE DID TRANS OR ALL TIE XLATE UNUSE DID TRANS 3 Dial 0 or 1 to select option e g 1 OR Press VOLUME keys to make selection and press RIGHT soft key 705 TIE XLATE USE DID TR...

Page 163: ...f the destination defined in MMC 406 is a VMAA port or group the system will repeat the digits received from the C O to the port when it answers If you select this option press the right soft key and NUM OF DGT will appear in the display Enter the number of incoming digits from the C O 0 4 ACTION DISPLAY 1 Open programming and select 416 Display shows 701 E M TRANS FOLLOW INCOM DGT 2 Enter desired...

Page 164: ... Card Restart must be used to restart the card to make the change effective ACTION DISPLAY 1 Open programming and select 417 Display shows e g for DCS 701 E1 PRI CRC ON 2 Enter first trunk number in PRI card e g 701 OR Press VOLUME keys to select first trunk number and press RIGHT soft key to move cursor 701 E1 PRI CRC ON 3 Enter 1 for ON or 0 for OFF OR Press VOLUME keys to select and press RIGHT...

Page 165: ...st trunk number in ISDN card e g 701 OR Press VOLUME keys to select first trunk number and press RIGHT soft key to move cursor 701 RESTART CARD RESTART NO 3 Press VOLUME keys to select YES or NO and press RIGHT soft key If you select NO system returns to step 2 701 RESTART CARD RESTART YES 4 You are asked to confirm your selection Enter 1 for YES or 0 for NO OR Press VOLUME keys to select and pres...

Page 166: ... CHANNEL ANY is YES the system checks if the adjacent port another B channel in the same BRI access is free If it is free the user can call through that port Oth erwise the user hears busy tone BRI MODE P P DDI When BRI line is point to point configuration and is a DDI line Incoming calls are placed as set in MMC 714 DDI Number Name Translation All incoming calls through the DDI trunk will be plac...

Page 167: ...shows BRI STN Items to select include some or all of the following CHANNEL ANY POWER FEED and BRI CODING CHANNEL ANY See above POWER FEED This field determines if power to a BRI access will be supplied YES or NO BRI CODING A LAW or µ LAW A LAW in UK In BRI STN options DLSEND and BRI MODE are not included because the system uses implicit data for these enblock for DLSEND and P MP for BRI MODE ACTIO...

Page 168: ...HANNEL ANY YES 3 a 3 For another port repeat from step 2 When finished go to step 4 3 b Display is as shown for STATION ports 703 BRI STN CHANNEL ANY YES 3 b 1 Press VOLUME keys to choose item CHANNEL ANY POWER FEED BRI CODING Press RIGHT soft key to move cursor and make selection 3 b 2 For other items repeat step 3 b 1 3 b 3 For another port repeat from step 2 4 Press Transfer TRSF to store and e...

Page 169: ... or Enblock If Enblock digits are sent in a single block if Overlap dig its are sent as they dialled CLIP TABLE Used to select the CLIP number to send to the network If NONE is se lected the trunk number set in MMC 405 Trunk Number is sent to the network Other wise the number entered in MMC 323 Send CLIP Number corresponding to the num ber set here is sent to the network NB TYPE Changes the number...

Page 170: ...ey to return to step 2 704 PRI OPTION DLSEND ENBLOCK 5 Press Transfer TRSF to store and exit OR Press SPEAKER to store and advance to next MMC Default Data CHANNEL ANY YES PRI MODE DDI DLSEND OVERLAP CLIP TABLE NONE NB TYPE UNKNOWN NB PLAN UNKNOWN Related Items MMC 418 Card Restart MMC 406 Trunk Ring Assignment MMC 714 DDI Number and Name Translation ...

Page 171: ...ared or camped on to the station which is alerted to the call There is a total of eight entries on a trunk basis and each entry consists of the following fields DIGITS Digits to be received maximum of 10 DAY DEST OR RING PLAN Destination in day mode can be a station or a station group Destinations for ring plans 1 6 can be a station or a station group NIGHT DEST OR RING PLAN Destination in night m...

Page 172: ...eys to make selection and press RIGHT soft key NB iDCS and OS500 systems show ring plans 1 and 2 Enter values for these plans and press RIGHT soft key to select destinations for ring plans 3 and 4 then plans 5 and 6 as required Then go to step 7 704 MSN DGT 4 D 204 N 6 Enter night destination e g 202 OR Press VOLUME keys to make selection and press RIGHT soft key 704 MSN DGT 4 D 204 N 202 7 Enter ...

Page 173: ...or all systems except iDCS OS500 ACTION DISPLAY 1 Open programming and select 422 Display shows first trunk 701 TRK COS DAY 01 NIGHT 01 2 Dial trunk number e g 705 OR Press VOLUME keys to scroll through trunks and press RIGHT soft key OR Select all trunks see section 1 5 2 705 TRK COS DAY 01 NIGHT 01 OR ALL TRK COS DAY NIGHT 3 Enter day class of service e g 05 OR Press VOLUME keys to scroll throug...

Page 174: ...s RIGHT soft key to move cursor Enter class of service for ring plan 1 e g 05 OR Press VOLUME keys to scroll through classes of service and press RIGHT soft key 205 TRK COS 1 05 2 01 3 01 4 Enter class of service for ring plan 2 e g 05 OR Press VOLUME keys to scroll through classes of service and press RIGHT soft key Continue to select COS for other ring plans as re quired 205 TRK COS 1 05 2 05 3 ...

Page 175: ...s MMC will take effect only after restarting the BRI card Use MMC 418 Card Restart to restart the card ACTION DISPLAY 1 Open programming and select 423 Display shows e g TRUNK 701 S T MODE TRUNK 2 Dial BRI trunk number e g 703 OR Press VOLUME keys to select the port Use the RIGHT soft key to position the cursor under TRUNK or STATION 703 S T MODE TRUNK 3 Press VOLUME keys to make selection TRUNK o...

Page 176: ... same number in more than one BRI access However more than one number can be mapped onto a port and used in a BRI access ACTION DISPLAY 1 Open programming and select 424 Display shows 7801 S0 MAPPING NONE 2 Dial an ISDN terminal number e g 7803 OR Press VOLUME keys to select the number and press RIGHT soft key to move cursor 7803 S0 MAPPING NONE 3 Dial an ISDN station number e g 703 OR Press VOLUM...

Page 177: ... programming and select 426 Display shows 701 TRUNK GAIN RX 0 0 TX 0 0 2 Dial trunk number e g 704 OR Press VOLUME keys to select trunk and press RIGHT soft key 704 TRUNK GAIN RX 0 0 TX 0 0 OR OR Select all trunks see section 1 5 2 ALL TRUNK GAIN RX 0 0 TX 0 0 3 Press VOLUME keys to select trunk RX gain and press RIGHT soft key 704 TRUNK GAIN RX 1 0 TX 0 0 4 Press VOLUME keys to select trunk TX ga...

Page 178: ...SAMSUNG MMC PROGRAMS COMBINED SYSTEMS PROGRAMMING MANUAL FEBRUARY 2004 MMC 427 Page 1 of 1 MMC 427 R2MFC SIGNAL Not Used in UK EU ...

Page 179: ...ISPLAY 1 Open programming and select 428 Display shows 301 USE 301 DIAL YES 2 Dial the first trunk use group number e g 301 OR Press VOLUME keys to select group and press RIGHT soft key OR Select all trunks see section 1 5 2 301 USE 301 DIAL YES 3 Dial the second trunk use group number e g 303 OR Press VOLUME keys to select group and press RIGHT soft key 301 USE 303 DIAL YES 4 Dial 1 for YES or 0 ...

Page 180: ...nk only if you want incoming call costing By default all cost rates are selected For most applications there is no need to change this default ACTION DISPLAY 1 Open programming and select 433 Display shows trunk number and cost rates CR 701 12345678 CR 11111111 2 Dial trunk number e g 705 OR Press VOLUME keys to select trunk and press RIGHT soft key to move cursor OR Select all trunks see section ...

Page 181: ...splay will show MADE BUSY If the station is in busy state with no other connection the display will show BUSY only If a conference is in progress with the selected trunk or station the display will show one of the conference parties and an arrow Other parties in the conference can then be displayed by pressing the RIGHT soft key ACTION DISPLAY 1 Open programming and select 434 Display shows for ex...

Page 182: ... e g 702 OR Press VOLUME keys to select and press RIGHT soft key to move the cursor OR Select all lines see section 1 5 2 702 TMC GAIN R 0 dB T 0 dB OR ALL TMC GAIN R 0 dB T 0 dB 3 Enter the gain level for received calls R e g 1 OR Press VOLUME keys to select and press RIGHT soft key to move the cursor 702 TMC GAIN R 1 dB T 0 dB 4 Enter the gain level for transmitted calls T e g 1 OR Press VOLUME ...

Page 183: ...ill allow to incorrectly access a DISA line before locking out the DISA line RANGE 1 99 4 NEW CALL Number of times the system will allow a user to signal New Call on a C O line during one call RANGE 1 99 5 UCDS VISUAL ALARM Used to set the Visual Alarm threshold It is triggered when the number of calls waiting to be answered in the UCD group reaches this value RANGE 0 25 6 UCDS AUDIO ALARM Used to...

Page 184: ...lection and press RIGHT soft key to move cursor UCDS VISUAL ALAM 00 _ 3 Enter new value If entry is valid system will return to step 2 UCDS VISUAL ALAM 00 02 4 Press Transfer TRSF to store and exit OR Press SPEAKER to store and advance to next MMC Default Data Alarm Reminder 5 Auto Redial 5 DISA Call 99 DISA Lock 3 New Call 99 UCDS Visual Alarm 0 UCDS Audio Alarm 0 UCD CS Level 1 0 UCD CS Level 2 ...

Page 185: ...000 See table of timers and values be low ACTION DISPLAY 1 Open programming and select 501 Display shows first timer value AA INT DGT TIME 05 SEC 2 Press VOLUME keys to select timer e g KMMC Lock Out and press RIGHT soft key to move KMMC LOCK OUT TM 30 SEC _ cursor 3 Enter new value System returns to step 2 KMMC LOCK OUT TM 30 SEC 255 4 Press Transfer TRSF to store and exit OR Press SPEAKER to sto...

Page 186: ...SEC CO CONFIRM 3 MIN 0 255 MIN CO CO DISCONNECT 20 MIN 0 255 MIN CONFER TONE INT 9900 MS 100 9900 MS CONFIRM TONE 1000 MS 100 2500 MS CRD TONE INT 30 SEC 1 250 SEC DIAL PASS 5 SEC 1 25 SEC DISA DISCONNECT 30 MIN 1 255 MIN DISA LOCK OUT 30 MIN 1 255 MIN DISA NOANS DISC 30 SEC 0 250 SEC DISA PASS CHECK 30 MIN 1 255 MIN DISPLAY DELAY 3 SEC 1 250 SEC DOOR LOCK RELEASE 500 MS 100 2500 MS DOOR RING DETE...

Page 187: ...is AA NO ACT Time AA will wait for first digit for processing after which call is transferred to the desti nation set in NO ACT DEST in MMC 733 AA TRANS After this time compare input digit with AA translation table MMC 732 and transfer to destination ALARM The time after which the System Alarm key will start ringing again when it has been silenced iDCS500 L and OS500 systems only ALERT TONE Sets t...

Page 188: ...e is activated or deactivated CRD TONE INT Controls the interval of the intermittent tone presented to station users whose calls are being recorded using the Auto Record feature see Voice Mail documentation DIAL PASS The wait time for preventing the misdialling of an outgoing call After the last digit has been dialled the voice path is connected DISA DISCONNECT Controls the maximum duration of a D...

Page 189: ...amming status LCR ADVANCE Controls the period of time before selecting the next allowable route when a station is allowed to route advance LCR INTER DIGIT Controls the grace period between dialling valid digits before dropping the call and returning the user to error tone LONG KEY DETECT Controls the period for which pressing and holding a key will dial the corre sponding single digit personal spe...

Page 190: ... timer also controls the LCD duration timer on the keysets The duration time displayed and the SMDR time duration will be the same ROUTE OPTIMISE When a call is made via Q SIG signalling route optimisation is activated after this time SYS HOLD RECALL Determines the time calls can be left on hold before recalling the holding sta tion Setting timer to 000 means no recalling will take place TRANSFER ...

Page 191: ...period between lifting the handset and plac ing an internal external call as programmed in MMC 306 Range 0 250 sec iDCS OS500 systems only 4 EFWD DELAY Controls how long a station set to External Call Forward will ring before the call is forwarded Range 1 250 sec iDCS OS500 systems only Other systems can be programmed for these options in MMC 501 Note It is reasonable for the system administrator ...

Page 192: ... g 0200 System returns to step 2 205 DTMF DUR 0100 MS 0200 5 Press Transfer TRSF to store and exit OR Press SPEAKER to store and advance to next MMC Default Data NO ANS FWD 015 sec DTMF DURATION 100 msec FIRST DGT DELAY 600 msec OFFHK SEL 015 sec EFWD DELAY 010 sec Related Items MMC 102 Call Forward MMC 207 Assign VM AA Port MMC 306 Hot Line MMC 726 VM AA Options ...

Page 193: ...S DET TM 0000 2500 MSEC 0000 MSEC RNG DET TM 0010 2500 MSEC 0050 MSEC WINK TIME 0100 0300 MSEC 200 MSEC MF DP INT TM 0100 9900 MSEC 0800 MSEC MFR DLY TM 00 25 SEC 00 SEC ACTION DISPLAY 1 Open programming and select 503 Display shows 701 ANS BAK TM 0600 MS 2 Dial trunk number e g 704 OR Press VOLUME keys to select trunk and press RIGHT soft key to move cursor OR Select all trunks see section 1 5 2 ...

Page 194: ... Break ratio 01 99 Dial 1 Pulse Per Second 10 or 20 ACTION DISPLAY 1 Open programming and select 504 Display shows MAKE BREAK RATIO 33 MAKE 2 Dial 0 or 1 for option e g 1 OR Press VOLUME keys for selection and press RIGHT soft key to move cursor PULSE PER SECOND 10 PPS _ 3 Dial in new value e g 20 System returns to step 2 PULSE PER SECOND 10 PPS 20 4 Press Transfer TRSF to store and exit OR Press ...

Page 195: ... 2002 HH Hour 00 23 MM Minute 00 59 ACTION DISPLAY 1 Open programming and select 505 Display shows system date and time OLD 1 1 1 0 2 9 9 1 1 4 7 NEW WMMDDYY HHMM 2 Enter new date and time using above table OLD 1 1 1 0 2 9 9 1 1 4 7 NEW 3 1 1 0 5 0 1 1 4 4 5 3 Verify time and date Re enter data if necessary OLD 3 1 1 0 5 0 1 1 4 4 5 NEW WMMDDYY HHMM 4 Press Transfer TRSF to store and exit OR Press...

Page 196: ...Camp on tone MSGWAT Message waiting tone RGBACK Ringback tone RING Ring over page tone to external page port TRSFER Transfer dial tone DID RNGBACK AC15 ringback tone not available on 408 systems CO BUSY CO Busy tone CO RINGBACK CO Ringback tone CO DIAL CO Dial tone ACTION DISPLAY 1 Open programming and select 506 Display shows BUSY TONE INTERRUPT TONE 2 Press VOLUME keys to select tone e g TRSFER ...

Page 197: ...350 CONFIRM BARGE IN 50 50 50 50 DIAL CONTINUOUS DND NO MORE 250 250 250 250 ERROR 100 100 100 100 HOLD CAMP ON 500 3500 500 3500 MESSAGE WAIT CONTINUOUS RING BACK 400 200 400 2000 RING 1000 3000 1000 3000 TRANSFER 100 100 100 100 DID RINGBACK 1000 3000 1000 3000 CO BUSY 350 350 350 350 CO RINGBACK 400 200 400 2000 CO DIAL 1000 250 1000 250 Note All times are in milliseconds Related Items MMC 514 ...

Page 198: ... key is pressed again to disable the override Refer to either MMC 722 Station Key Programming or MMC 723 System Key Programming A passcode is required to use these keys see MMC 202 When programming ring plans for any given day it is important to remember that they must be programmed in sequence 1 2 3 4 5 6 a ring plan cannot be skipped e g you cannot program 1 2 4 etc a higher numbered plan cannot...

Page 199: ...ey RING PLAN TUE 1 ST END 3 Dial ring plan number 1 6 e g 2 OR Press VOLUME keys to select and press RIGHT soft key RING PLAN TUE 2 ST _ END 4 Enter Start time e g 0800 Cursor moves to END RING PLAN TUE 2 ST 0800 END _ 5 Enter End time e g 2200 System returns to step 2 RING PLAN TUE 2 ST 0800 END 2200 6 Press Transfer TRSF to store and exit OR Press SPEAKER to store and advance to next MMC Default...

Page 200: ...night to day service e g start 1730 WED end 0800 THUR All times are entered in 24 hour clock format e g 1730 is 5 30pm FEATURE KEYS 0 SUN 4 THU 1 MON 5 FRI 2 TUE 6 SAT 3 WED ACTION DISPLAY 1 Open programming and select 507 Display shows NIGHT TIME SUN ST END 2 Dial day number 0 6 e g 3 OR Press VOLUME keys to select day and press RIGHT soft key to advance cursor NIGHT TIME WED ST END 3 Dial start ...

Page 201: ...enerates additional call cost calculated by multiplying this rate by the original call cost Ranges from 100 to 250 WARNING Changing a value when there is a call in progress may result in an inaccurate call cost This MPD facility requires the Meter Pulse Detection version of the trunk card It is not available on the standard product ACTION DISPLAY 1 Open programming and select 508 Display shows UNI...

Page 202: ...ased and is queued for redial after expiration of the Auto Redial Interval timer see MMC 501 FEATURE KEYS DIAL 0 INTERRUPT TONE DIAL 1 CONTINUOUS TONE TONES BUSY TONE RINGBACK TONE DIAL TONE ACTION DISPLAY 1 Open programming and select 509 Display shows CO BUSY TONE INTERRUPT TONE 2 Press VOLUME keys to select tone Press LEFT soft key and advance to step 3 CO RGBACK TONE CONTINUOUS TONE 3 Dial 0 f...

Page 203: ...OMBINED SYSTEMS PROGRAMMING MANUAL FEBRUARY 2004 MMC 509 Page 2 of 2 Default Data TONE ON OFF ON OFF BUSY 350 350 350 350 DIAL 1000 250 1000 250 RINGBACK 400 200 400 200 Note All times are in milliseconds Related Items None ...

Page 204: ...ff on off Contact Technical Support for advice before changing any of these values ACTION DISPLAY 1 Open programming and select 510 Display shows 1 STN RING 1000 3000 1000 3000 2 Dial option 1 5 e g 2 OR Press VOLUME keys to select and press RIGHT soft key 2 TRK RING 0400 0200 0400 3000 3 Enter new value s for cadence 4 digits per value as required 2 TRK RING 0400 0200 0400 2000 4 Press Transfer T...

Page 205: ...ng and select 511 Display shows MW LAMP CADENCE ON 1000 OFF 1000 2 Enter value for ON followed by value for OFF enter all four digits MW LAMP CADENCE ON 2000 OFF 2000 3 Press Transfer TRSF to store and exit OR Press SPEAKER to store and advance to next MMC Q For iDCS and OS500 systems ACTION DISPLAY 1 Open programming and select 511 Display shows MW LAMP CADENCE INTERRUPT LED 2 Press VOLUME keys t...

Page 206: ...ASSIGN HOLIDAY 01 2 Press VOLUME keys to select option 01 60 and press RIGHT soft key ASSIGN HOLIDAY 01 _ 3 Enter date in format MMDD ASSIGN HOLIDAY 01 1225 4 Press Transfer TRSF to store and exit OR Press SPEAKER to store and advance to next MMC Default Data None Related Items MMC 507 Assign Auto Night Time Q For iDCS and OS500 systems The procedure is to select a ring plan and enter the required...

Page 207: ... RIGHT soft key ASSIGN HOLIDAY 01 4 Enter the holiday period e g 1225 Cursor returns to allow you to enter another entry number 01 60 To select another ring plan move the cursor back to the top line select the RING PLAN option and follow the above procedure ASSIGN HOLIDAY 01 1225 5 Press Transfer TRSF to store and exit OR Press SPEAKER to store and advance to next MMC Default Data Follow ring plan...

Page 208: ...tem will flag all occupied rooms as Needs Cleaning CHECK IN END TIME iDCS and OS500 systems only The time entered here tells the system which rooms to automatically add an additional day s charge at the Check Out Time For example if you set the Check In End time as 5 a m all rooms checked in before 5 a m will be automatically charged an extra day at the Check Out Time which might be say 11 a m Roo...

Page 209: ...e tones which can be changed are 0 BUSY TONE 1 DIAL TONE 2 DND NO MORE 3 TRANSFER TONE 4 MSG WAIT TONE 5 ERROR TONE 6 RINGBACK TONE ACTION DISPLAY 1 Open programming and select 514 Display shows BUSY TONE TONE 2 Select the tone using the VOLUME keys e g MSG WAIT OR Dial 0 6 for the tone and press RIGHT soft key MSG WAIT TONE TONE 3 Dial the tone source e g 371 OR Press VOLUME keys to select MSG WA...

Page 210: ...ered as follows NO entry number 01 10 YY year last 2 digits e g 02 for 2002 START start date MMDD e g 0801 is 1st August END end date MMDD e g 0910 is 10th September ACTION DISPLAY 1 Open programming and select 515 Display shows NO YY START END 01 2 Dial 01 10 to select entry number e g 01 OR Press VOLUME keys to select and press RIGHT soft key NO YY START END 01 _ 3 Enter dates see above e g 02 0...

Page 211: ...ng and select 600 Display shows OPERATOR GROUP D 500 N 500 2 Dial day operator group e g 501 OR Press VOLUME keys to select and press RIGHT soft key OPERATOR GROUP D 501 N 500 3 Dial night operator group e g 501 OR Press VOLUME keys to select and press RIGHT soft key OPERATOR GROUP D 501 N 501 4 Press Transfer TRSF to store and exit OR Press SPEAKER to store and advance to next MMC Default Data Da...

Page 212: ...2 500 3 Dial operator group for ring plan 2 e g 501 OR Press VOLUME keys to select and press RIGHT soft key Continue selecting group for plans 3 6 as required OPERATOR GROUP 1 501 2 501 4 Press Transfer TRSF to store and exit OR Press SPEAKER to store and advance to next MMC Default Data All ring plans 500 Related Items MMC 211 Door Ring Assignment MMC 406 Trunk Ring Assignment MMC 507 Assign Ring...

Page 213: ... AUTO ANSWER GROUP TYPE Other possible entries are 3801 3820 COM BELL This device is a common bell relay on a Trunk A card 3601 3640 RING PAGE This device is ring over an external page zone output of a Trunk A card NORMAL GROUP Station ring group VMAA GROUP Group VMAA ports designated in MMC 207 can only have distrib ute or sequential ringing see Ring Modes below UCD GROUP UCD group has wrap up ca...

Page 214: ...stations listed in the group will ring Busy stations will receive off hook ring if set in MMC 300 The maximum number of stations allowed to ring unconditionally for a group is DCS 32 Compact II 10 816 16 408 408i 8 iDCS 32 OS500 32 Note When a group is called or a caller is transferred to a group ringback is sent to the caller Calls to a group do not follow the call forwarding instructions of any ...

Page 215: ...al ring option 0 2 e g 1 OR Press VOLUME keys to make selection and press LEFT soft key to move cursor back to RING or press RIGHT soft key to return to step 2 505 STN GROUP RING DISTRIBUTE 6 Dial next feature option and continue OR Press VOLUME keys to select option OR Press LEFT soft key to return to step 2 505 STN GROUP RING DISTRIBUTE 7 Press Transfer TRSF to store and exit OR Press SPEAKER to...

Page 216: ... 1 for key descriptions Tip When the character you want is on the same key as the previous character you typed in press the VOLUME UP key to move the cursor to the right then select the character The key can be used for the following special characters in sequence of key presses space _ ACTION DISPLAY 1 Open programming and select 602 Display shows 500 SGR NAME 2 Dial group number e g 505 OR Press...

Page 217: ...0 iDCS500 M 11 01 99 iDCS500 L 50 01 99 OS500 30 01 99 ACTION DISPLAY 1 Open programming and select 603 Display shows e g trunk group 9 9 TRK GROUP MODE SEQUENTIAL 2 Enter valid trunk group see above e g 81 OR Press VOLUME keys to make selection and press RIGHT soft key to advance cursor 81 TRK GROUP MODE SEQUENTIAL 3 Press RIGHT soft key to change mode OR Press VOLUME keys to change mode to membe...

Page 218: ...D SYSTEMS PROGRAMMING MANUAL FEBRUARY 2004 MMC 603 Page 2 of 2 7 Press Transfer TRSF to store and exit OR Press SPEAKER to store and advance to next MMC Default Data MODE SEQUENTIAL Related Items LCR programming Tenant programming ...

Page 219: ... only these zones can be flagged as 1 Zones 3 and 4 are flagged as 0 ACTION DISPLAY 1 Open programming and select 604 Display shows ENTRY STN 1234 01 NONE 00001 2 Enter number 01 80 or 01 40 or 01 12 or 1 4 depending on your system see above e g 04 OR Press VOLUME keys to make selection and press RIGHT soft key to move cursor ENTRY STN 1234 04 NONE 00001 3 Enter station number e g 205 OR Press VOL...

Page 220: ...ne number 0 4 e g 2 OR Press VOLUME keys to make selection and press RIGHT soft key to move cursor INT PAGE ZONE 2 MEMBER 01 NONE 3 Enter index number e g 05 OR Press VOLUME keys to make selection and press RIGHT soft key to move cursor INT PAGE ZONE 2 MEMBER 05 NONE 4 Enter station number e g 205 OR Press VOLUME keys to make selection and press RIGHT soft key to move cursor INT PAGE ZONE 2 MEMBER...

Page 221: ... Three are located on the optional MISC card The page relays have default DNs of 36x e g 361 iDCS500 System must be equipped with a MISC card for external paging OS500 System must be equipped with a MISC card for external paging ACTION DISPLAY 1 Open programming and select 605 Display shows first page zone member number shows as 1 or 01 etc depending on system EXT PAGE ZONE 5 MEMBER 1 NONE 2 Dial ...

Page 222: ...rsonal numbers with a maximum of 5 blocks per station 408 408i Maximum 300 entries a maximum of 200 20 blocks for system speed dials while the rest 10 blocks can be allocated as personal numbers with a maximum of 5 blocks per station iDCS100 Maximum 1500 entries a maximum of 500 50 blocks can be assigned as system speed dials and the rest 100 blocks can be allocated as personal speed dials with a ...

Page 223: ... to this step to make another selection If finished go to step 6 FREE LIST 60 SYSTEM 20 4 Enter desired EXT extension number e g 205 OR Press VOLUME keys to make selection and press RIGHT soft key to advance cursor FREE LIST 60 EXT205 1 5 Enter valid number for blocks 0 5 OR Press VOLUME keys to make selection OR Press HOLD key to delete block s FREE LIST 60 EXT205 5 6 Press Transfer TRSF to store...

Page 224: ... time ringing stops the agent is logged out from the group and ringing starts at the next idle agent If set as 0000 call will rotate between agents until answered UCD RECALL Determines length of MOH between MSGs MOH SOURCE Specifies MOH source to be presented to the caller WRAP UP No calls are presented to agents during this period AUTO LOGOUT Turns ON or OFF the automatic logout of agents when th...

Page 225: ... to select option Press RIGHT soft key 502 UCD OPTION SECOND MSG 62 4 Enter new value using dial keypad e g 01 OR Press VOLUME keys to select value Press RIGHT soft key 502 UCD OPTION SECOND MSG 01 5 Press Transfer TRSF to store and exit OR Press SPEAKER to store and advance to next MMC Default Data FIRST MSG 61 SECOND MSG 62 EXIT CODE NONE RETRY COUNT 03 FINAL DEST 500 RING NEXT 30 sec UCD RECALL...

Page 226: ...igned The system automatically assigns 1 block of 10 bins to each keyset Each keyset may be assigned a maximum of 5 blocks a total of 50 numbers or bins ACTION DISPLAY 1 Open programming and select 608 Display shows 201 REVIEW BLK 10 1060 FREE 2 Dial station number e g 205 OR Press VOLUME keys to select station and press RIGHT soft key to move cursor 205 REVIEW BLK 10 1060 FREE 3 Press VOLUME keys...

Page 227: ...re left to be assigned Total bins per system are iDCS100 1000 iDCS500 M 1000 iDCS500 L 1500 OS500 2000 Each keyset may be assigned a maximum of 5 blocks a total of 50 numbers or bins ACTION DISPLAY 1 Open programming and select 609 Display shows 201 LOG BLOCK 10 1100 FREE 2 Dial station number e g 205 OR Press VOLUME keys to select station and press RIGHT soft key to move cursor 205 LOG BLOCK 10 1...

Page 228: ...programming and select 611 Display shows for example 201 TMSG STN NOT USED 61 FREE 2 Dial station number e g 205 OR Press VOLUME keys to select station and press RIGHT soft key to move cursor 205 TMSG STN NOT USED 61 FREE 3 Press VOLUME keys to select USED or NOT USED An error message is displayed if the maximum number of allowed stations is exceeded 205 TMSG STN USED 4 Press Transfer TRSF to stor...

Page 229: ...en programming and select 612 Display shows for example 201 CONF STN NOT USED 61 FREE 2 Dial station number e g 205 OR Press VOLUME keys to select station and press RIGHT soft key to move cursor 205 CONF STN NOT USED 61 FREE 3 Press VOLUME keys to select USED or NOT USED An error message is displayed if the maximum number of allowed stations is exceeded 205 CONF STN USED 4 Press Transfer TRSF to s...

Page 230: ...example STATION GROUP 202 001 2 Dial 0 to select Station Group or 1 to select Trunk Group OR Press VOLUME keys to select or and press RIGHT soft key to move cursor TRUNK GROUP 701 301 3 Dial station or trunk number e g 702 OR Press VOLUME keys to select and press RIGHT soft key TRUNK GROUP 702 301 4 Dial use group number e g 302 OR Press VOLUME keys to select group and press RIGHT soft key TRUNK G...

Page 231: ...IP MGI3 MGI3 port used for Public IP USER ITP PAGED Port used for paging calls to ITP phones SEQUENTIAL MODE DISTRIBUTE Ring mode MEMBER 001 240 Ports included in the USER type ACTION DISPLAY 1 Open programming and select 615 Display shows for example USER PUB IP ITP MODE SEQUENTIAL 2 Press VOLUME keys to select USER type e g LOCAL ITP and press RIGHT soft key to move cursor USER LOCAL ITP MODE SE...

Page 232: ...MMC PROGRAMS COMBINED SYSTEMS PROGRAMMING MANUAL FEBRUARY 2004 MMC 615 Page 2 of 2 5 Press Transfer TRSF to store and exit OR Press SPEAKER to store and advance to next MMC Default Data None Related Items None ...

Page 233: ...DISPLAY 1 Open programming and select 616 Display shows for example 3831 MGI USER NONE 2 Press VOLUME keys to select port number and press RIGHT soft key to move cursor 3831 MGI USER NONE 3 Press VOLUME keys to select extension number and press RIGHT soft key 3831 MGI USER 3201 4 Press Transfer TRSF to store and exit OR Press SPEAKER to store and advance to next MMC Default Data NONE Related Items...

Page 234: ... MMC 701 ACTION DISPLAY 1 Open programming and select 700 Display shows COPY COS ITEMS COS 01 COS 01 2 Dial selected COS to copy e g 05 OR Press VOLUME keys to select COS and press RIGHT soft key to move cursor COPY COS ITEMS COS 05 COS 01 3 Dial target COS e g 06 OR Press VOLUME keys to select COS and press RIGHT soft key to move cursor back to step 2 COPY COS ITEMS COS 05 COS 06 4 To make change...

Page 235: ...ing procedure and COS feature lists for iDCS and OS500 systems come after the programming procedure and COS feature lists for all other systems shown next For all systems except iDCS OS500 ACTION DISPLAY 1 Open programming and select 701 Display shows COS CONTENTS 01 TOLL LEVEL A 2 Dial COS number e g 06 OR Press VOLUME keys to select COS and press RIGHT soft key to move cursor COS CONTENTS 06 TOL...

Page 236: ...call 030 MESSAGE Message 031 MM PAGE Meet me page 032 NEW CALL New call 033 OHVAED Receive off hook voice announcement 034 OHVAING Make off hook voice announcement 035 ONEA2 1A2 emulation 036 OPERATOR Operator 037 OUT TRANSFER TRSF Outgoing transfer 038 OVERRIDE Executive Override 039 PAGE 0 Page zone 0 PAGING 040 PAGE 1 Page zone 1 PAGING 041 PAGE 2 Page zone 2 PAGING 042 PAGE 3 Page zone 3 PAGIN...

Page 237: ... 091 TRKGRP05 Trunk group 05 calling 092 TRKGRP06 Trunk group 06 calling 093 TRKGRP07 Trunk group 07 calling 094 TRKGRP08 Trunk group 08 calling 095 TRKGRP09 Trunk group 09 calling 096 TRKGRP10 Trunk group 10 calling 097 TRKGRP11 Trunk group 11 calling 098 UNCO CNF CO to CO conference 099 VM AREC Voice mail automatic call record 100 VM AME Voice mail answering machine emulation 101 VM REC Voice ma...

Page 238: ...tem speed dial toll check 053 STN LOCK Station locking 054 STNGRP 01 Station group 01 calling 055 STNGRP 02 Station group 02 calling 056 STNGRP 03 Station group 03 calling 057 STNGRP 04 Station group 04 calling 058 STNGRP 05 Station group 05 calling 059 STNGRP 06 Station group 06 calling 060 STNGRP 07 Station group 07 calling 061 STNGRP 08 Station group 08 calling 062 STNGRP 09 Station group 09 ca...

Page 239: ...estigate 007 CONFER Conference 008 DALM CLR DISA alarm ring clear 009 DAY NIG Change day night mode 010 DIRECT Directory dial 012 DND Do Not Disturb 013 DND OVRD DND Override 015 DOOR Door ring answer 016 DSS Direct station select 017 DTS Direct trunk select 018 Not used 019 EXT FWD External call forward 020 FEATURE Feature key 021 FLASH Trunk flash 022 FOLLOW ME Follow Me call forward 023 FORWARD...

Page 240: ... CLIP abandoned 408i only 05 CLIP INQ CLIP inquiry for review 408i only 06 CLIP INV CLIP investigate 408i only 04 07 CONFER Conference 05 08 DALM CLR DISA alarm ring clear 06 09 DAY NIG Change day night mode 07 10 DIRECT Directory dial 09 12 DND Do Not Disturb 10 13 DND OVRD DND Override 12 15 DOOR Door ring answer 13 16 DSS Direct station select 14 17 DTS Direct trunk select 15 18 EXT FWD Externa...

Page 241: ...s See Related Items below For iDCS OS500 systems Options are 0 TOLL LEVEL 1 USABLE FEATURE 2 CALL STN GROUP 3 CALL TRK GROUP and 4 CALL BIVMS STN ACTION DISPLAY 1 Open programming and select 701 Display shows COS CONTENTS 01 TOLL LEVEL A 2 Dial COS number e g 06 OR Press VOLUME keys to select COS and press RIGHT soft key to move cursor COS CONTENTS 06 TOLL LEVEL A 3 Dial 0 4 to select option e g 1...

Page 242: ...ORWARDTOVMS Call forward to voice mail 25 GRP I O Group in out 26 HOLD Hold 27 HOT LINE Hot line 28 INTERCOM Intercom call 29 Not used 30 MESSAGE Message 31 MM PAGE Meet me page 32 NEW CALL New call 33 OHVAED Receive off hook voice announcement 34 OHVAING Make off hook voice announcement 35 ONEA2 1A2 emulation 36 OPERATOR Operator 37 OUT TRSF Outgoing transfer 38 OVERRIDE Executive Override 39 PAG...

Page 243: ... TRK GROUP and 4 CALL BIVMS STN options iDCS100 iDCS500 L iDCS500 M OS500 L OS500 S M STN GROUP 01 20 01 50 01 30 01 80 01 40 Station group xx calling TRK GROUP 01 11 01 50 01 11 01 30 01 30 Trunk group xx calling BIVMS STN 01 08 01 16 01 16 01 16 01 16 VM port xx calling Default Data Toll Level all COS A USABLE FEATURES DND OVRD EXT AREC OVERRIDE SET RLOC TRK AREC VM AREC VM AME VM REC NO ALL OTH...

Page 244: ...e dial string limited only to what is allowed or denied in MMC 704 There are six toll levels B to G that are programmable Toll level A is set as unrestricted by default and toll level H is set as internal calls only by default WILD CARD KEYS Wild card characters X Y and Z can be entered using the keys on your keyset shown in the table For example 8 means key number 8 Refer to the keyset diagrams i...

Page 245: ...sor to COS options DENY 005 BCDEFG 0 0 0 0 0 0 DENY 005 BCDEFG 212 0 0 0 0 0 0 DENY 005 BCDEFG 21X 0 0 0 0 0 0 3 Press VOLUME keys to move cursor along line until under toll class mark e g E Enter a 1 for YES or 0 for NO and press RIGHT soft key to return to step 1 OR Press LEFT soft key to return to step 2 DENY 001 BCDEFG 212 0 0 0 1 0 0 4 Press Transfer TRSF to store and exit OR Press SPEAKER to...

Page 246: ...rd characters X Y and Z can be entered using the dedicated keys on your key set Refer to the tables in MMC 702 ACTION DISPLAY 1 Open programming and select 703 Display shows ALOW 001 BCDEFG 0 0 0 0 0 0 2 Dial entry number e g 005 OR Press VOLUME keys to select index and press RIGHT soft key to move cursor and enter toll pattern e g 212 OR Enter wild card e g 21X from above list and press RIGHT sof...

Page 247: ...g and select 704 Display shows 01234567894 X 111111111111 2 Press VOLUME keys to select X Y or Z and press RIGHT soft key to advance cursor to option line 01234567894 X 111111111111 3 Press VOLUME keys to move cursor to digit s desired e g 5 and enter 1 or 0 as required Press LEFT or RIGHT soft key to return to step 2 to make more selections if required 01234567894 X 111110111111 4 Press Transfer ...

Page 248: ... D Insert a pulse tone conversion code C E Mask unmask following digits shows as or F Toggle to MMC 706 and enter name for speed dial no Refer to section 1 5 2 in Part 1 for a description of feature keys ACTION DISPLAY 1 Open programming and select 705 Display shows SYS SPEED DIAL 500 2 Enter the speed dial required e g 505 OR Press VOLUME keys to make selection and press RIGHT soft key to move cu...

Page 249: ...le between upper and lower case text Refer to section 1 5 2 in Part 1 for key descriptions Tip When the character you want is on the same key as the previous character you typed in press the VOLUME UP key to move the cursor to the right then select the character The key can be used for the following special characters in sequence of key presses space _ The F key can be used to toggle to MMC 705 du...

Page 250: ...ON DISPLAY 1 Open programming and select 707 Display shows AUTHOR CODE 001 CODE COS 01 2 Dial code entry number see above including any leading zeros e g 05 or 005 OR Press VOLUME keys to selected index number and press RIGHT soft key to move cursor AUTHOR CODE 005 CODE _ COS 01 3 Enter authorisation code e g 1234 and press RIGHT soft key to move cursor AUTHOR CODE 005 CODE 1234 COS 01 4 Enter cla...

Page 251: ...00 001 500 999 001 999 999 001 999 Max no of digits 12 12 12 12 12 12 12 12 ACTION DISPLAY 1 Open programming and select 708 Display shows ACCOUNT CODE 001 2 Dial code entry number see above e g 005 OR Press VOLUME keys to selected index number and press RIGHT soft key to move cursor ACCOUNT CODE 005 3 Enter account code maximum 12 digits ACCOUNT CODE 005 123456789012 4 Press RIGHT soft key to mov...

Page 252: ...maximum of 10 entries is allowed each up to four digits iDCS OS500 systems also provide the following options 2 TOLL OVERRIDE This table of eight entries is used to identify numbers that will bypass all dialling restric tions including toll restriction trunk access and forced authorisation and account codes Each entry in the table can be up to 14 digits long 3 OVRD USE TRK GRP Designates the trunk...

Page 253: ... key to return to step 3 and enter another index number OR Press Transfer TRSF to store and exit OR Press SPEAKER to store and advance to next MMC Default Data None Related Items MMC 304 Assign Station Trunk Use MMC 305 Assign Forced Code MMC 401 CO PBX Line MMC 702 Toll Deny Table MMC 703 Toll Allowance Table ...

Page 254: ...codes ACTION DISPLAY 1 Open programming and select 710 Display shows LCR DIGIT 001 DIGIT 2 Dial LCR entry e g 005 or 0005 OR Press VOLUME keys to select entry and press RIGHT soft key to move cursor LCR DIGIT 005 DIGIT _ 3 Enter LCR digit string and press RIGHT soft key OR Press LEFT soft key to return to step 1 LCR DIGIT 005 DIGIT 305426 4 Enter digit length 00 31 Cursor will move to RT route sel...

Page 255: ...TIME BAND DIAL LCRT DIAL SUN 0 A 0 LCRT 1 MON 1 B 1 LCRT 2 TUE 2 C 2 LCRT 3 WED 3 D 3 LCRT 4 THU 4 FRI 5 SAT 6 ACTION DISPLAY 1 Open programming and select 711 Display shows LCR TIME SUN A HHMM 0000 LCRT 1 2 Dial day of week SUN SAT e g WED OR Press VOLUME keys to make day selection and press RIGHT soft key LCR TIME WED A HHMM 0000 LCRT 1 3 Dial time band A D e g B OR Press VOLUME keys to make sel...

Page 256: ...ANUAL FEBRUARY 2004 MMC 711 Page 2 of 2 Default Data DAY TIME BAND TIME LCRT SUN SAT A 0000 1 B 2359 1 Related Items MMC 210 Customer On Off MMC 400 Customer On Off Per Trunk MMC 710 LCR Digit Table MMC 712 LCR Route Table MMC 713 LCR Modify Digit Table ...

Page 257: ...ueue becomes ac tive and allocates trunks as they become available ACTION DISPLAY 1 Open programming and select 712 Display shows LCR ROUTE 01 1 C 1 G 9 M 001 2 Dial LCR ROUTE number e g 05 OR Press VOLUME keys to selected index and press RIGHT soft key to move cursor LCR ROUTE 05 1 C 1 G 9 M 005 3 Dial TIME BAND number 1 4 e g 2 OR Press VOLUME keys to selected index and press RIGHT soft key to m...

Page 258: ...AL FEBRUARY 2004 MMC 712 Page 2 of 2 Default Data ROUTE TIME BAND COS TRK GRP MODIFY TBL INDEX 01 16 1 1 9 001 016 17 32 1 1 NONE NONE Related Items MMC 310 LCR Class Of Service MMC 710 LCR Digit Table MMC 711 LCR Time Table MMC 713 LCR Modify Digit Table ...

Page 259: ... NOF DEL DGT 00 2 Enter index number 001 to 100 or 200 e g 005 OR Press VOLUME keys to make selection and press RIGHT soft key to move cursor LCR MODIFY 005 NOF DEL DGT 00 3 Enter number of digits to delete e g 2 OR Press RIGHT soft key to skip step and move cursor to step 4 LCR MODIFY 005 NOF DEL DGT 02 4 Enter digits to be inserted e g 10288 OR Press RIGHT soft key to skip step or to store infor...

Page 260: ...following fields DIGITS DGT Digits to be received max 12 digits Wild card 4 is a valid entry MOH SOURCE iDCS500 L OS500 systems only Music On Hold source for DDI calls put on hold There is a total of six possible music selections In addition to TONE you may select an in ternal or external music source Other sources can be An Auto Attendant AA port to provide continuous play of a specific recording...

Page 261: ... 204 N B 5 Enter night destination e g 204 OR Press VOLUME keys to make selection and press RIGHT soft key to move cursor DID DIGIT 005 D 204 N 204 6 Enter 1 for YES call waiting or 0 for NO no call waiting OR Press VOLUME keys to make selection and press RIGHT soft key to move cursor DID DIGIT 005 CW NO DELETE 0 7 Enter digits to be deleted e g 3 OR Press VOLUME keys to make selection and press R...

Page 262: ...e DDI number e g 4603831 and press RIGHT soft key to move cursor max 12 digits For iDCS500 L and OS500 systems only now go to step 4 For others now go to step 5 DID DIGIT 005 DGT 4603831 4 Enter Music on Hold source e g 372 OR Press VOLUME keys to make selection and press RIGHT soft key to move cursor DID DIGIT 005 MOH SOURCE 372 5 Enter destination for ring plan 1 e g 501 OR Press VOLUME keys to ...

Page 263: ... key to move cursor DID DIGIT 005 CW NO DELETE 3 8 Enter name max 11 characters and press RIGHT soft key to return to step 2 DID DIGIT 005 NAME _ 9 Press Transfer TRSF to store and exit OR Press SPEAKER to store and advance to next MMC Default Data DIGITS None DESTN B all ring plans CALL WAIT NO DELETE 0 NAME NONE Related Items MMC 419 BRI Options MMC 420 PRI Options MMC 421 MSN Digit ...

Page 264: ...wice to get the letter N and press the VOLUME UP key to move the cursor right Continue selecting characters from the keypad to complete your message Press the programmable A key to toggle between upper and lower case text Refer to section 1 5 2 in Part 1 for key descriptions Tip When the character you want is on the same key as the previous character you typed in press the VOLUME UP key to move th...

Page 265: ...can be changed 01 GIVE ME THE CALL 02 TAKE A MESSAGE 03 ASK THEM TO HOLD 04 SEND TO MY VOICE MAIL 05 TRSF TO MY SECY 06 LEAVE A MESSAGE 07 PAGE ME 08 OUT OF TOWN 09 IN A MEETING 10 I WILL CALL BACK Messages 11 18 are blank for new messages to be created up to 16 characters Messages 19 20 are pre programmed as fol lows but can be changed 19 RETURN AT 20 RETURN ON Station users can select these mess...

Page 266: ...e cursor PGM MESSAGE 11 Blank Message 3 If EMPTY MESSAGE or Blank Message is dis played you can press HOLD to delete this text However this is optional as any new message you type will simply overwrite the displayed text Enter new message maximum 16 characters e g In the Showroom PGM MESSAGE 11 In the Showroom 4 Press RIGHT soft key to return to step 2 OR Press Transfer TRSF to store and exit OR P...

Page 267: ... NONE or STATION NUMBER 3 STATION PIN NO Assigns individual users to selected PIN codes in the system ACTION DISPLAY 1 Open programming and select 716 Display shows NETWORK CODE 01 1703 USE CCC 2 Dial item number e g 2 OR Press VOLUME keys to make selection and press RIGHT soft key CCC OPTION STATION NUMBER 3 Dial 0 or 1 for CCC option e g 0 OR Press VOLUME keys to make selection and press RIGHT s...

Page 268: ...mming and select 717 Display shows AGENT PIN 001 ID GRP NONE 2 Dial PIN number e g 002 OR Press VOLUME keys to make selection and press RIGHT soft key AGENT PIN 002 ID _ GRP NONE 3 Enter ID four digits e g 5555 and press RIGHT soft key AGENT PIN 002 ID 5555 GRP NONE 4 Enter the group number e g 515 OR Press VOLUME keys to make selection and press RIGHT soft key to enter and return to step 2 AGENT ...

Page 269: ...n programming and select 717 Display shows PIN CODE 1 2 Enter index number e g 2 OR Press VOLUME keys to make selection and press RIGHT soft key to move cursor PIN CODE 2 3 Enter the desired access code e g 3040506 Press RIGHT soft key to enter and return to step 2 and enter another number PIN CODE 2 3040506 4 Press Transfer TRSF to store and exit OR Press SPEAKER to store and advance to next MMC ...

Page 270: ...SAMSUNG MMC PROGRAMS COMBINED SYSTEMS PROGRAMMING MANUAL FEBRUARY 2004 MMC 718 Page 1 of 1 MMC 718 MY AREA CODE Not Used in the UK EU ...

Page 271: ...es of text to display ACTION DISPLAY 1 Open programming and select 719 Display shows IDLE DISPLAY 01 2 Dial number of line 01 10 for text display e g 02 OR Press VOLUME keys to make selection and press RIGHT soft key to move cursor IDLE DISPLAY 02 _ 3 Enter the text to display and press RIGHT soft key IDLE DISPLAY 02 SAMSUNG 4 Press Transfer TRSF to store and exit OR Press SPEAKER to store and adv...

Page 272: ...e number of keys e g both are 24 button keysets or both are 12 button keysets ACTION DISPLAY 1 Open programming and select 720 Display shows 201 COPY KEY FROM NONE 2 Enter the station number to copy to e g 205 OR Press VOLUME keys to make selection and press RIGHT soft key to move cursor 205 COPY KEY FROM NONE 3 Enter station number to copy from e g 203 Cursor returns to step 2 OR Press VOLUME key...

Page 273: ...s used Options are SAVE and RESTORE Note This program is not to be confused with MMC 315 Set Relocation MMC 721 is for saving and restoring the same device type at a port ACTION DISPLAY 1 Open programming and select 721 Display shows 201 SAVE KEY RESTORE 2 Enter desired station number e g 205 OR Press VOLUME keys to make selection and press RIGHT soft key 205 SAVE KEY RESTORE 3 Press VOLUME keys t...

Page 274: ...6 can be pressed three times If the BOSS function is required press 2 twice for the first letter B and then use the VOLUME keys to change the selec tion from BARGE to BOSS Note 408 408i systems do not support AOMs and default key functions are different from other systems For example keys 1 and 2 are not set as CALL keys by default as these are not re quired ACTION DISPLAY 1 Open programming and s...

Page 275: ...Samsung DCS 408 408i Installation Manual Each programmable key can be reprogrammed with one of the functions listed below Programmable Key Function Assignments means a function is not available on that system KEY DESCRIPTION DCS CII 816 408 408i iDCS500 L iDCS500 M iDCS100 OS500 AAPLAY AUTO ATTND MESSAGE PL AY 1 AAREC AUTO ATTND MESSAGE RECORD 1 AB ABSENCE ABAND ABANDON DATA ABW AGENT BUSY WRAP UP...

Page 276: ...GROUP INFDSP INFORMATION DISPLAY INQIRE CLIP INQUIRE ISPY CLIP SPY LANREQ LAN REQUEST 4 LCR LEAST COST ROUTING LISTN GROUP LISTENING LNR LAST NUMBER REDIAL LOG CALL LOGGING 4 MMPA MEET ME PAGE ANSWER MMPG MEET ME PAGE MS MANUAL SIGNALLING MSG MESSAGE MUTE MUTE MW MESSAGE WAIT 3 NEW NEW CALL NIGHT NIGHT SERVICE NND CLIP NAME NUMBER DATE NOCLIP NO OUTGOING CLIP NXT CLIP NEXT OHVA OFF HOOK VOICE ANNO...

Page 277: ...OICE MAIL ADMINISTRATION 2 VMAME VOICE MAIL ANSWERING MACHINE EMULATION 2 VMMSG VOICE MAIL MESSAGE 2 VMSCMT VMS COMMENT SVM 800 CII only VMSMSG VMS MESSAGE SVM 800 CII only VMSOUT VMS OUT CALL SVM 800 CII only VMSREC VMS RECORD SVM 800 CII only VMSVAC VMS VACANT SVM 800 CII only VREC RECORD KEY FOR VOICE DIALLER VT VOICE MAIL TRANSFER WAKEUP HOTEL WAKE UP 6 XCHIN HOTEL EXPRESS CHECK IN 6 Notes 1 R...

Page 278: ...8 BTN 48 64 BTN AOMS 28 BTN 6 28 BTN 8 BTN 20 BTN 18 BTN 7 18 BTN 24B SIMPLE 28 BTN 8 BTN 8 8 BTN 18 BTN 99 BTN 9 8 BTN 38 BTN 21 BTN 14 BTN ACTION DISPLAY 1 Open programming and select 723 Display shows TYPE 24 BTN SETS 01 CALL1 OR OR For 408 408i systems display shows The programming procedure is however the same TYPE 24 BTN SETS 01 DT71 2 Enter keyset type using table above e g 1 OR Press VOLUM...

Page 279: ...nd press RIGHT soft key to return to step 2 TYPE 12 BTN SETS 12 DS GPIK03 6 Press Transfer TRSF to store and exit OR Press SPEAKER to store and advance to next MMC Default Data See notes and table of programmable key functions in MMC 722 Related Items MMC 107 Key Extender MMC 720 Copy Key Programming MMC 721 Save Station Key Programming MMC 723 System Key Programming ...

Page 280: ...aller port dialling numbers 2 2 N A 02 02 MISC DIAL NO Miscellaneous port dialling numbers e g MOH 3 3 2 03 03 STNG DIAL NO Station group dialling numbers 4 4 3 04 04 TRKG DIAL NO Trunk group dialling numbers 5 5 4 05 05 FEAT DIAL NO Feature codes 6 6 5 06 06 S0 STN DIAL NO S0 station dialling numbers 7 7 6 07 07 DECT STN DIAL NO DECT station dialling numbers 8 N A N A 08 08 NTWK LCR DIAL NO Addit...

Page 281: ...ay shows e g for Compact II STN DIAL NUMBER BASE01 201 2 Enter option number 0 8 e g FEAT DIAL NO OR Press VOLUME keys to make selection and press RIGHT soft key FEAT DIAL NUMBER ABAND 64 3 Use dial keypad to select feature e g DICT OR Press VOLUME keys to make selection and press RIGHT soft key to advance cursor FEAT DIAL NUMBER DICT NONE _ 4 Enter digits e g 68 FEAT DIAL NUMBER DICT NONE 68 5 Pr...

Page 282: ...None VREC 682 BILL None GRPK 66 RB None WAKEUP 18 BLOCK None HDSET None REJECT None WCOS 59 BOSS None HLDPK 12 RP None CAMP 45 HOLD 11 RSV None CANMG 42 HOTEL None RTO None CBK 44 IG 53 SELFID None CHIN None INFDSP None SETMG 41 CHOUT None LCR SLOCAT None CHOICE None LISTN None SLTALM None CONF 46 LNR 19 SLTMMC 15 CONP None LOG None SNR 17 CR None MMPA 56 SPEED 16 CREDIT None MMPG 54 SRELOC None D...

Page 283: ...duration set in MMC 501 IN OUT GROUP Allows a message IN GROUP or OUT GROUP to be printed in the Digits Dialled column each time a station enters or leaves a group DND CALL Allows a message DND ON or DND OFF to be printed in the Digits Dialled column each time a station enters or leaves DND WAKE UP CALL Determines whether stations receiving an alarm reminder call print on SMDR DIRECTORY NAME Allow...

Page 284: ...name Press the programmable A key to toggle between upper and lower case text Refer to section 1 5 2 in Part 1 for key descrip tions Tip When the character you want is on the same key as the previous character you typed in press the VOLUME UP key to move the cursor to the right and enter the new character The key can be used for the following special characters in sequence of key presses space _ E...

Page 285: ... RIGHT soft key to save the data and return to step 2 LINE PER PAGE 50 LINE PAGE 4 After all desired options have been selected and set press Transfer TRSF to exit OR Press SPEAKER to exit and advance to next MMC Default Data Page Header Yes Abandon Call Yes Line Per Page 66 No of Dial Mask 00 Outgoing Call Yes Incoming Answer Yes Incoming Call Yes Intercom Call Yes Authorise Code Yes Key MMC In O...

Page 286: ... digit is sent between the DN1 and the DN2 information Both DN1 and DN2 must be set to YES for SEPARATOR to be sent 5 DISCONNECT SIGNAL This signal is sent when the calling station or C O line hangs up 6 CALL TYPE ID Under this VM AA option are several customising appli cations 0 DIRECT CALL A call originating directly from another station in the sys tem 1 ALL FWD CALL This indicates that a call w...

Page 287: ... A B Insert DTMF digit B C Insert DTMF digit C Refer to section 1 5 2 in Part 1 for key descriptions ACTION DISPLAY 1 Open programming and select 726 Display shows EXT FOR DN1 YES 2 Enter the option number from above list e g 4 for other options see steps 4 to 11 SEPARATOR NO OR Press VOLUME keys to make selection Press LEFT soft key to move cursor 3 Enter 1 for YES or 0 for NO OR SEPARATOR YES Pr...

Page 288: ...er 6 CALL TYPE ID above CALL TYPE ID DIRECT CALL NO 11 If option 7 is selected at step 2 A valid entry consists of digits 0 9 or alpha characters A C See table of Tones under 7 PROGRESS TONE ID above PROGRESS TONE ID DIAL TONE NO 12 Press Transfer TRSF to store and exit OR Press SPEAKER to store and advance to next MMC Default Data EXT FOR DN1 Yes TRK FOR DN1 Yes EXT FOR DN2 No TRK FOR DN2 No SEPA...

Page 289: ...Year MM Month DD Day Version version number e g V6 25 L1 22 etc ACTION DISPLAY 1 Open programming and select 727 Display shows date and version ROM VERSION 01 02 16 V6 25 OR MCP VERSION 2001 10 01 L1 22 2 Press VOLUME keys to select other installed cards e g Misc card MISC VER MISC 96 10 02 V3 0 3 Press Transfer TRSF to exit OR Press SPEAKER to advance to next MMC Note If a particular card is not ...

Page 290: ...digits and a name up to 16 digits iDCS500 Translation table consists of 1500 entries L systems or 400 entries M systems each comprising a telephone number up to 14 digits and a name up to 16 digits OS500 Translation table consists of 2000 entries L systems or 1000 entries S and M systems each comprising a telephone number up to 14 digits and a name up to 16 digits Names are written using the keypa...

Page 291: ...o select and press RIGHT soft key CLIP XLAT 005 DGT _ 3 Enter telephone number and press RIGHT soft key to advance to name entry OR Enter telephone number and press LEFT soft key to return to step 2 CLIP XLAT 005 DGT 3054264100 4 Enter associated name as described above and press RIGHT or LEFT soft key to return to step 2 OR Press SPEAKER to save and advance to next MMC OR Press Transfer TRSF to s...

Page 292: ...s RIGHT soft key 385 AAREC GAIN REC GAIN 0 0 3 Press VOLUME keys to select record gain and press RIGHT soft key 385 AAREC GAIN REC GAIN 1 0 4 Press Transfer TRSF to store and exit OR Press SPEAKER to store and advance to next MMC Q For iDCS and OS500 systems 1 Open programming and select 730 Display shows 3951 AA GAIN REC 0 0 PL 0 0 2 Dial AA number first port in card e g 3959 OR Press VOLUME keys...

Page 293: ...ystem Configuration Quick Reference ACTION DISPLAY 1 Open programming and select 731 Display shows e g for Compact II 816 381 RAM CLEAR CLR RECORDED NO 2 Dial AA number e g 381 OR Press VOLUME keys to make selection and press RIGHT soft key 381 RAM CLEAR CLR RECORDED NO 3 Dial 0 No or 1 Yes OR Press VOLUME keys to make selection and press RIGHT soft key 381 RAM CLEAR CLR RECORDED YES 4 Dial 0 No o...

Page 294: ...destination field Refer to section 1 5 2 in Part 1 for key descriptions If you press the A key you can enter an AA plan table 01 12 The display shows P If you press the B key the destination will be the same as the digits dialled by the caller If you press the C key you can enter CHANGE GREETING MESSAGE CODE If you press the D key this takes the call to voice mail iDCS and OS500 Systems and DCS Co...

Page 295: ...e ring plan is changed the system will remain in the selected ring plan until the next scheduled ring plan change If the greeting message is changed the system will remain in the existing ring plan or the selected ring plan until the alternative greeting is manually changed back Example iDCS OS500 Caller dials into the system and is answered by the AA card Caller en ters the passcode then dials 3 ...

Page 296: ...C PROGRAMS COMBINED SYSTEMS PROGRAMMING MANUAL FEBRUARY 2004 MMC 732 Page 3 of 3 Default Data Table 01 is set for transfers to station group and plan nos Other tables are empty Related Items MMC 733 AA Plan Table ...

Page 297: ... Systems Other Systems Value PLAN MSG1 6 Introduction message during ring plans 1 6 00 05 01 64 DAY MSG Introduction message during Day Mode 00 01 64 NIGHT MSG Introduction message during Night Mode 01 01 64 ALTER MSG Emergency message 06 02 01 64 INVLID MSG Message when an invalid digit is dialled 07 03 01 64 NO ANS MSG Message when there is no reply from the destination 08 04 01 64 XFER MSG Tran...

Page 298: ... 49 4 Dial value e g 01 OR Press VOLUME keys to select and press RIGHT soft key AA PLAN PROG 02 NIGHT MSG 01 5 Press Transfer TRSF to store and exit OR Press SPEAKER to store and advance to next MMC Default Data PLAN MSG1 6 49 DAY MSG 49 NIGHT MSG 49 ALTER MSG 49 INVLID MSG 64 NO ANS MSG 51 XFER MSG 53 BUSY MSG 52 NO STN MSG 50 NO ACT MSG 59 CAMP ON OFF ANS DELAY TIME 01 SEC RETRY CNT 3 03 TRANS T...

Page 299: ...ogramming and select 734 Display shows AA MSG MATCH 01 01 2 Dial the desired MSG identification number 01 64 e g 05 OR Press VOLUME keys to select and press RIGHT soft key AA MSG MATCH 01 05 3 Dial MSG numbers 01 64 recorded in AA card up to 5 OR Press VOLUME keys to select and press RIGHT soft key MMC will automatically insert as a delimiter AA MSG MATCH 01 05 07 13 16 64 4 Press Transfer TRSF to...

Page 300: ...figuration Quick Reference ACTION DISPLAY 1 Open programming and select 735 Display shows e g for Compact II 381 AA PLAN PLAN NO 01 2 Dial AA number or AA group pilot number e g 382 OR Press VOLUME to select and press RIGHT soft key 382 AA PLAN PLAN NO 01 3 Dial AA PLAN number e g 02 OR Press VOLUME keys to select and press RIGHT soft key 382 AA PLAN PLAN NO 02 4 Press Transfer TRSF to store and e...

Page 301: ...em Configuration Quick Reference ACTION DISPLAY 1 Open programming and select 736 Display shows e g for DCS 3958 SET AAMOH MOH MSG NOT USE 2 Press RIGHT soft key to select MOH message 3958 SET AAMOH MOH MSG NOT USE 3 Dial AA message number for MOH 01 64 e g 20 3958 SET AAMOH MOH MSG 20 4 Press Transfer TRSF to store and exit OR Press SPEAKER to store and advance to next MMC Default Data NOT USE Re...

Page 302: ...tem checks the Auth Code entered for each handset against the DECT Auth Code If it is the same the regis tration procedure continues otherwise the DCS rejects the registration procedure Caution Only the system administrator and or installer should be allowed access to change the DECT System Code and register handsets ACTION DISPLAY 1 Open programming and select 737 Display shows DECT SYSTEM CODE A...

Page 303: ...annot clear the information ACTION DISPLAY 1 Open programming and select 738 Display shows 7901 DECT CLEAR MODE FORCED 2 Enter the number of the DECT handset to clear and press the RIGHT soft key to move the cursor 7901 DECT CLEAR MODE FORCED 3 Select the de registration clear mode using VOLUME keys e g Normal and press the RIGHT soft key to move the cursor 7901 DECT CLEAR MODE NORMAL 4 Enter 1 fo...

Page 304: ...LUME keys e g 3 BSI SLOT 3 DBS 1 DOWNLOAD NO 3 Select the DBS number using VOLUME keys e g 1 BSI SLOT 3 DBS 1 DOWNLOAD NO 4 Press VOLUME keys to select download and confirm download BSI SLOT 3 DBS 1 DOWNLOAD YES BSI SLOT 3 DBS 1 ARE YOU SURE YES When downloading is in progress the display shows However if a downloading failure occurs the display shows BSI SLOT 3 DBS 1 DOWNLOADING BSI SLOT 3 DBS 1 ...

Page 305: ...either station and both will ring when the primary receives a call ACTION DISPLAY 1 Open programming and select 740 Display shows 201 PRIMARY SECONDARY NONE 2 Enter the primary station number e g 201 OR Press VOLUME keys to select and press RIGHT soft key 201 PRIMARY SECONDARY NONE 3 Enter the secondary station number e g 205 OR Press VOLUME keys to select and press RGHT soft key 201 PRIMARY SECON...

Page 306: ... DBS using the keypad or the VOLUME keys OR Select all DBS see section 1 5 2 Press the RIGHT soft key BSI SLOT 2 DBS 1 RESTART NO 3 Press VOLUME keys to select YES or NO and press RIGHT soft key BSI SLOT 2 DBS 1 RESTART YES 4 Confirm whether you want to restart by selecting YES or NO using the VOLUME keys and press RIGHT soft key BSI SLOT 2 DBS 1 ARE YOU SURE YES 5 Press Transfer TRSF to exit OR P...

Page 307: ...ter S Slave not used SUCC successful if status of BSI card is good or FAIL OR BSI STATUS M SUCC S NONE OR For iDCS500 OS500 SUCC successful if status of BSI card is good or FAIL or NONE if no card for up to three cards Note M systems support one BSI card only same display as shown for DCS BSI STATUS M NONE SUCC NONE 2 Press Transfer TRSF to exit OR Press SPEAKER to advance to next MMC Default Data...

Page 308: ...d For DCS DBS 1 8 OR DBS 12345678 STS 11101100 OR For Compact II or iDCS100 DBS 1 3 OR DBS STATUS 1 1 2 1 3 0 OR For iDCS500 OS500 DBS 1 8 Up to three BSI cards S 1 S 2 S 3 Note M systems support one BSI card only Press VOLUME keys to scroll cards 1 3 and view status DBS 12345678 S 1 STS 11101100 2 Press Transfer TRSF to store and exit OR Press SPEAKER to store and advance to next MMC Default Data...

Page 309: ...1 Open programming and select 744 Display shows ENABLE DECT REG PASSCODE 2 Enter passcode If the correct code is entered the display shows An incorrect code entry shows ENABLE DECT REG PASSCODE 4444 ENABLE DECT REG DISABLE ENABLE DECT REG PASSCODE ERROR If the SYSTEM ID in MMC 737 DECT System Code has not been set the message shown will be displayed ENABLE DECT REG NO REG SYSTEM ID 3 Dial 1 for EN...

Page 310: ...shows the status of each carrier 0 9 If 1 is shown below a carrier this carrier can be used by the base station If 0 is shown below a carrier this carrier cannot be used by the base station CARS 0123456789 SELS 1111111111 2 Dial 1 or 0 for each carrier as required CARS 0123456789 SELS 1101111111 3 Press Transfer TRSF to store and exit OR Press SPEAKER to store and advance to next MMC Default Data ...

Page 311: ...flicts e g 142 and 1429 are allowed Wild cards X Y Z can be used to represent any digit and are defined in MMC 704 When all entries are used LAST ENTRY is displayed CALL RATE This is one of eight 1 8 cost rates used by MMC 433 Trunk Cost Rate to determine the correct billing according to MMC 747 Rate Calculation Table Examples When a station user dials a number the system will search the Costing D...

Page 312: ...or COST DP 005 DIGIT _ 3 Enter digit string via the dial keypad e g 1305 and press RIGHT soft key COST DP 005 DIGIT 1305 4 Enter Dial Plan 1 8 e g 7 and press LEFT soft key to return to step 3 or RIGHT soft key to return to step 2 COST DP 005 CALL RATE 7 5 Press Transfer TRSF to store and exit OR Press SPEAKER to store and advance to next MMC Default Data None Related Items MMC 202 Change Feature ...

Page 313: ...econds six seconds Second Interval Cost The cost for each billing increment The range is 0 999 pence or cents if the Use Euro option is set on in MMC 210 For example 025 is 0 25 or 25 Ecents Surcharge This is a one time charge applied to a call over and above the time charges The range is 0 999 pence or Ecents ACTION DISPLAY 1 Open programming and select 747 COST RATE 1 1ST DUR 000 SEC 2 Dial Cost...

Page 314: ...7 Page 2 of 2 7 Enter SURCHARGE e g 100 COST RATE 3 SURCHARGE 100 C 8 Press Transfer TRSF to store and exit OR Press SPEAKER to store and advance to next MMC Default Data None Related Items MMC 110 Station On Off Call Cost option MMC 433 Trunk Cost Rate MMC 746 Costing Dial Plan ...

Page 315: ...rned off to save boot up time CARD RESTART If this option is set to YES the card will immediately restart according to the Download option specified above VIRTUAL NUM DOWN If set to YES the voicemail will create subscribers for the virtual ports when defaulted ACTION DISPLAY 1 Open programming and select 750 Display shows VM CARD RESTART DOWNLOAD YES 2 Dial 1 for YES or 0 for NO download OR Press ...

Page 316: ...xes can be added through Voice Mail administration or by using this MMC ACTION DISPLAY 1 Open programming and select 751 Display shows ASSIGN MAIL BOX 301 YES 2 Dial station or group number e g 302 OR Press VOLUME keys to select station and press RIGHT soft key ASSIGN MAIL BOX 302 YES 3 Dial 0 for NO or 1 for YES OR Press VOLUME keys to select and press RIGHT soft key to return to step 2 ASSIGN MA...

Page 317: ...l use of this feature ACTION DISPLAY 1 Open programming and select 752 Display shows AUTO RECORD STN 301 MB NONE 2 Dial station number e g 302 OR Press VOLUME keys to select station and press RIGHT soft key AUTO RECORD STN 302 MB NONE 3 Dial mailbox number e g 341 OR Press VOLUME keys to select mailbox and press RIGHT soft key AUTO RECORD STN 302 MB 341 4 Dial Voice Mail port number e g 519 OR Pre...

Page 318: ...on call that is forwarded to Voice Mail will remain ringing at the forwarding station until answered Note The destination is the same as the VM ALARM mailbox in MMC 755 ACTION DISPLAY 1 Open programming and select 753 Display shows default destination WARNING DEST DEST 500 2 Dial destination number e g 213 OR WARNING DEST DEST 213 Press VOLUME keys to scroll to number 3 Press Transfer TRSF to stor...

Page 319: ... card using MMC 810 Halt Processing ACTION DISPLAY 1 Open programming and select 754 Display shows VM HALT STATUS PROC 2 Dial 1 to halt HALT or 0 not to halt PROC OR Press VOLUME keys to select Press RIGHT soft key VM HALT STATUS HALT 3 Press VOLUME keys to select YES or NO YES will take the card off line Press RIGHT soft key VM HALT ARE YOU SURE YES 4 Press Transfer TRSF to store and exit OR Pres...

Page 320: ...n this MMC the range is 00 99 For example if you select a threshold of 70 an alarm message is generated if more than 70 of capacity is reached Refer to your Voice Mail documentation for more informa tion ACTION DISPLAY 1 Open programming and select 755 Display shows VM ALARM THRESHOLD 80 2 Enter new threshold value using keypad e g 85 OR Press VOLUME keys to select threshold value Press RIGHT soft...

Page 321: ...e used for VM AA applications Refer to your Voice Mail documentation for more informa tion ACTION DISPLAY 1 Open programming and select 756 Display shows SET VMMOH 717 NOT USED 2 Press VOLUME keys to select port and press RIGHT soft key SET VMMOH 717 NOT USED 3 Press VOLUME keys to select MOH file number 00 99 and press RIGHT soft key SET VMMOH 717 01 4 Press Transfer TRSF to store and exit OR Pre...

Page 322: ...y port set as an MOH port in MMC 756 will display as MOH in MMC 757 and cannot be changed in this MMC ACTION DISPLAY 1 Open programming and select 757 Display shows VM IN OUT 717 IN OUT 2 Dial port number e g 718 OR Press VOLUME keys to select Press RIGHT soft key VM IN OUT 718 IN OUT 3 Press VOLUME keys to select option e g IN and press RIGHT soft key VM IN OUT 718 IN 4 Press Transfer TRSF to sto...

Page 323: ...rding to the setting in this MMC The option for DAY or NIGHT is entered for each ring plan 1 6 as required Refer to your Voice Mail documentation for more information ACTION DISPLAY 1 Open programming and select 758 Display shows VM DAY NIGHT RING 1 DAY 2 Press VOLUME keys to select ring plan e g 2 and press RIGHT soft key VM DAY NIGHT RING 2 DAY 3 Press VOLUME keys to select option DAY NIGHT e g ...

Page 324: ...posits 89 W UP SET A wake up call was set 90 W UP ANS A wake up call was answered 91 W UP N ANS A wake up call was not answered 92 W UP CANCL A wake up call was cancelled 93 Check In A guest has checked into a room 94 Check out A guest has checked out of a room 95 Available Room flagged as Available 96 Occupied Room flagged as Occupied 97 Clean Room Room flagged as Needs Cleaning 98 Fix Room Room ...

Page 325: ... key ITEM CODE 05 NAME _ 3 Enter item name e g ROOM COST ITEM CODE 05 NAME ROOM COST 4 Press RIGHT soft key to move cursor to tax entry ITEM CODE 05 TAXES 00000000 5 Enter the tax rates that apply to this item enter 1 for each and press RIGHT soft key to return to step 2 ITEM CODE 05 TAXES 11000000 6 Press Transfer TRSF to store and exit OR Press SPEAKER to store and advance to next MMC Default Da...

Page 326: ...he actual tax rate that will be applied to the item cost NAME The name up to 10 characters that will be displayed on the room bill alongside the tax e g VAT Service Charge Names are entered using the keypad Refer to the description Item Names in MMC 760 ACTION DISPLAY 1 Open programming and select 761 Display shows TAX RATE 1 TYPE VAL 00 00 2 Enter valid tax rate number 1 8 OR Press VOLUME keys to...

Page 327: ... 100 During the check in procedure for a guest if you set 100 for the room cost the real room cost will be 150 on Saturday and Sunday 90 on Monday and 100 from Tuesday to Friday ACTION DISPLAY 1 Open programming and select 762 Display shows RM COST RAT SUN 100 2 Dial day number 0 6 for SUN SAT e g 2 OR Press VOLUME keys to select day and press RIGHT soft key RM COST RAT TUE 100 _ 3 Enter room cost...

Page 328: ...er TRSF 800 Display shows ENABLE TECH PROG PASSCODE 2 Enter passcode DCS iDCS500 OS500 only Correct code shows to allow you to select a tenant OR Other systems Correct code shows If you enter an incorrect code you see this display and you return to the passcode entry display so you can try again ENABLE TECH PROG PASSCODE ENABLE TECH PROG DISABLE TENANT 1 OR ENABLE TECH PROG DISABLE ENABLE TECH PRO...

Page 329: ...ve finished programming Return to MMC 800 The display shows that programming is enabled Use the VOLUME keys to select DISABLE and press Transfer TRSF to exit If you do not close programming using MMC 800 programming mode will be automatically disabled if you do not carry out any programming tasks within the time set in the system timer KMMC LOCK OUT see MMC 501 System Wide Timers Default Data DISA...

Page 330: ...CTION DISPLAY 1 Open programming and select 801 TECH PASSCODE NEW CODE _ 2 Enter new passcode TECH PASSCODE NEW CODE 3 Enter new passcode again to verify TECH PASSCODE VERIFY 4 If verification succeeds press RIGHT soft key to continue and enter desired MMC TECH PASSCODE VERIFY SUCCESS If verification fails display shows Failure and system returns to step 2 TECH PASSCODE VERIFY FAILURE 5 Press Tran...

Page 331: ...er systems go to step 3 CUST USE MMC 1 100 STN LOCK YES 2 Enter desired tenant number 1 2 OR Press VOLUME keys to make selection and press RIGHT soft key to move cursor CUST USE MMC 1 100 STN LOCK YES 3 Enter desired MMC number e g 102 OR Press VOLUME keys to make selection and press RIGHT soft key to move cursor CUSTOMER ACCESS 102 CALL FWD YES 4 Enter 1 for YES or 0 for NO OR Press VOLUME keys t...

Page 332: ...01 T 1 OR TENANT GROUP C 1 S 1 01 T 1 2 Enter cabinet C number if no change press RIGHT soft key to move cursor TENANT GROUP C 1 S 1 P 01 T 1 3 Enter slot S number if no change press RIGHT soft key to move cursor TENANT GROUP C 1 S 1 P 01 T 1 4 Enter port P number if no change press RIGHT soft key to move cursor TENANT GROUP C 1 S 1 P 01 T 1 5 Enter tenant T number if no change press RIGHT soft ke...

Page 333: ...a MEM4 card OS500 Three ports Ports 2 3 and 5 Port 5 is used for internal modem control Use the tables below to customise I O ports PARAMETER OPTIONS Dial 0 Service Type of Service Dial 1 Baud Rate Speed Dial 2 Char Length Character Length Dial 3 Parity Parity Bit Dial 4 Retry Count Number of Retries Dial 5 Stop Bit Stop Bit Dial 6 Wait Time Message Wait Time Dial 7 DSR Check DSR Check on off all ...

Page 334: ...PMS SMDR PMS report and SMDR BD PMS Bi directional PMS REMO M A Remote Maintenance Administration not remote PCMMC SPEED BPS Dial Speed DCS CII 816 408 408i iDCS500 iDCS100 OS500 600 0 1200 1 2 0 2400 2 3 1 4800 3 4 0 2 0 9600 4 5 1 3 1 19200 5 2 4 2 38400 3 3 System with LAN interface only CHARACTER LENGTH PARITY Dial 7 7 bits Dial 0 None Dial 8 8 bits Dial 1 Odd Dial 2 Even RETRY COUNT STOP BIT ...

Page 335: ...r desired value e g 19200 bps OR Press VOLUME keys to display value and press RIGHT soft key to return to step 2 SYS I O PORT 2 BAUD 19200 BPS 5 Press Transfer TRSF to store and exit OR Press SPEAKER to store and advance to next MMC Default Data Option DCS CII 816 408 408i iDCS500 iDCS100 OS500 Service Type 1 PCMMC 2 SMDR 1 SMDR 1 PCMMC 2 SMDR 3 to 5 NOT USED 1 PCMMC 2 SMDR 3 NOT USED 2 PCMMC 3 SM...

Page 336: ...programming and select 805 Display shows TX LEVEL CONTROL LEVEL 0 1 2 Press VOLUME keys to select TX LEVEL CONTROL or MISC TSW GAIN or TSW GAIN CONTROL OR Press RIGHT soft key to select option If you selected TX go to step 3 If you selected TSW go to step 5 If you selected MISC TSW go to step 7 3 Press RIGHT soft key to go to the volume level OR Press VOLUME keys to go to next volume level TX LEVE...

Page 337: ...ect TSW gain data Press RIGHT soft key to go back to step 4 or go to step 7 if finished TSW GAIN CONTROL SLT SLT 2 0 7 Press RIGHT soft key to go to the volume level Enter the value 0 7 system returns to step 2 OR Press VOLUME keys to select and press RIGHT soft key to return to step 2 MISC TSW GAIN BGM MOH 1 8 Press Transfer TRSF to store and exit OR Press SPEAKER to store and advance to next MMC...

Page 338: ...Display shows C1 01 INSTALL PRITRK PRITRK 2 Enter cabinet number e g 3 OR Press VOLUME keys to make selection and press RIGHT soft key to move cursor C3 01 INSTALL PRITRK PRITRK 3 Enter slot number e g 5 OR Press VOLUME keys to make selection and press RIGHT soft key to return to step 2 C3 05 INSTALL DLI DLI 4 Press Transfer TRSF to store and exit OR Press SPEAKER to store and advance to next MMC ...

Page 339: ... DISPLAY 1 Open programming and select 806 Display shows C 1 S 1 P N 00 PRITRK PRITRK 2 Enter cabinet number e g 1 OR Press VOLUME keys to make selection and press RIGHT soft key to move cursor C 1 S 1 P N 00 16 DLI 16 DLI 3 Enter slot number e g 3 OR Press VOLUME keys to make selection and press RIGHT soft key C 1 S 3 P N 00 4 TRK 4 TRK 4 Press VOLUME keys to select YES or NO C 1 S 3 P N 00 RESET...

Page 340: ...elect 807 Display shows e g DCS VOL CONTROL DGP KEY TONE VOL 1 2 Press RIGHT soft key to move cursor VOL CONTROL DGP KEY TONE VOL 1 3 Press VOLUME keys to select feature e g SIDE TONE VOL and press RIGHT soft key VOL CONTROL DGP SIDE TONE VOL 1 4 Press VOLUME keys to select volume and press LEFT soft key VOL CONTROL DGP SIDE TONE VOL 2 5 Repeat step 3 to select and change other volume levels OR Pr...

Page 341: ...SAMSUNG MMC PROGRAMS COMBINED SYSTEMS PROGRAMMING MANUAL FEBRUARY 2004 MMC 808 Page 1 of 1 MMC 808 T1 TRUNK CODING Not Used in the UK EU ...

Page 342: ...uage Your system supports some or all of the following languages ENGLISH DANISH GERMAN DUTCH PORTUGUESE SPANISH ACTION DISPLAY 1 Open programming and select 809 Display shows SYS MMC LANGUAGE ENGLISH 2 Press VOLUME keys to make selection and press RIGHT soft key SYS MMC LANGUAGE GERMAN 3 Press Transfer TRSF to store and exit OR Press SPEAKER to store and advance to next MMC Default Data ENGLISH Re...

Page 343: ...ON DISPLAY 1 Open programming and select 810 Display shows HALT PROCESSING C ALL S ALL PROC 2 Enter cabinet number OR Press VOLUME keys to make selection and press RIGHT soft key to advance cursor OR HALT PROCESSING C 3 S ALL PROC Select all cabinets and all slots see section 1 5 2 and go to step 4 HALT PROCESSING C ALL S ALL PROC 3 Enter slot number OR Press VOLUME keys to make selection and pres...

Page 344: ...UME keys to make selection and press RIGHT soft key to advance cursor OR HALT PROCESSING SLOT NO 5 PROC Select all slots see section 1 5 2 HALT PROCESSING SLOT NO ALL PROC 3 Enter 1 for HALT or 0 to PROC OR Press VOLUME keys to make selection and press RIGHT soft key to enter data and return to step 2 HALT PROCESSING SLOT NO 5 HALT 4 Press Transfer TRSF to store and exit OR Press SPEAKER to store ...

Page 345: ...started all voice data connections are dropped If memory is cleared all customer data is deleted and the system returns to default status ACTION DISPLAY 1 Open programming and select 811 Display shows SYSTEM RESTART RESET SYSTEM NO 2 Press VOLUME keys to make selection RESET SYSTEM or CLEAR MEMORY After selection is made press RIGHT soft key to move cursor to YES NO option SYSTEM RESTART CLEAR MEM...

Page 346: ... You do not need to enable system programming in MMC 800 in order to run this program but you will still require the technician s passcode ACTION DISPLAY 1 Open programming and select 812 Display shows the country selected by the installer e g UK To accept this setting go to step 4 SELECT COUNTRY U K 2 Press VOLUME keys to select a different country and press RIGHT soft key SELECT COUNTRY DENMARK ...

Page 347: ...tems require a MEM4 card in order to operate Hotel features ACTION DISPLAY 1 Open programming and select 813 Display shows HOTEL OPERATION DISABLE 2 Press VOLUME keys to select enable disable HOTEL OPERATION ENABLE 3 Press VOLUME keys to select YES or NO and press RIGHT soft key HOTEL OPERATION ARE YOU SURE YES 4 Press Transfer TRSF to store and exit OR Press SPEAKER to store and advance to next M...

Page 348: ...l reset to accept the new data Note 1 iDCS100 systems require a MEM4 card which contains the SRAM 2 The SRAM is on the MCP MCP2 card in iDCS500 and OS500 systems If the SmartMedia card or Flash Memory is in use when you run this program a message SMART IS BUSY or FLASH IS BUSY is displayed ACTION DISPLAY To copy SRAM to SMBD or FLBD 1 Open programming and select 815 CUST DBASE SMDB S 10 18 02 01 0...

Page 349: ...DBASE SRAM COPY TO SMBD NO 8 Press RIGHT soft key to move cursor Press VOLUME keys to select YES to copy and press RIGHT soft key CUST DBASE SRAM COPY TO SMBD YES 9 Press VOLUME keys to select YES and press RIGHT soft key to copy SRAM CUST DBASE SRAM ARE YOU SURE YES 10 Press Transfer TRSF to store and exit OR Press SPEAKER to store and advance to next MMC Default Data No Daily Save Related Items ...

Page 350: ...gain level for conference calls ACTION DISPLAY 1 Open programming and select 816 Display shows CONFERENCE GAIN USE DEFAULT YES Press VOLUME keys to select YES or NO and press RIGHT soft key CONFERENCE GAIN USE DEFAULT YES 2 Press Transfer TRSF to store and exit OR Press SPEAKER to store and advance to next MMC Default Data YES Related Items None ...

Page 351: ...ms or the TEPRI card on iDCS100 systems ACTION DISPLAY 1 Open programming and select 818 Display shows PGM DOWNLOAD MCP MCPL1021 E Press VOLUME keys to select card e g LAN and press RIGHT soft key PGM DOWNLOAD LAN LAN2V108 PGM 2 Press VOLUME keys to select program and press RIGHT soft key PGM DOWNLOAD LAN LAN2V108 PGM 3 Press VOLUME keys to select YES and press RIGHT soft key to begin download If ...

Page 352: ...e dia card You can also delete a file by selecting the file and pressing the HOLD key ACTION DISPLAY 1 Open programming and select 819 Display shows STARTUP SYS sz 65279 byte 2 Press VOLUME keys to scroll through programs Press HOLD key to delete a program file MCPL1021 E sz 2603496 byte 3 Press Transfer TRSF to store and exit OR Press SPEAKER to store and advance to next MMC Default Data None Rel...

Page 353: ... system on setting up calls and is used by the system when receiving calls Note iDCS100 systems require a MEM4 card ACTION DISPLAY 1 Open programming and select 820 Display shows SYSTEM LINK ID SELF 200 2 Press VOLUME keys to select SELF or NO 01 19 and press RIGHT soft key SYSTEM LINK ID SELF 200 3 Enter new value 1 10 digits e g 217 SYSTEM LINK ID SELF 217 4 Press Transfer TRSF to store and exit...

Page 354: ...N DISPLAY 1 Open programming and select 821 Display shows 701 Q SIG TRK NORMAL 2 Press VOLUME keys to select trunk number e g 701 and press RIGHT soft key 701 Q SIG TRK NORMAL 3 Press VOLUME keys to select NORMAL trunk or Q SIGNALING trunk and press RIGHT soft key to return to step 2 701 Q SIG TRK Q SIGNALING 4 Press Transfer TRSF to store and exit OR Press SPEAKER to store and advance to next MMC...

Page 355: ... 7 BUTTON 14 BUTTON 5000 series 6 BUTTON Euro LARGE 5000 series large LCD 28 BUTTON iDCS series ACTION DISPLAY 1 Open programming and select 822 Display shows 3501 PORT TYPE SLT 2 Dial port number e g 3501 OR Press VOLUME keys to select and press RIGHT soft key 3501 PORT TYPE SLT 3 Press VOLUME keys to select port type e g SLT and press RIGHT soft key 3501 PORT TYPE SLT 4 Press Transfer TRSF to st...

Page 356: ...Level 1 3 2 14 CI PROTECT Intrusion Protection Level 0 3 2 15 CLIP Calling Line Identification Presentation Y 16 CLIR Calling Line Identification Restriction N 17 CNIP Calling Name Identification Presentation Y 18 CNIR Calling Name Identification Restriction N 19 CNIRO Calling Name Identification Restriction Override Y 20 COLP Connected Line Identification Presentation Y 21 COLR Connected Line Ide...

Page 357: ...UME keys to select and press RIGHT soft key NETWORK COS 02 01 CALL OFFER Y 3 Dial option number e g 08 OR Press VOLUME keys to select and press RIGHT soft key NETWORK COS 01 08 CFB Y 4 Dial 0 for NO or 1 for YES OR Press VOLUME keys to select and press RIGHT soft key NETWORK COS 01 08 CFB N 5 Press Transfer TRSF to store and exit OR Press SPEAKER to store and advance to next MMC Default Data See t...

Page 358: ...CS100 20 Note iDCS100 systems require a MEM4 card ACTION DISPLAY 1 Open programming and select 824 Display shows access digit programmed in MMC 724 e g 3 01 3 SZ 0 MAX 00 MB N 2 Dial entry number e g 01 OR Press VOLUME keys to select and press RIGHT soft key 01 3 _ SZ 0 MAX 00 MB N 3 Dial digit string for access to node e g 300 followed by the access digit 3 in this example Press RIGHT soft key to...

Page 359: ...on the calling system node for this range of extensions Y N Requires SVMi Voice Mail card on calling system node Press RIGHT soft key 01 3 3003 SZ 3 MAX 06 MB Y 7 Press Transfer TRSF to store and exit OR Press SPEAKER to store and advance to next MMC Default Data None Related Items MMC 710 LCR Digit Table MMC 724 Dial Numbering Plan MMC 820 Assign System Link ID ...

Page 360: ...mote VM is used enter remote VM number REMOTE CID NUMBER Include node number when sending Caller ID through Voice Mail card select Yes No ACTION DISPLAY 1 Open programming and select 825 Display shows ADD NUMB TO NAME YES 2 Press VOLUME keys to select option and press RIGHT soft key USE REMOTE VM NO 3 Press VOLUME keys to select YES or NO and press RIGHT soft key USE REMOTE VM YES 4 Press Transfer...

Page 361: ...k source is used Options are PRIORITY 1 3 C1 S1 S9 SELF C2 S1 S9 SELF C3 S1 S9 SELF ACTION DISPLAY 1 Open programming and select 826 Display shows REFERENCE CLOCK PRIORITY 1 C1 S1 2 Dial priority number 1 9 e g 2 OR Press VOLUME keys to select and press RIGHT soft key REFERENCE CLOCK PRIORITY 2 C2 S2 3 Dial cabinet slot option number 0 9 OR Press VOLUME keys to select and press RIGHT soft key REFE...

Page 362: ...er Both None PRINTER IP Printer IP address PRINTER TCP Printer port number 5 digits LAN TCP Port number of LAN TCP 5 digits RETRY COUNT No of retries to print 00 10 RETRY WAIT Wait time between retries 005 250 secs PJL ENABLE True False to match printer LANGUAGE RAW PCL PS to match printer PAPER SIZE A4 Letter FONT TYPE Courier Times New Roman DUPLEX ENAB True False to match printer ORIENTATION Po...

Page 363: ...tion press RIGHT soft key then enter new value using dial keypad or by scrolling with VOLUME keys Press RIGHT soft key 02 RETRY COUNT 05 5 Press Transfer TRSF to store and exit OR Press SPEAKER to store and advance to next MMC Default Data DATA TYPE Setting of SIO port CURR STATUS Current Status EMPTY BUFF NO UPDATE LAN NO DESTINATION None PRINTER IP 200 1 1 1 PRINTER TCP 10010 LAN TCP 10020 RETRY...

Page 364: ... is available to view only Options are iDCS ITM3 Card Parameters are LAN IP ADDRESS PCMMC ADDRESS LAN SUBNET MASK REMOTE M A ADDRESS LAN GATEWAY TAPI SERVER ADDRESS LAN MAC ADDRESS TRACE ADDRESS Default Data LAN IP ADDRESS 10 0 0 2 LAN SUBNET MASK 255 255 255 0 LAN GATEWAY 10 0 0 1 LAN MAC ADDR 0000F03A07B9 PCMMC ADDRESS 10 0 0 101 REMOTE M A ADDR 10 0 0 102 TAPI SERVER ADDR 10 0 0 103 TRACE ADDRE...

Page 365: ... 0 2 2 Press VOLUME keys to select option and press RIGHT soft key SYSTEM NET MASK 255 255 255 0 3 Enter new data as required 4 You are asked if you want to reset the card SYSTEM RESET ARE YOU SURE YES Press VOLUME keys to select YES and press RIGHT soft key 5 Press Transfer TRSF to store and exit OR Press SPEAKER to store and advance to next MMC Default Data None Related Items None ...

Page 366: ...LE Calling Line Identification Presentation table This provides the calling station number when calling from one ITM3 location to another Range 1 4 or NONE If set to NONE the trunk number set in MMC 405 will be sent Other wise the number set in MMC 323 will be sent VOIP MODE Three options are available FOLLOW DID TRANS MMC 714 FOLLOW INCOM DGT follow incoming digit or FOLLOW TRK RING MMC 406 VERSI...

Page 367: ...new data as required Cursor returns to top line 6 Press VOLUME keys to select next option Gate way press RIGHT soft key and enter new data Repeat steps 4 6 for each remaining option 7 Press Transfer TRSF to store and exit OR Press SPEAKER to store and advance to next MMC Default Data IP ADDRESS 1 1 1 1 SUB MASK 255 255 255 0 GATEWAY 1 1 1 1 STS PERIOD 00 SEC MAX FAX CH 0 CLIP TABLE NONE VOIP MODE ...

Page 368: ...for routing the access code to an IP address For iDCS systems IP tables are 00 30 For OS500 systems IP tables are 00 62 IP TABLE 2 iDCS systems For iDCS systems the second table 00 30 referenced as a look up for an IP address to route the call based on the access code IP START This entry indicates where in a table to start looking for an IP code to associ ate with the access code This can be used ...

Page 369: ... 6 for each remaining option 7 Press Transfer TRSF to store and exit OR Press SPEAKER to store and advance to next MMC Default Data ACCESS CODE 00 09 digits 0 9 10 62 None CODE LENGTH 1 DELETE LENGTH 1 INSERT CODE None IP TABLE 1 00 IP TABLE 2 None IP START None GK USE No Related Items MMC 831 VoIP Parameters MMC 833 VoIP IP Table MMC 834 VoIP Option MMC 835 VoIP DSP Option MMC 836 VoIP GK Option ...

Page 370: ...te IP address fields Note All IP address entries must 3 digit entries For example IP address 105 52 10 201 must be entered as 105 052 010 201 ACTION DISPLAY 1 Open programming and select 833 Display shows TB 00 ENTRY 00 1 1 1 1 2 Dial table TB number e g 01 OR Press VOLUME keys to select and press RIGHT soft key TB 01 ENTRY 00 1 1 1 1 3 Dial table entry number e g 01 OR Press VOLUME keys to select...

Page 371: ...s are T 38 or the proprietary Samsung formats Default is T 38 SWITCH TO H 245 Enables switching to the H 245 protocol at the time of Fast Start DEFAULT DIL NO Allows programming of the default DIL number when digits are not included on an incoming call SIGNALLING PORT Indicates the port number for H 323 signalling and sets a range of numbers allowed by firewall equipment The IP path or port used i...

Page 372: ...ess RIGHT soft key Repeat steps 3 4 for each option as required 5 Press Transfer TRSF to store and exit OR Press SPEAKER to store and advance to next MMC Default Data H 323 FAST SETUP DISABLE GW CALL ID 1234 BILLING TYPE STANDARD CALLER ID TYPE ANI INCOMING CHANNEL DISTRIBUTE DTMF GENERATION H 245 SIGNAL FAX SIGNALLING TYPE T 38 SWITCH TO H 245 ENABLE DEFAULT DIL None SIGNALLING PORT 10000 STATUS ...

Page 373: ...BLE Sets the Caller Data Table number in MMC 323 that will be sent as the caller information when calling through the VoIP network Number in MMC 405 is used when set as None INCOMING MODE For VoIP incoming calls sets whether to use the received Called Party Number as is or to follow MMC 714 or to use the destina tion specified for each C O line in MMC 406 ALLOW GW CHECK Enables Gateway IP check AC...

Page 374: ...s 31dB to 31dB 0 63 MULTIFRAME COUNT This option selects the number of frames the ITM3 will consolidate in the packet message The voice packets are buffered to the set num ber and sent as a single packet The range is 1 12 JITTER OPTION Selects the dynamic jitter specific value Value determines whether the focus is on packet loss or packet delay The range is 00 12 RTP DELAY LIMIT Value of the delay...

Page 375: ...peat steps 2 3 for each option as required to enable disable or enter value 5 Press Transfer TRSF to store and exit OR Press SPEAKER to store and advance to next MMC Default Data AUDIO CODEC G 723 1 ECHO CANCEL ENABLE SILENCE SUPPRESS ENABLE INPUT FILTER ENABLE OUTPUT FILTER ENABLE INPUT GAIN 31 VOICE VOLUME 31 MULTI FRAME COUNT 02 JITTER OPTION 04 RTP DELAY LIMIT 500 RTP LOSS LIMIT 10 RTP CHECK P...

Page 376: ...s the voice volume The range is 31dB to 31dB 0 63 FRAME COUNT This option selects the number of frames the MGI will consolidate in the packet message The voice packets are buffered to the set num ber and sent as a single packet The range is 1 12 JITTER OPTION Selects the dynamic jitter specific value Value determines whether the focus is on packet loss or packet delay The range is 00 12 MIN JITTER...

Page 377: ... store and advance to next MMC Default Data AUDIO CODEC G 729A ECHO CANCEL ENABLE SILENCE SUPPRESS ENABLE INPUT FILTER ENABLE OUTPUT FILTER ENABLE INPUT GAIN 31 VOICE VOLUME 31 FRAME COUNT 02 JITTER OPTION 04 MIN JITTER 020 mS MAX JITTER 150 mS FAX ECM ENABLE MAX FAX COUNT 02 DTMF TYPE OUTBAND TOS FIELD 000000 Related Items MMC 831 VoIP Parameters MMC 832 VoIP Code MMC 833 VoIP IP Table MMC 834 Vo...

Page 378: ...h the Gatekeeper up to 16 digits RAS MANUAL Selects automatic or manual registration of Gatekeeper GK ROUTING Selects if Gatekeeper is routing call OS500 MGI Card GK CONNECT Determines if the MGI is to connect to a Gatekeeper The options are dis able or enable GK ROUTING Selects if Gatekeeper is routing call GK IP ADDRESS The Gatekeeper s IP address GK NAME Name identifier of the Gatekeeper The na...

Page 379: ...ect ITM3 MGI card and press RIGHT soft key 7001 GK CONNECT G 723 1 3 Press VOLUME keys to select option and press RIGHT soft key 7001 GK TYPE SIGK 4 Press VOLUME keys to select option and press RIGHT soft key 7001 GK TYPE OTHER SIGK 5 Press Transfer TRSF to store and exit OR Press SPEAKER to store and advance to next MMC Default Data GK CONNECT DISABLE GK ROUTING DISABLE GK IP ADDR 0 0 0 0 GK NAME...

Page 380: ...er Agent Server USA waits after receiving the ACK message 5000 mS 12 GENERAL RING TM In an unreliable transmission protocol it cannot be confirmed whether the client received the last response from the server In this case the server retransmits the response for this length of time until the requested retransmission is received For example the wait time after sending 200 OK for INFO 5000 mS 13 INVI...

Page 381: ... used 1 33 INCOMING MODE For VoIP incoming calls sets whether to use the received called party number or to follow MMC 714 or to use the destination specified for each C O line in MMC 406 Follow DID Trans 34 ALLOW GW CHECK Allows Gateway IP check DISABLE ACTION DISPLAY 1 Open programming and select 837 Display shows GATEWAY CALL ID 1234 2 Dial option number 00 34 OR Press VOLUME keys to select and...

Page 382: ...he purpose of using NAT Network Address Translation You can enter or change these addresses if required ACTION DISPLAY 1 Open programming and select 838 Display shows PRIVATE IP 01 0 0 0 0 2 Dial number 01 80 OR Press VOLUME keys to select and press RIGHT soft key PRIVATE IP 02 0 0 0 0 3 Enter address via dial keypad PRIVATE IP 02 255 255 255 255 4 Press Transfer TRSF to store and exit OR Press SP...

Page 383: ...als and the system this is adjusted for traversing firewalls if necessary 09000 IP TYPE Type of IP address 0 PRIVATE 1 PUBLIC PRIVATE DSP TYPE G 729A or G 711 G 729A PHONE TYPE Type of IP phone 0 SAMSUNG 1 SIP STANDARD SAMSUNG REGIST CLR Deletes the registered IP phone data None FRAME CNT Frame count 1 4 x10MS 4x JITTER BUF Jitter buffer 1 9 x10MS 9x TOS FIELD Type of service packets 00000000 SW V...

Page 384: ...ITP DSP PARA Display parameters Frame count jitter buffer etc ITP TX GAIN HSET Set level for TX gain for handset ITP RX GAIN HSET Set level for RX gain for handset ITP TX GAIN MIC Set level for TX gain for microphone ITP RX GAIN SPKR Set level for RX gain for speaker ITP VERS UPGRADE Upgrade version Type start interval MGI ALIVE PERIOD Period between polling MGI cards for availability dis abled if...

Page 385: ... DSP PARA Frame count 10mS Jitter buffer size 20mS TOS field 00000000 Down System data ITP TX GAIN HSET Level 1 23 2 24 3 25 4 26 5 27 6 28 7 29 8 30 ITP RX GAIN HSET Level 1 22 2 24 3 26 4 28 5 30 6 32 7 34 8 36 ITP TX GAIN MIC Level 1 23 2 24 3 25 4 26 5 27 6 28 7 29 8 30 ITP RX GAIN SPKR Level 1 16 2 18 3 20 4 22 5 24 6 26 7 28 8 30 9 32 10 34 11 36 12 38 13 40 14 42 15 44 16 46 ITP VERS UPGRAD...

Page 386: ...by the wireless terminals Different IPs are assigned to each system CODEC LIST Codec that can be used for VoIP calls between WBS and terminals G 711u G 711a G 726 and G 729 may all be designated For each WBS WBS1 to WBS8 the options are Parameter Description IP ADDRESS The IP address GATEWAY Gateway address of network on which WBS is installed NET MASK Netmask of network on which WBS is installed ...

Page 387: ...ult Data WLI Card WBS SYSTEM ID WBS24 IP ADDRESS 0 0 0 0 SYSTEM KEY 00000 GATEWAY 0 0 0 0 1 st DNS IP 0 0 0 0 NET MASK 255 255 255 0 2 nd DNS IP 0 0 0 0 MAC ADDR 0000 0000 0000 2 nd WBS IP 106 200 16 5 VERSION None STATUS OFF CODEC LIST CODEC 1 G 726 CODEC 2 G 729 CODEC 3 G 711a CODEC 4 G 711u USE RF CH WBS1 01 WBS2 04 WBS3 07 WBS4 10 WBS5 03 WBS6 06 WBS7 09 WBS8 02 Related Items None ...

Page 388: ...he WBS24 in service where the terminal is in use 5 IP OFFSET Location of the IP pool where the IP of the terminal is located 6 IP ADDRESS IP address assigned to the terminal 7 MAC ADDR MAC address of the terminal 8 USER ID User ID of terminal 9 PASSWORD User password of terminal ACTION DISPLAY 1 Open programming and select 846 Display shows 3301 REGISTERED NO 2 Press VOLUME keys to select device n...

Page 389: ...TATUS X X X X X X X X where X is either N no or Y yes for each WBS For example the following action will reset WBS1 ACTION DISPLAY 1 Open programming and select 847 Display shows WLI RESET RESET NOW NO 2 Press VOLUME keys to select option and press RIGHT soft key WBS 1 RESET RESET NOW NO 3 Press VOLUME keys to select YES and press RIGHT soft key WBS 1 RESET RESET NOW YES 4 Press Transfer TRSF to s...

Page 390: ... USED in the display ACTION DISPLAY 1 Open programming and select 848 Display shows IP 001 USED 0 0 0 0 2 Dial 0 to select IP address or 1 to select MAC address OR Press VOLUME keys to select and press RIGHT soft key IP 001 USED 0 0 0 0 3 Dial index number of terminal 001 100 OR Press VOLUME keys to select and press RIGHT soft key IP 002 USED 0 0 0 0 4 Enter IP address of terminal IP 002 USED 165 ...

Page 391: ...ge messages and de lete registered data WBS WEP SERVICE Enables WBS Security The WEP key must be entered in advance WEP KEY WEP KEY is the password key used for WBS Security identification ACTION DISPLAY 1 Open programming and select 849 Display shows ENTER PASSWORD _ 2 Enter password default is 0000 but can be changed in MMC 202 ENTER PASSWORD 4444 3 Press VOLUME keys to select option and press R...

Page 392: ... free resources Options are 0 DTMFR DSPs 1 CID DSPs iDCS500 OS500 only 2 R2MFC DSPs iDCS500 OS500 only 3 CONF GROUPS ACTION DISPLAY 1 Open programming and select 850 Display shows DTMFR DSP S USE 000 FREE 032 2 Press VOLUME keys to select option CID DSP S USE 000 FREE 000 3 Press Transfer TRSF to store and exit OR Press SPEAKER to store and advance to next MMC Default Data None Related Items None ...

Page 393: ...re cabinet port and or slot will be displayed If an ALARM I O port is programmed in MMC 804 alarm information can be printed on demand and also as alarm information is provided ALARM REPORTING OPTIONS VIEW ALARM View alarm buffer see Alarm Code Table below OVERWRITTEN When buffer is full the oldest entry in buffer overwritten OVERFLOW CONTROL STOP RECORDING When buffer is full stop recording alarm...

Page 394: ...rt process has been executed via button reset MJA03 Mem Reset The system RAM has been cleared via manual programming PCMMC or KMMC resulting in a system reset MJA04 MCP Reset The MCP has reset Alarm data Reason BUS ERR Restart Bus Error ADDR ERR Restart Address Error ILLEGAL Restart Illegal opcode ZERO DIVID Restart Zero divide PRIVILEGE Restart Privilege Violation VECTOR 1 Restart Auto Vector Lev...

Page 395: ... abnormal fault reported in one of the systems AA card DTMF resources has recovered Alarm data Cabinet Slot Port Cx Syy Pzz MJC12 E911 Restart The E911 card has restarted Alarm data Cabinet Slot Cx Syy MJC13 E911 Block The E911 card has restarted because the system detected the card does not work correctly Alarm data Cabinet Slot Cx Syy MJC14 VoIP Restart The ITM3 MGI card has restarted Alarm data...

Page 396: ...BRI DL Recovery A BRI data link is back in service Alarm Data Cabinet Slot Channel Cx Syy czz MJD17 RAM Error An error has occurred in the TEPRI or BRI card RAM Alarm Data Cabinet Slot Cx Syy MJD18 E1 Restart The E1 card has restarted Alarm Data Cabinet Slot Cx Syy MJD19 PRI Restart The PRI card has restarted Alarm Data Cabinet Slot Cx Syy MJD20 BRI Restart The BRI card has restarted Alarm Data Ca...

Page 397: ...le time slots Maximum 192 per cabinet Alarm Data Cabinet Slot Cx Syy MNF16 PSU Alarm Indicates there are over 56 ports in a cabinet with a single PSU and more power is required Alarm Data Cabinet Slot Cx Syy MNF17 PSU Alarm Rec A second PSU has been recognised when added after alarm condition of Alarm Data Cabinet Slot Cx Syy MNF18 SLI Fault An SLI card has been detected as out of service via an i...

Page 398: ...o grammed as an ALARM port in MMC 804 The specific fault alarm data can be displayed via MMC 851 Note Alarm Notification Off On 0 1 determines if the alarm provides a visual and audible notifi cation to the System Alarm key station s Pressing the System Alarm key and the ANS RLS key will silence the audible alarm only at the station at which these keys were pressed Refer to the Alarm Code Table in...

Page 399: ...DSPs and miscellaneous equipment such as page ports AA ports or voice mail card ports can also be placed in a maintenance busy state MAINTENANCE BUSY OPTIONS 0 TRK Trunks 1 STN Stations 2 PAGE Page Ports 3 AA Auto Attendant card ports 4 DTMFR DSP receiving DTMF 5 CID DSP receiving CID 6 R2MFC DSP receiving R2MFC 7 CONF DSP for conference 8 MGI MGI Port Selectable states are 0 Idle and 1 Busy Displ...

Page 400: ...iagnostic time It is recommended that you assign the diagnostic time during non peak traffic periods DIAL PAD DAY SELECTION 0 Sunday 4 Thursday 1 Monday 5 Friday 2 Tuesday 6 Saturday 3 Wednesday ACTION DISPLAY 1 Open programming and select 854 Display shows DIAGNOSTIC TIME SUN 2 Dial day selection 0 6 e g MON OR Press VOLUME keys to select day and press RIGHT soft key DIAGNOSTIC TIME MON _ 3 Enter...

Page 401: ...DIP switch status of MCP C1 POWER B Shows second power supply in Cabinet 1 yes no C1 POWER B Shows second power supply in Cabinet 1 yes no CxSy VPM Shows VPM installed on Voice Mail card SCP D BD 1 Shows SCP daughterboard 1 CxSy SW Shows DIP switch status of TEPRI card SCP D BD 2 Shows SCP daughterboard 2 SCP D BD 3 Shows SCP daughterboard 3 LCP1 ONLINE Shows connection status of LCP1 C2 POWER B S...

Page 402: ... and select 855 Display shows In this example daughterboard 1 on the MCP card is an ESM card SYSTEM OPTIONS MCP D BD 1 ESM 2 Press VOLUME keys to scroll through options SYSTEM OPTIONS MCP D BD 2 IPM 3 Press Transfer TRSF to store and exit OR Press SPEAKER to store and advance to next MMC Default Data None Related Items None ...

Page 403: ...ISC card iDCS100 LAN Indicates that programming was accessed by PCMMC via the LAN connec tion on i the IOM board iDCS500 or ii the MEM4 card iDCS100 or iii the MCP2 card OS500 SIOx Indicates that programming was accessed by PCMMC via i one of the SIO connections on the IOM board iDCS500 or OS500 or ii the MISC MEM4 card iDCS100 where x is the number 1 4 of the SIO port that was used ACTION DISPLAY...

Page 404: ...MMC 851 Codes MJA01 to MNF27 are designated numbers 01 87 respectively in MMC 858 and each is selectable ON OFF ACTION DISPLAY 1 Open programming and select 858 Display shows 01 MJA01 ACT OFF POR Restart 2 Press VOLUME keys to select alarm number and press RIGHT soft key 01 MJA01 ACT OFF POR Restart 3 Press VOLUME keys to select alarm ON OFF e g ON and press RIGHT soft key 01 MJA01 ACT ON POR Rest...

Page 405: ... version MCP B3 Shows MCP daughterboard 3 version MCP B2 Shows MCP daughterboard 2 version C1 M BOARD Shows motherboard version of basic cabinet MCP B3 Shows MCP daughterboard 3 version SCP B1 Shows SCP daughterboard 1 version SCP B2 Shows SCP daughterboard 2 version SCP B3 Shows SCP daughterboard 3 version C2 M BOARD Shows motherboard version of first expansion cabinet LCP1 B1 Shows LCP1 daughter...

Page 406: ...SPLAY 1 Open programming and select 859 Display shows H W EPLD VERSION MCP CARD V03 2 Press VOLUME keys to scroll through options H W EPLD VERSION MCP B1 ESM V01 3 Press Transfer TRSF to store and exit OR Press SPEAKER to store and advance to next MMC Default Data Hardware versions Related Items None ...

Page 407: ...no Note To use this information a special PC application is required This is not supplied by Samsung ACTION DISPLAY 1 Open programming and select 860 Display shows UCD VIEW SERVICE DISABLE 2 Press VOLUME keys to select option e g SEND AGENT STATE and press RIGHT soft key SEND AGENT STATE YES Press VOLUME keys to select YES NO and press RIGHT soft key SEND AGENT STATE NO 3 Press Transfer TRSF to st...

Page 408: ... Disable 2 LINE ENBLOC Enables Enbloc dialling on 2 Line LCD phones Enable Dis able ACTION DISPLAY 1 Open programming and select 861 Display shows AUTO UPDATE TIME ENABLE 2 Press VOLUME keys to select option see table above and press RIGHT soft key AUTO UPDATE TIME ENABLE 3 Press VOLUME keys to select other options as required AUTO UPDATE TIME DISABLE 4 Press Transfer TRSF to store and exit OR Pre...

Page 409: ...lay shows 201 CALL CLEAR ARE YOU SURE NO 2 Dial station or line number e g 202 OR Press VOLUME keys to select station and press RIGHT soft key 202 CALL CLEAR ARE YOU SURE NO 3 Dial 0 to select CALL CLEAR or 1 to select DB INITIAL Press VOLUME keys to select and press RIGHT soft key 202 DB INITIAL ARE YOU SURE NO 4 Dial 1 to select YES or 0 to cancel OR Press VOLUME keys to select and press RIGHT s...

Page 410: ...Samsung Business Communications Brookside Business Park Greengate Middleton Manchester M24 1GS ...

Reviews: