

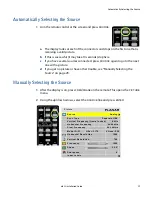


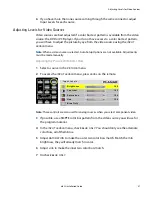
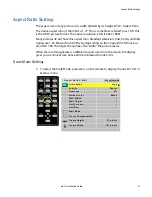


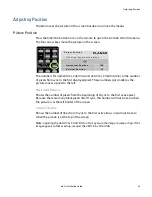


Adjusting Frequency Manually
40
m52L Installation Guide
Adjusting Frequency Manually
1
Press
FREQ
/
PHASE
on the remote. This opens the
PICTURE
menu. Confirm that the
source is
ANALOG
.
2
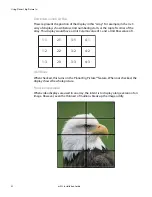
Display a checkerboard pattern from the computer.
3
Select
FREQUENCY
in the menu and use the + or - keys to change the Frequency.
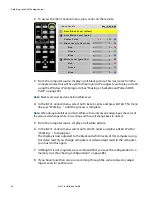
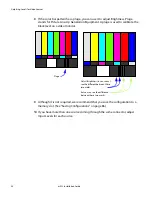
Don’t worry about the number that appears in the menu. Look at the screen. As the
Frequency is moved away from the ideal setting, more and more vertical bands will
appear in the picture. Adjust Frequency so there are no vertical bands.
Note:
Be sure there are no zoom adjustments in effect when adjusting Frequency. If there
are, you will not be able to get rid of all the vertical bands.
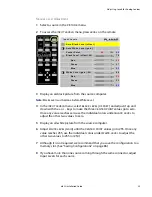
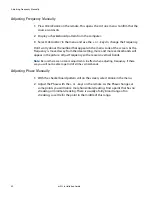
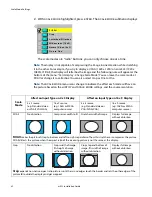
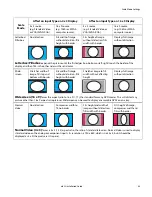
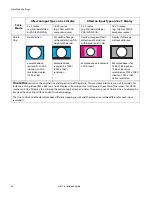
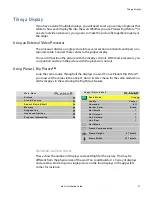
Adjusting Phase Manually
1
With the checkerboard pattern still on the screen, select
PHASE
in the menu.
2
Adjust the Phase with the + or - keys on the remote. As the Phase changes, at
some points you will notice more horizontal streaking. Find a point that has no
streaking or minimal streaking. There is usually a fairly broad range of no
streaking, so settle for the point in the middle of this range.
Summary of Contents for m52L
Page 1: ...m52L Installation Guide ...
Page 2: ......
Page 4: ...iv m52L Installation Guide ...
Page 10: ...Table of Contents vi m52L Installation Guide ...
Page 20: ...Tools and Other Things You May Need 10 m52L Installation Guide ...
Page 28: ...Lining Up Screen Brackets 18 m52L Installation Guide ...
Page 32: ...About UPS Supplies 22 m52L Installation Guide ...
Page 58: ...Sharpness Settings 48 m52L Installation Guide ...
Page 60: ...Picture Position 50 m52L Installation Guide ...
Page 64: ...Using Planar s Big PictureTM 54 m52L Installation Guide ...
Page 68: ...Viewport Adjustment 58 m52L Installation Guide ...
Page 74: ...Tips for Color Balancing 64 m52L Installation Guide ...
Page 88: ...Turn Backlight Off With No Source and DPMS Delay 78 m52L Installation Guide ...
Page 92: ...Controlling With RS232 Commands 82 m52L Installation Guide ...
Page 102: ...Deleting a Configuration 92 m52L Installation Guide ...
Page 106: ...Where to Go From Here 96 m52L Installation Guide ...
Page 116: ...106 m52L Installation Guide ...
Page 118: ...Rear View 108 m52L Installation Guide Rear View 0 3 0 7 5 7 2 7 21 0 00 3 ...
Page 120: ...110 m52L Installation Guide ...