


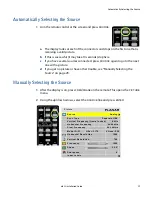


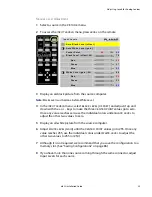


Manually Selecting the Source
30
m52L Installation Guide
3
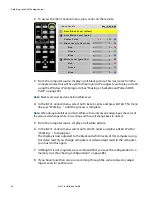
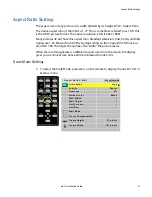
The
SOURCE
popup menu displays to the right of the
PICTURE
menu.
Note:
If the display does not have a VIM (Video Input Module) installed, only the first two
items will appear in this menu.
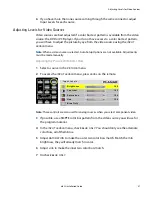
4
With the arrow keys, select the input connector you want and press
ENTER
.
Within a second or two the display analyzes the picture, adjusts to it, and displays
it. If you see no picture:
a
If you see an “out of range” message on the display, the input from the source
cannot be displayed. Try changing the source’s resolution output.
b
If you see a “source absent” message on the display, the data from the source
is not reaching the display. Try disconnecting and reconnecting the cables
between the source and the display, and make sure the source is powered on.
If the source is a laptop, ensure that the VGA output on the rear of the source
is enabled.
c
If no message is displayed, maybe the source has timed out and is displaying
a blank screen.
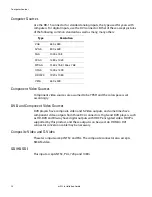
A n a l o g
D i g i ta l
C o m p o n e n t ( Y P b P r )
S - Vi d e o
C o m p o s i t e
S D I
Summary of Contents for m52L
Page 1: ...m52L Installation Guide ...
Page 2: ......
Page 4: ...iv m52L Installation Guide ...
Page 10: ...Table of Contents vi m52L Installation Guide ...
Page 20: ...Tools and Other Things You May Need 10 m52L Installation Guide ...
Page 28: ...Lining Up Screen Brackets 18 m52L Installation Guide ...
Page 32: ...About UPS Supplies 22 m52L Installation Guide ...
Page 58: ...Sharpness Settings 48 m52L Installation Guide ...
Page 60: ...Picture Position 50 m52L Installation Guide ...
Page 64: ...Using Planar s Big PictureTM 54 m52L Installation Guide ...
Page 68: ...Viewport Adjustment 58 m52L Installation Guide ...
Page 74: ...Tips for Color Balancing 64 m52L Installation Guide ...
Page 88: ...Turn Backlight Off With No Source and DPMS Delay 78 m52L Installation Guide ...
Page 92: ...Controlling With RS232 Commands 82 m52L Installation Guide ...
Page 102: ...Deleting a Configuration 92 m52L Installation Guide ...
Page 106: ...Where to Go From Here 96 m52L Installation Guide ...
Page 116: ...106 m52L Installation Guide ...
Page 118: ...Rear View 108 m52L Installation Guide Rear View 0 3 0 7 5 7 2 7 21 0 00 3 ...
Page 120: ...110 m52L Installation Guide ...