Adjusting Frequency and Phase
m52L Installation Guide
39
Adjusting Frequency and Phase
Frequency and Phase are mostly adjusted for computer sources and
must
be made
using the computer that has, or will have, program content. Although Frequency and
Phase can also be adjusted for component sources, it is not usually necessary.
If you press the
SETUP
button on the remote, the automatic adjustment of Frequency
and Phase is usually good enough. (See "Auto Setup Options" on page 67) If
automatic adjustment is not good enough, adjust it manually. If the image shows
vertical banding, adjust the Frequency. (See "Adjusting Frequency Manually" on
page 40) If the image has noticeable horizontal streaks moving through the image,
adjust the Phase. (See "Adjusting Phase Manually" on page 40)
Note:
Auto Setup Options rely on the content displayed on the screen. You will get best
results with something that has a lot of changes, such as a checkerboard pattern.
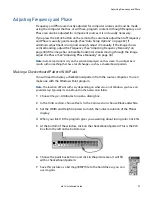
Making a Checkerboard Pattern With Paint
You will need to display a checkerboard pattern from the source computer. You can
make one with the Windows Paint program.
Note:
The location of Paint with vary depending on what version of Windows you have on
your desktop. Typically it can be found in the Accessories folder.
1
Choose Image > Attributes to open a dialog box.
2
In the Units section, choose Pixels. In the Color section, choose Black and white.
3
Set the Width and Height in pixels to match the
native
resolution of the Planar
display.
4
When you click OK, the program gives you a warning about losing color. Click Yes.
5
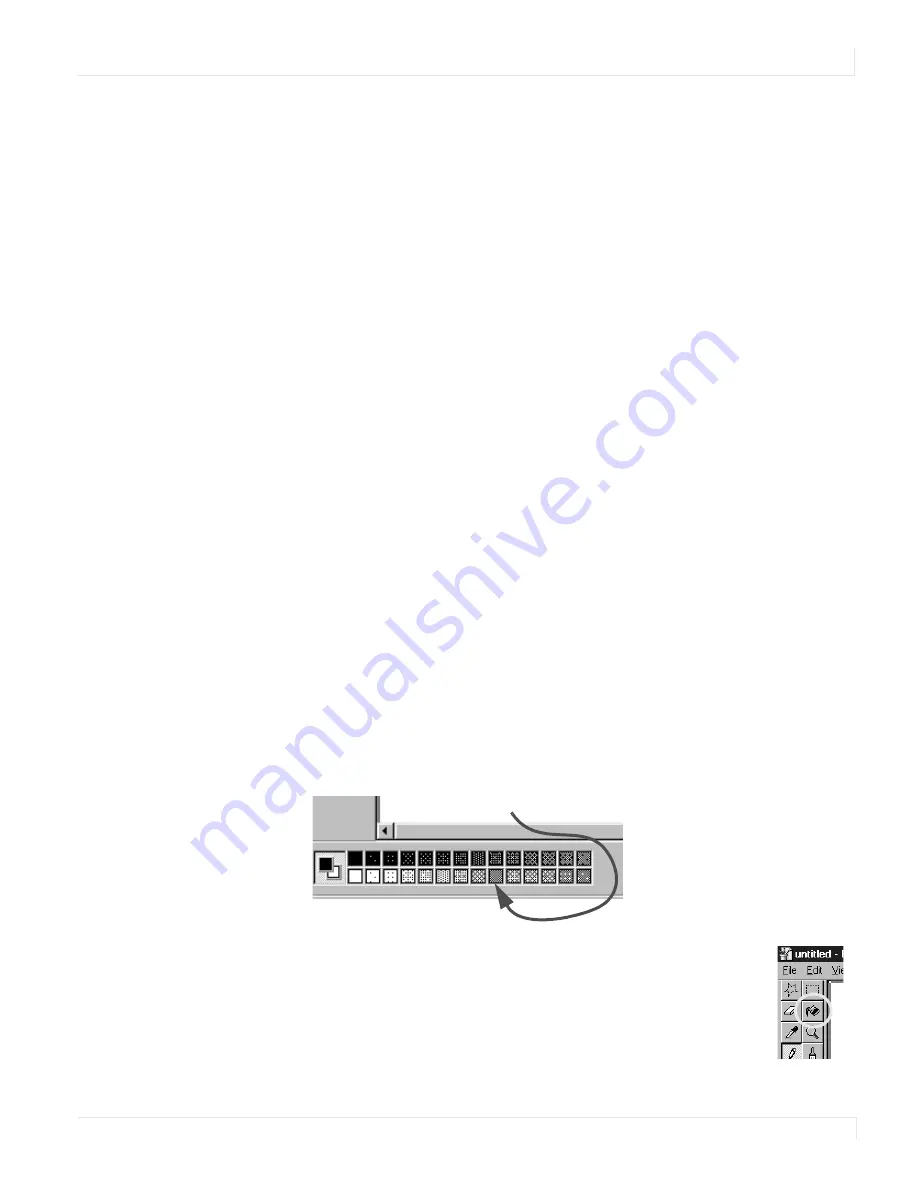
At the bottom of the window, click on the checkerboard pattern. This is the 9th
box from the left on the bottom row.
6
Choose the paint bucket icon and click in the picture area. It will fill
with a checkerboard pattern.
7
Save this picture as a bit map (.BMP) file to the hard drive so you can
use it again.
Summary of Contents for m52L
Page 1: ...m52L Installation Guide ...
Page 2: ......
Page 4: ...iv m52L Installation Guide ...
Page 10: ...Table of Contents vi m52L Installation Guide ...
Page 20: ...Tools and Other Things You May Need 10 m52L Installation Guide ...
Page 28: ...Lining Up Screen Brackets 18 m52L Installation Guide ...
Page 32: ...About UPS Supplies 22 m52L Installation Guide ...
Page 58: ...Sharpness Settings 48 m52L Installation Guide ...
Page 60: ...Picture Position 50 m52L Installation Guide ...
Page 64: ...Using Planar s Big PictureTM 54 m52L Installation Guide ...
Page 68: ...Viewport Adjustment 58 m52L Installation Guide ...
Page 74: ...Tips for Color Balancing 64 m52L Installation Guide ...
Page 88: ...Turn Backlight Off With No Source and DPMS Delay 78 m52L Installation Guide ...
Page 92: ...Controlling With RS232 Commands 82 m52L Installation Guide ...
Page 102: ...Deleting a Configuration 92 m52L Installation Guide ...
Page 106: ...Where to Go From Here 96 m52L Installation Guide ...
Page 116: ...106 m52L Installation Guide ...
Page 118: ...Rear View 108 m52L Installation Guide Rear View 0 3 0 7 5 7 2 7 21 0 00 3 ...
Page 120: ...110 m52L Installation Guide ...

