25
English
Français
En/Fr
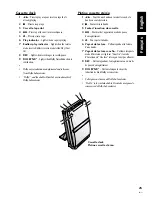
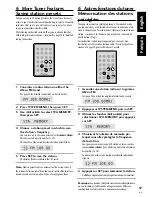
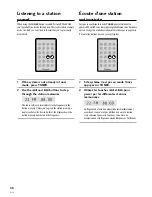
1 Switch on.
You can use the button on the remote control or
STANDBY
/
ON
button on the top panel of the CD tuner
unit.
The display lights and briefly indicates the current volume
level before showing the current function (e.g. CD).
2 Select CLOCK ADJUST from the timer
menu.
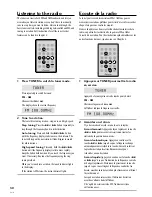
Press
TIMER
to display the timer menu, then press
4
or
¢
until
CLOCK
ADJUST
is shown in the display, then
press
SET
.
The display changes to show a date and time, with the day
part of the date blinking to indicate that you can set it.
3 Use the
4
and
¢
buttons to set the
day, then press SET.
Once you’ve pressed
SET
, the month will start flashing.
4 In the same way, set the rest of the date
and time.
Each time you press
SET
, the next part of the date/time will
start blinking. Adjust using the
4
and
¢
buttons.
Pressing
SET
after setting the minute completes the clock
setup.
Remember:
If power is interrupted, the clock display will flash
until you reset it to the correct time. To use the timer features,
always set the clock to the correct time.
Tip
•
You can display the clock in either 12 or 24-hour
format. See page 69 for how to change it.
•
Press SYSTEM DISP in standby mode to show the
day and time. The display remains until you hit the
STANDBY/ON button.
1 Mettez l’appareil sous tension.
Vous pouvez utiliser la touche de la télécommande ou la
touche
STANDBY
/
ON
sur le panneau supérieur du CD
tuner.
L’afficheur s’allume et indique brièvement le volume actuel,
avant d’indiquer la fonction sélectionnée (p.ex. CD).
2 Sélectionnez CLOCK ADJUST sur le menu
Minuterie.
Appuyez sur
TIMER
pour afficher le menu Minuterie, puis
appuyez sur
4
ou
¢
jusqu’à ce que
CLOCK
ADJUST
apparaisse sur l’afficheur, puis appuyez sur
SET
.
L’afficheur change et indique la date et l’heure, tandis que le
chiffre du jour clignote, signalant que vous pouvez le régler.
3 Servez-vous des touches
4
et
¢
pour
ajuster le jour, puis appuyez sur SET.
Lorsque vous appuyez sur
SET
, le mois se met à clignoter.
4 De la même façon, réglez les autres
parties de la date et de l’heure.
A chaque poussée sur
SET
, la partie suivante de la date/heure
se met à clignoter. Faites les réglages avec les touches
4
et
¢
.
Une poussée sur
SET
après avoir réglé les minutes termine le
réglage de l’horloge.
Rappel:
En cas d’interruption de l’alimentation, l’affichage de
l’horloge clignote jusqu’à ce que vous remettiez l’horloge à
l’heure. Pour pouvoir utiliser les fonctions de la minuterie,
l’horloge doit toujours être réglée à l’heure exacte.
Conseil
•
Vous pouvez afficher l’heure en cycle de 12 ou 24
heures. Sur la façon de changer ce réglage,
reportez-vous à la page 69.
•
Appuyez sur SYSTEM DISP en mode d’attente pour
indiquer le jour et l’heure. Cet affichage subsiste
jusqu’à ce que vous appuyiez sur la touche
STANDBY/ON.


