Chapter 4
Settings — [Settings]
ENGLISH - 45
[Settings]
Click the [Settings] button to display the [Settings] page.
There are four buttons displayed in the [Settings] page: [General], [Ethernet], [Inputs], and [Outputs]. Click a button to switch the page and
set the necessary items. Set the inputs and outputs before installing the device at a location. By setting all inputs and outputs, all functions for
properly operating the device can be set through this screen. In the input source or output device list, a small yellow key symbol is displayed,
indicating that the HDCP source is supported in the channel with the HDCP function.
[General]
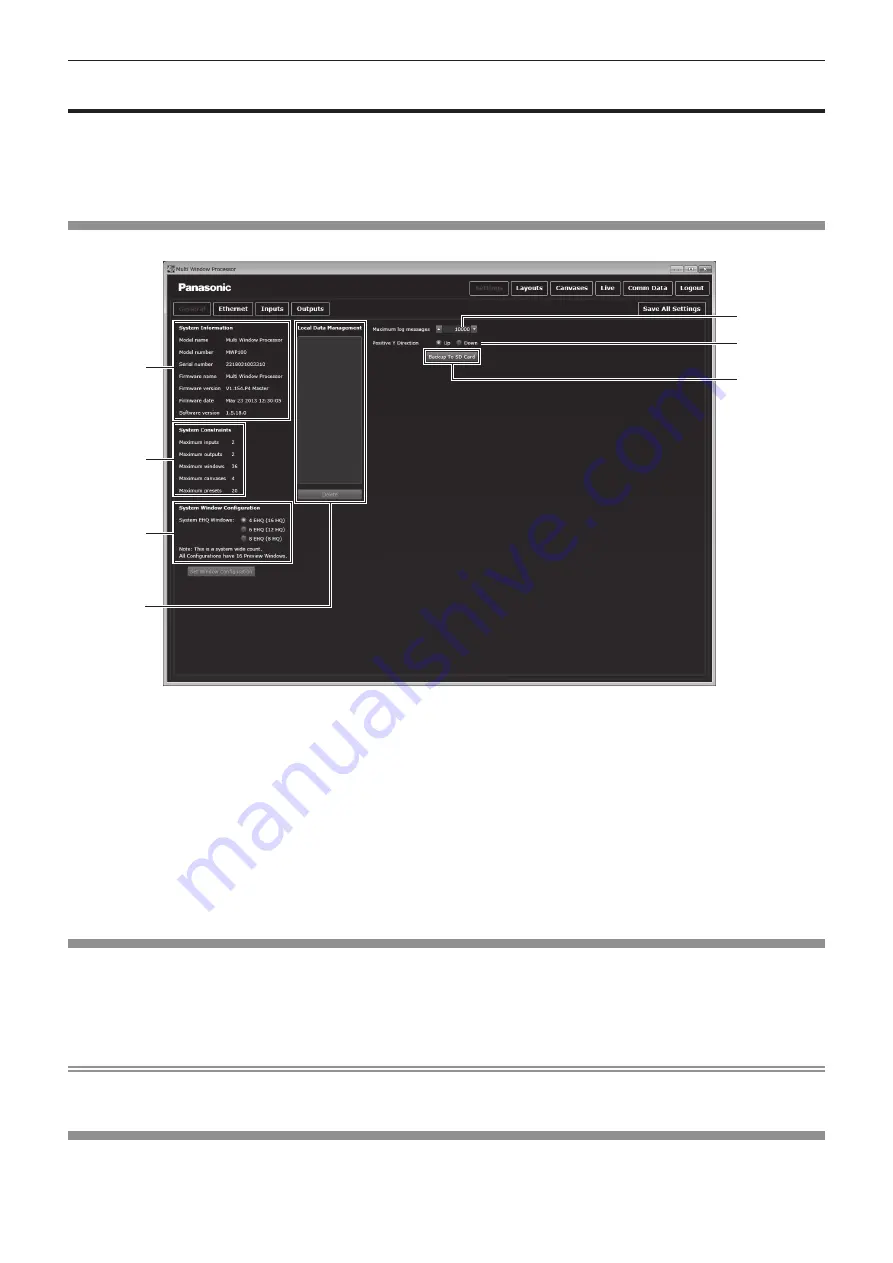
Click the [General] button on the [Settings] page. You can check basic information.
1
2
3
4
7
6
5
1 [System Information]
Enables you to check the device and control software
information.
2 [System Constraints]
Enables you to check the system usage status.
3 [System Window Configuration]
Enables you to set the EHQ number.
After you change the settings, click the [Set Window
Configuration] button to apply the changes.
The device needs to restart. Note that all unsaved information in
the device will be lost when restarting.
4 [Local Data Management]
Displays the setting data saved in the control computer. Clicking
the [Delete] button will delete the data.
5 [Maximum log messages]
Sets the number of communication log items to be displayed.
You can set a number from 1 000 to 100 000.
6 [Positive Y Direction]
Select the direction of the [Layouts] and [Canvases] coordinates
(Y-axis).
Selecting [Up] will make the upper direction of the control
software positive.
Selecting [Down] will make the lower direction of the control
software positive.
7 [Backup To SD Card]
This function is used by the service personnel.
[Ethernet]
Click the [Ethernet] button on the [Settings] page. Perform this setting when connecting to the device via LAN. You can also view the MAC
address of the CPU board section on the device.
Set the IP address at [IP address], subnet mask at [Subnet mask], and default gateway at [IP gateway], and then click the [Take] button. The
settings will be sent to the device.
Click the [Undo] button when you want to go back to the previous state, before the setting was changed.
Note
f
To change the [Ethernet] setting, connect the device to the control computer using a serial cable. When connected using the LAN cable, the
[Ethernet] setting on the [Settings] page cannot be changed.
[Inputs]
Click the [Inputs] button on the [Settings] page. Sets the input source.
On the left side of the screen, a list of input sources detected by the device are displayed. You can select an input signal format and color scale
setting by clicking the displayed input source. You can also adjust the luminance and contrast of an image.


