


1–8
XR-56-201 5
Overview 03/18
Overview
User Interface Operation
All menus within the system are controlled using a mouse and keyboard (optional). Clicking with the
left-hand mouse button (ie left click) will select menu tabs, enable functions and allow items to be
chosen from drop down lists.
The majority of the user interface screen area is reserved for instrumentation and major functional
areas. Tabs are provided along the top of the screen to allow the selection of these major functional
areas such as
Viewer
,
Generator
,
Configuration
and
Connections
. Along the bottom of the screen are
a set of buttons that give quick access to specific commonly used functions. Control panels will appear
at the right-hand side of the screen to provide context-specific functionality applicable to the currently
selected major menu area, instrument tile or menu block.
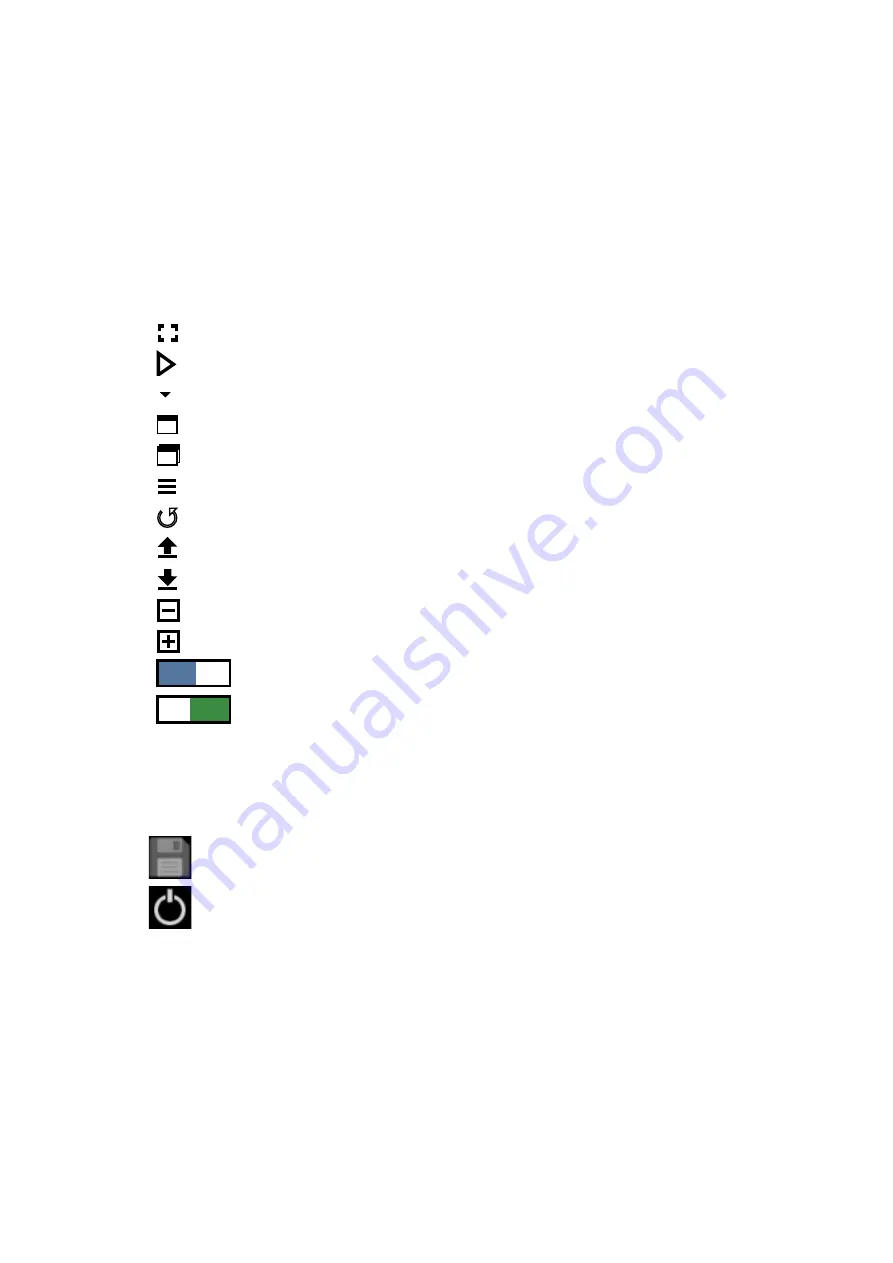
Menu Conventions
0
I
Full screen display (web-browser)
0
I
Clean display mode
0
I
Drop down menu
0
I
Full size window
0
I
Small size window
0
I
Panel menu selection
0
I
Reset Instrument to defaults
0
I
Upload file
0
I
Download file
0
I
Minimize menu
0
I
Maximize menu
0
I
Function turned off
0
I
Function turned on
Shut Down and Power off
When the system is operating, the unit's internal SD card is used to store system configuration
information and other files. While the system is saving to the SD card an icon will be displayed at the
top of the screen.
Clicking on this icon, which appears at the top of the screen, will manually save any
information that is waiting to be saved to the SD card.
Clicking on this icon, in the top right-hand corner of the screen, will shut down the
system so that it can be safely turned off using the power button on the font of the
unit.
Summary of Contents for Ultra XR
Page 13: ...Ultra XR User Guide 1 1 XR 56 201 5 1 Overview...
Page 14: ...1 2 XR 56 201 5 Overview 03 18 Overview...
Page 16: ...1 4 XR 56 201 5 Overview 03 18 Overview...
Page 25: ...Ultra XR User Guide 2 1 XR 56 201 5 2 Viewer...
Page 26: ...2 2 XR 56 201 5 Viewer 03 18 Viewer...
Page 38: ...2 14 XR 56 201 5 Viewer 03 18 Viewer...
Page 56: ...2 32 XR 56 201 5 Viewer 03 18 Viewer...
Page 64: ...2 40 XR 56 201 5 Viewer 03 18 Viewer...
Page 76: ...2 52 XR 56 201 5 Viewer 03 18 Viewer...
Page 80: ...2 56 XR 56 201 5 Viewer 03 18 Viewer...
Page 85: ...Ultra XR User Guide 3 1 XR 56 201 5 3 Generator...
Page 86: ...3 2 XR 56 201 5 Generator 03 18 Generator...
Page 92: ...3 8 XR 56 201 5 Generator 03 18 Generator...
Page 93: ...Ultra XR User Guide 4 1 XR 56 201 5 4 Configuration...
Page 94: ...4 2 XR 56 201 5 Configuration 03 18 Configuration...
Page 108: ...4 16 XR 56 201 5 Configuration 03 18 Configuration...
Page 120: ...4 28 XR 56 201 5 Configuration 03 18 Configuration...
Page 121: ...Ultra XR User Guide 5 1 XR 56 201 5 5 Connections...
Page 122: ...5 2 XR 56 201 5 Connections 03 18 Connections...
Page 141: ...Ultra XR User Guide A 1 XR 56 201 5 A Glossary...
Page 142: ...A 2 XR 56 201 5 Glossary 03 18 Glossary...
Page 150: ...A 10 XR 56 201 5 Glossary 03 18 Glossary...
Page 151: ...Ultra XR User Guide B 1 XR 56 201 5 B Installation...
Page 152: ...B 2 XR 56 201 5 Installation 03 18 Installation...
Page 158: ...B 8 XR 56 201 5 Installation 03 18 Installation...
Page 162: ...B 12 XR 56 201 5 Installation 03 18 Installation...
Page 169: ...Ultra XR User Guide C 1 XR 56 201 5 Ultra XR User Guide C 1 XR 56 201 5 C Applications...
Page 170: ...C 2 XR 56 201 5 Applications 03 18 Applications...
Page 176: ...C 8 XR 56 201 5 Applications 03 18 Applications...
Page 184: ...C 16 XR 56 201 5 Applications 03 18 Applications...


