


-----------------------Conversion Facilities: Format Conversion ----------------------
Ultra v2.0a User Guide
D-3
Step 3: Set the Output Video Standard
The Output Video Standard can either be selected from a list of current selections or it can be
picked it out via its properties of Interface, Raster size, refresh rate and Sampling type.
The steps to use are outlined below. For further information, see Section B.1.5.
To set the Output Video Standard
to a recent selection:
1.
Click on the down arrow to the right of the Output Video Standard currently being quoted
for the port. A drop-down list of recent selections is displayed.
2.
Select the required standard from the list displayed, or if the required standard is not
listed, select
Other…
then follow the steps below, starting at Step 2.
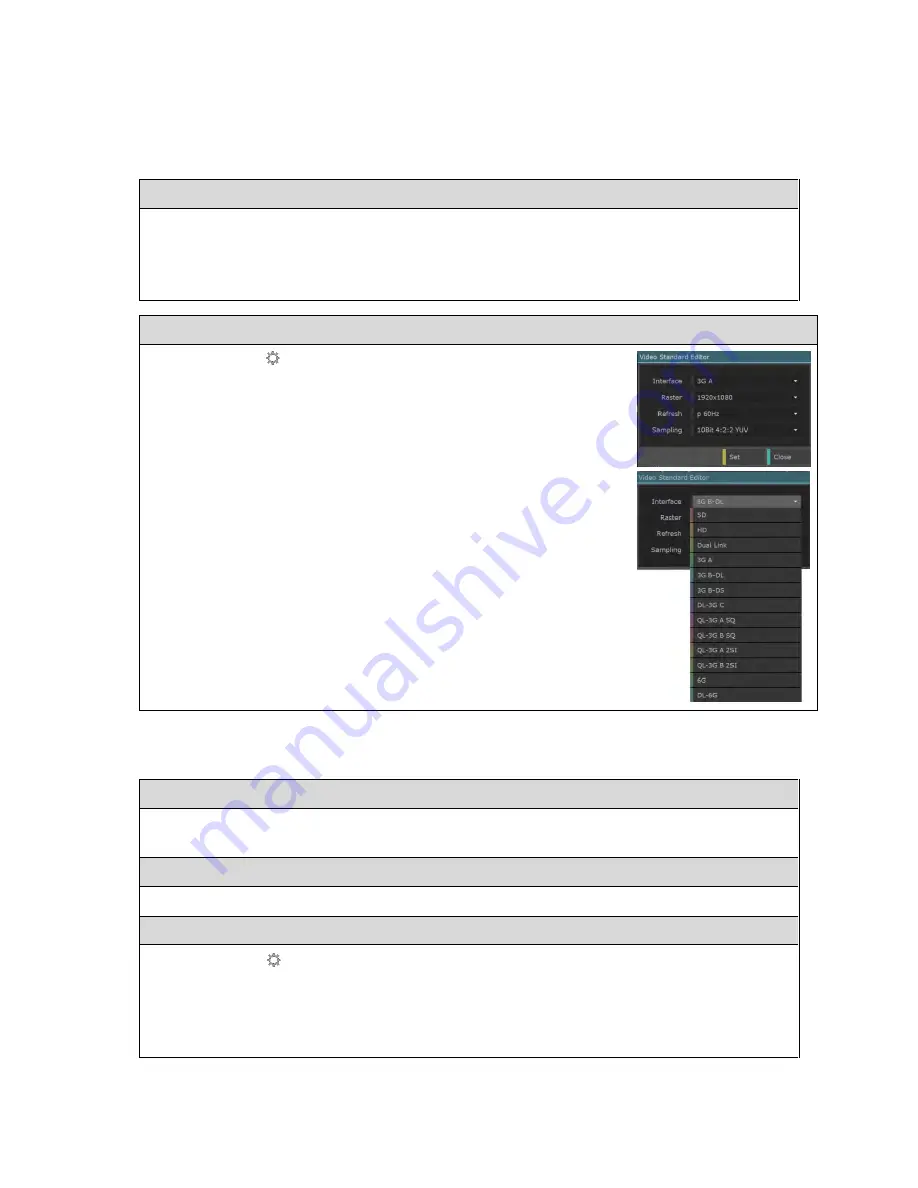
To set the Output Video Standard
via its properties:
1.
Click on the symbol to the right of the current Output
Video Standard.
The dialogue shown to the right is displayed.
2.
Starting with the
Interface
entry, click on the down arrow
to the right of the current selection and pick the required
option from the drop-down list that is displayed.
3.
Use the same procedure to set the
Raster
setting, then the
Refresh
then the
Sampling
.
4.
When all entries have been set to define the required video
standard, click on the
Set
option at the bottom of the
dialogue to select this video standard and return to the
Connections window.
Step 4: Set the Required Genlock
The steps to use are outlined below. For further information, see Section B.1.6.
1.
Select the required Genlock source (applies to all outputs):
Pick the required source from the drop-down menu offered in the
Genlock
area in the
bottom left-hand corner of the display.
2.
To select between Genlock and Free Run (for each output type):
Click on the down-arrow next to the current Genlock selection, and click the required option.
3.
Set the timing relative to the Genlock source:
Click on the symbol to the right of the current Genlock selection, and use the dialogue
that is displayed to set the required timing adjustment in Lines and Pixels.
Note:
Where video is output over multiple SDI signals, the same timing adjustment is applied
to each of those signals. Where different timings are needed, this can be achieved by setting
the appropriate Interlink Delays as described in Section G.1.
Summary of Contents for Ultra 4K Tool Box
Page 1: ...Ultra 4K Tool Box User Guide Version 2 0a August 2015...
Page 8: ...General Ultra v2 0a User Guide...
Page 50: ...General Automated Control Ultra v2 0a User Guide C 6...
Page 52: ...Conversion Facilities Ultra v2 0a User Guide...
Page 62: ...Signal Analysis Ultra v2 0a User Guide...
Page 96: ...Signal Analysis Status Ultra v2 0a User Guide O 4...
Page 98: ...Physical Layer Analysis Ultra v2 0a User Guide...
Page 112: ...Physical Layer Eye Jitter Ultra v2 0a User Guide S 14...
Page 118: ...Generator Ultra v2 0a User Guide...
Page 134: ...Generator Creating Test Patterns W 8 Ultra v2 0a User Guide...
Page 139: ...Ultra v2 0a User Guide...


