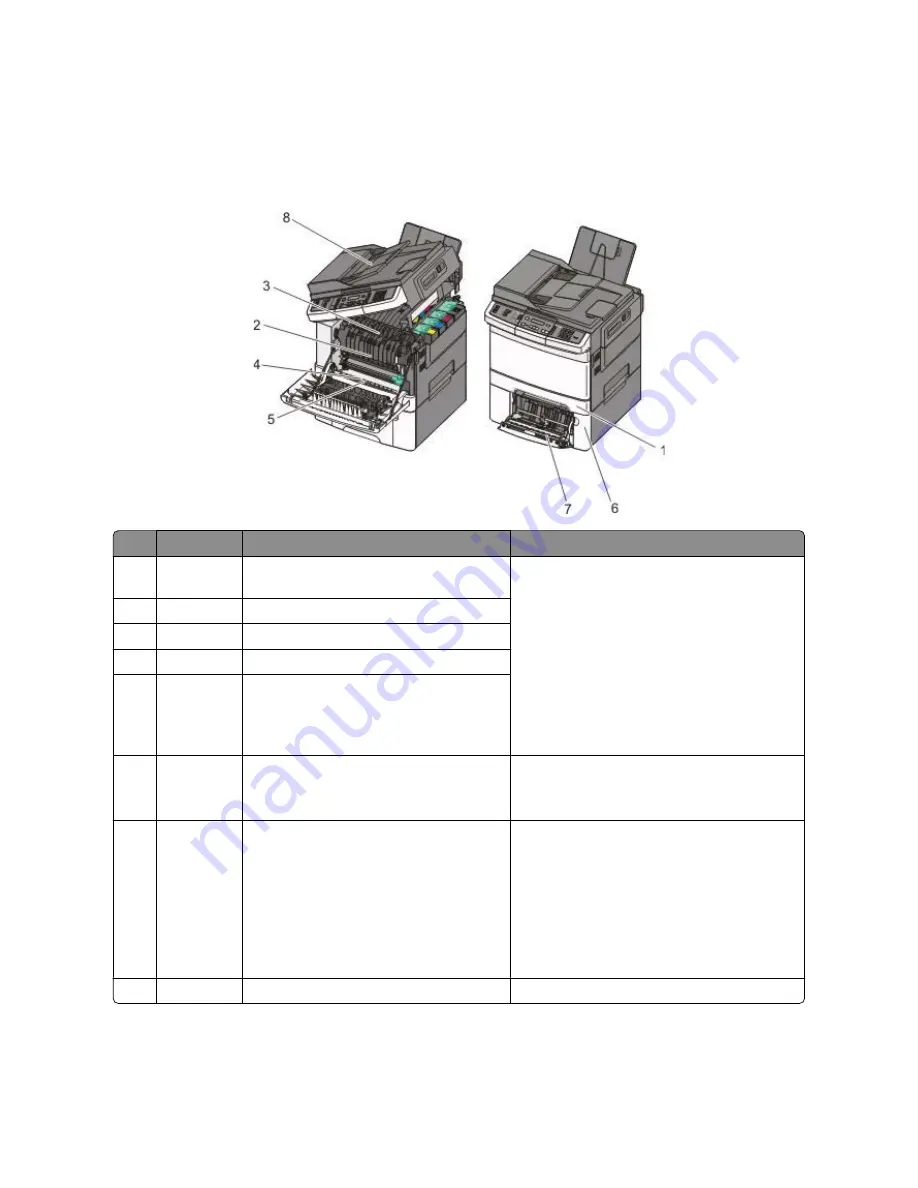
Understanding jam numbers and locations
When a jam occurs, a message indicating the jam location appears. The following illustration and table list the paper
jams that can occur and the location of each jam. Open doors and covers, and remove trays to access jam locations.
Jam number Jam location
Instructions
1
200
Standard 250-sheet tray and manual feeder
(Tray 1)
1
Open the front door. Inspect the area behind
the front door, and then remove any jams.
2
Open the fuser cover. Inspect the area under
the cover, and then remove any jams.
3
Close the front door.
4
Pull Tray 1 out. Inspect the tray area, and then
remove any jams.
5
Verify that the paper is loaded correctly.
6
Reinsert Tray 1.
2
201
Under the fuser
3
202
In the fuser
4
230
In the duplex
5
235
In the duplex
Note:
This jam number indicates that the
paper being used for a duplex print job is not
supported.
6
242 and 243
550-sheet tray
Note:
The 550-sheet tray is a part of the
optional 650-sheet duo drawer.
1
Pull the 550-sheet tray out, and then remove
any jams.
2
Reinsert the tray.
7
250
In the multipurpose feeder
1
Press the release latch to the left to release the
multipurpose feeder.
2
Inspect the multipurpose feeder, and then
remove any jams.
3
Close the multipurpose feeder.
Note:
You may need to open the 650-sheet duo
tray to remove jammed pages behind the
multipurpose feeder.
8
290
ADF
Open the ADF cover, and then remove the jam.
Clearing jams
109
Summary of Contents for d-Color MF920
Page 1: ...d Color MF920 d Color MF923 OPERATION GUIDE Code 556701en GB...
Page 89: ...3 Connect the answering machine or telephone to the adapter Faxing 89...
Page 174: ...3 Open the top door 4 Remove the right side cover Maintaining the printer 174...
Page 193: ...13 Insert the developer unit 14 Align and insert the imaging kit Maintaining the printer 193...
Page 248: ......


