Roll-to-Roll Media Installation
12/9/04
3-9
5.
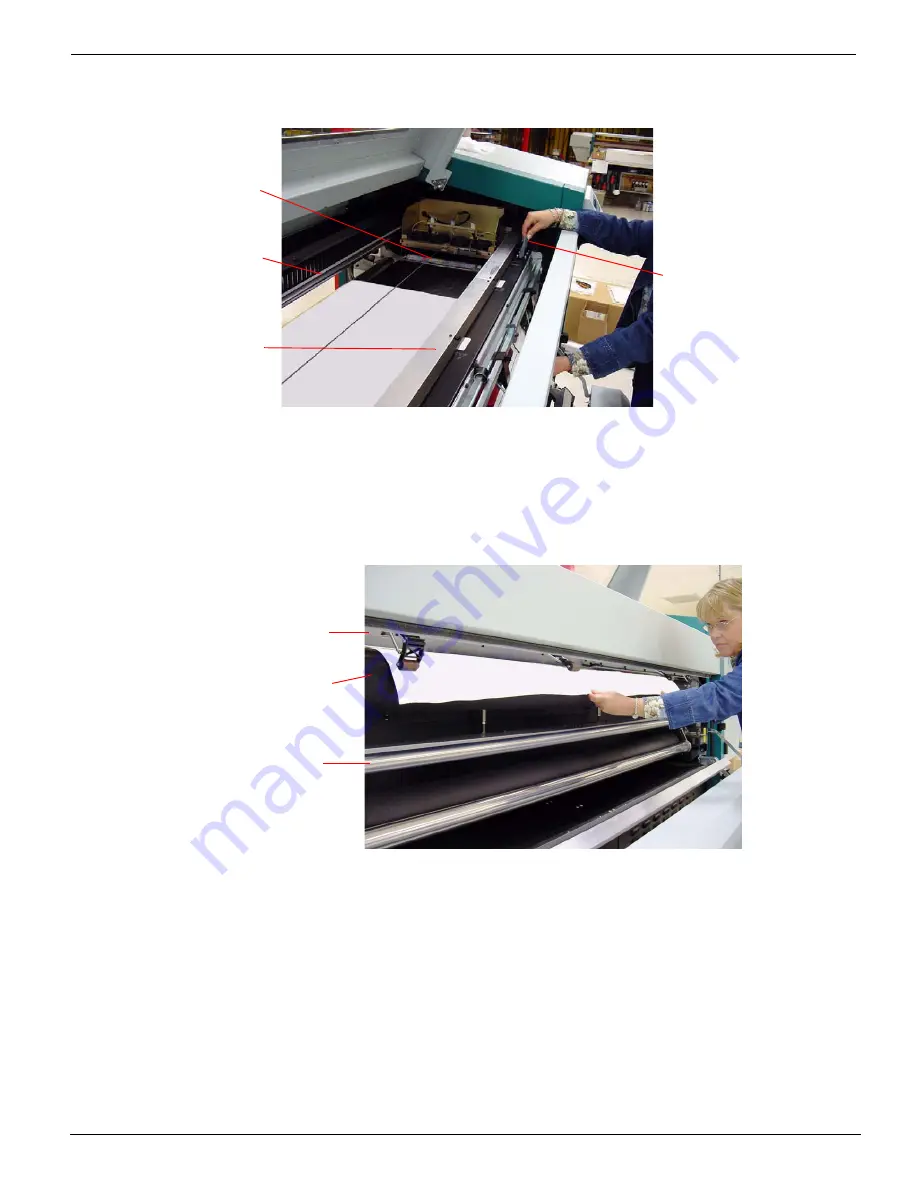
If not already open, gently open the top door completely, and pull the pinch roller
handle to disengage the rollers (see Figure 3-10).
Figure 3-10 Pinch Roller Handle
6.
From the front of the printer, push/pull the media towards the drive roll, making sure
it passes between the heat deflector and the drive roll (see Figure 3-11). Use the +/-
buttons to add more or less media during installation.
Figure 3-11 Feeding Media Over the Drive Roll
7.
Work the media over the front of the take-up dancer and around the back of the take-
up core (see Figure 3-12 on page 3-10)
.
Before proceeding to step 8, walk behind the
Drip Roller
Pinch
Roller
Handle
Rear
Carriage
Rail
Front
Carriage
Rail (Under
Aluminum
Strip)
Heat Deflector
Drive Roll
Take-up Dancer
Summary of Contents for Arizona 600
Page 2: ...Oc Display Graphics Systems 2004 All Rights Reserved...
Page 6: ...Oc Ordering Printer Supplies vi...
Page 34: ...Oc Media System 3 6 Figure 3 6 Secure the Mandrel Media Assembly...
Page 58: ...Oc Media System 3 30...
Page 110: ...Oc Printer Maintenance 5 20...
Page 118: ...Oc Error Messages and Troubleshooting 6 8...
Page 120: ...Oc Menus A 2 Figure A 1 Copies Reprints Menu...
Page 121: ...12 9 04 A 3 Figure A 2 Print Parameters Menu...
Page 122: ...Oc Menus A 4 Figure A 3 Test Prints Menu...
Page 123: ...12 9 04 A 5 Figure A 4 Maintenance Menu Part 1...
Page 124: ...Oc Menus A 6 Figure A 5 Maintenance Menu Part 2...
Page 126: ...Oc Menus A 8 Figure A 7 About Printer Menu...
Page 127: ...12 9 04 A 9 Figure A 8 Units Menu...
Page 128: ...Oc Menus A 10 Figure A 9 Set Clock Menu...
Page 129: ...12 9 04 A 11 Figure A 10 Ink Menu...
Page 130: ...Oc Menus A 12 Figure A 11 Configure I O Menu...
Page 137: ...12 9 04 B 7 Photo 2 Photo 3...
Page 138: ...Oc Printer Maintenance B 8 Photo 4...
Page 148: ...Oc Index Index 4...


