Switching On or Off
12/9/04
1-5
1.4
Switching On or Off
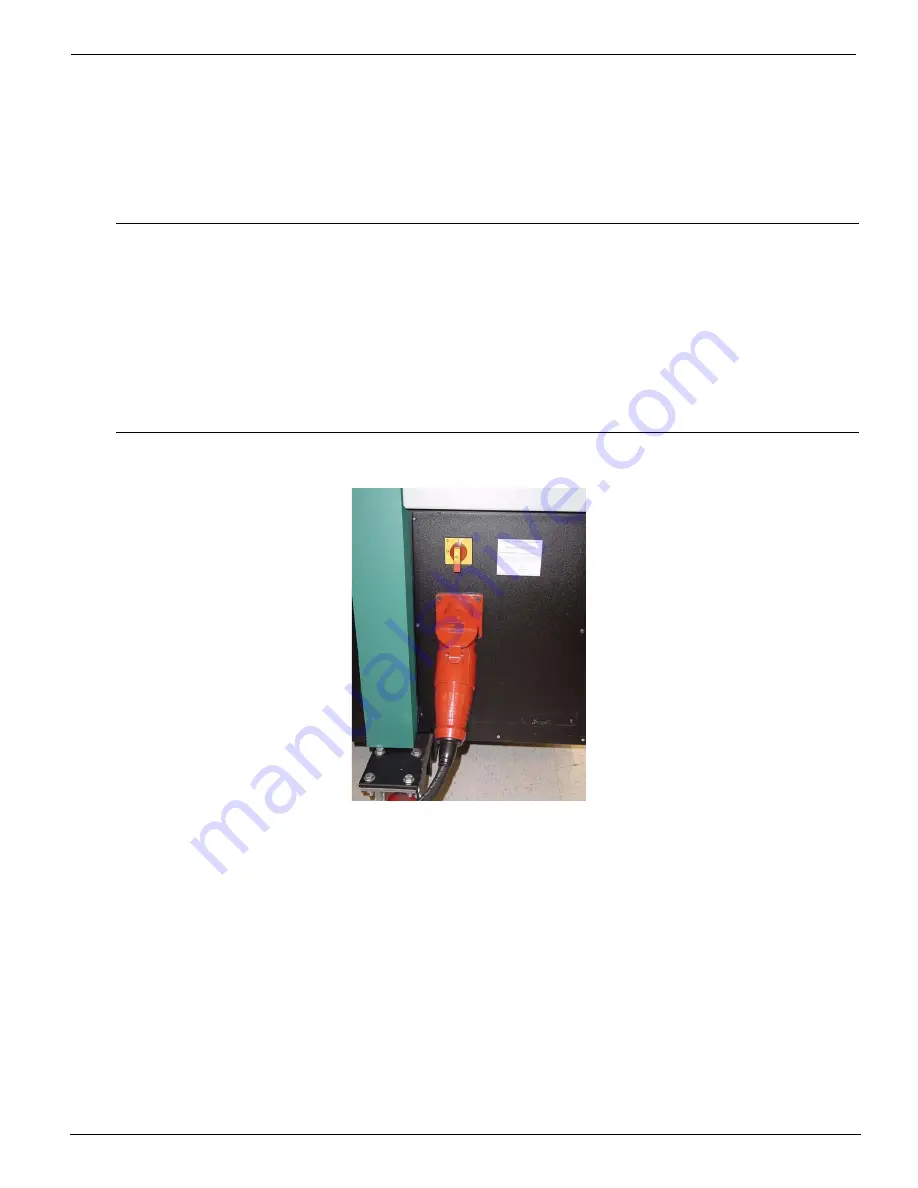
The printer is to be powered On/Off only by a trained and qualified service technician (see
Figure 1-2). Position the power cord so that it does not pose a hazard when someone walks
around or accesses the doors on the printer
Figure 1-2 Circuit Breaker Switch Location
1.5
Precautionary Measures
The battery back-up vacuum control option prevents ink from draining out of the reservoirs
for 48 to 72 hours if an AC power outage occurs. This back-up option is intended for
emergency
use only. If the printer will be without power for a longer period of time, all ink
must be flushed from the system. Contact your Customer Service representative to perform
this function.
The battery back-up unit power switch should always be in the ON (up) position to protect
the system and charge the battery. The battery should maintain the printer vacuum for 48
to 72 hours. It is normal for the vacuum pump to run continuously when the printer has
Important:
Full-time AC power is required to maintain negative pressure on the inkjet
heads. Without this pressure, ink will drain out of the heads until the ink
reservoirs are empty. If not rectified, permanent damage to the heads could
occur.
The printer may contain a battery back-up vacuum control option to
maintain negative pressure for approximately 48 to 72 hours. This vacuum
backup is intended for emergency use only during power outage.
Summary of Contents for Arizona 600
Page 2: ...Oc Display Graphics Systems 2004 All Rights Reserved...
Page 6: ...Oc Ordering Printer Supplies vi...
Page 34: ...Oc Media System 3 6 Figure 3 6 Secure the Mandrel Media Assembly...
Page 58: ...Oc Media System 3 30...
Page 110: ...Oc Printer Maintenance 5 20...
Page 118: ...Oc Error Messages and Troubleshooting 6 8...
Page 120: ...Oc Menus A 2 Figure A 1 Copies Reprints Menu...
Page 121: ...12 9 04 A 3 Figure A 2 Print Parameters Menu...
Page 122: ...Oc Menus A 4 Figure A 3 Test Prints Menu...
Page 123: ...12 9 04 A 5 Figure A 4 Maintenance Menu Part 1...
Page 124: ...Oc Menus A 6 Figure A 5 Maintenance Menu Part 2...
Page 126: ...Oc Menus A 8 Figure A 7 About Printer Menu...
Page 127: ...12 9 04 A 9 Figure A 8 Units Menu...
Page 128: ...Oc Menus A 10 Figure A 9 Set Clock Menu...
Page 129: ...12 9 04 A 11 Figure A 10 Ink Menu...
Page 130: ...Oc Menus A 12 Figure A 11 Configure I O Menu...
Page 137: ...12 9 04 B 7 Photo 2 Photo 3...
Page 138: ...Oc Printer Maintenance B 8 Photo 4...
Page 148: ...Oc Index Index 4...


