


24
5
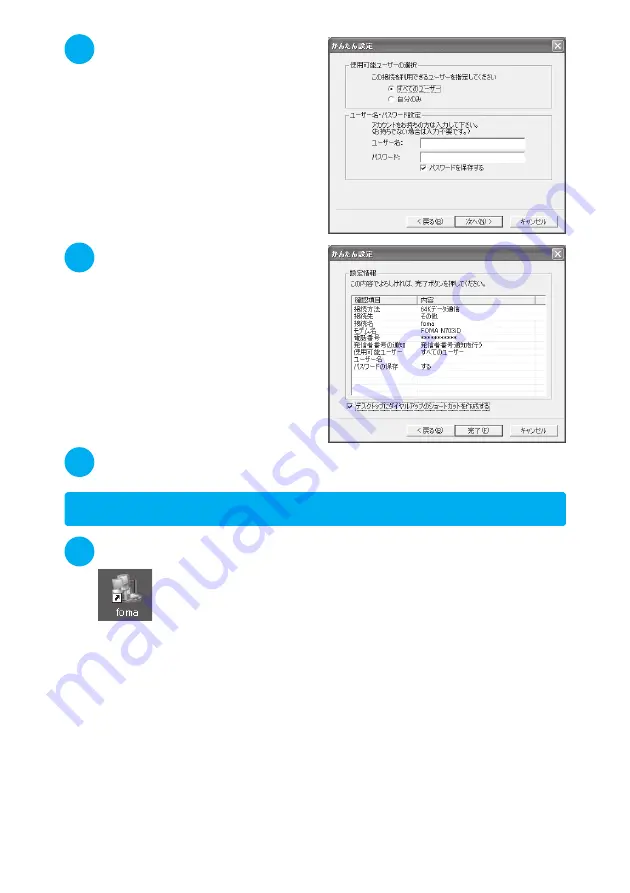
Specify a user name and
password, select the accessible
user and click “
次へ
” (Next)
When “
すべてのユーザー
” (All users) is
selected in the “
使用可能ユーザーの選択
”
(Selecting accessible user) column, the
connection setting is applied to all the users
registered in Windows.
When setting the user name and password,
input the correct, case-sensitive data provided
by the service provider.
6
Check the setting information
and click “
完了
” (Finish)
The contents of the settings are listed. Make
sure that all settings are correct.
Checking “
デスクトップにダイヤルアップの
ショートカットを作成する
” (Add dial-up
shortcut on desktop) automatically creates a
shortcut icon.
To change any setting, click “
戻る
” (Back).
7
Click “OK”
Execute communication.
→
p.24
Executing Set Data Communication
1
Double-click the connection icon on the desktop
If the connection icon does not appear on the desktop, use the following procedure:
Windows XP
Open “
スタート
” (Start)
→
“
すべてのプログラム
” (All Programs)
→
“
アクセサリ
” (Accessories)
→
“
通信
” (Communication)
→
“
ネットワーク接続
” (Network connection)
→
Open the access point
Windows 2000
Open “
スタート
” (Start)
→
“
プログラム
” (Programs)
→
“
アクセサリ
” (Accessories)
→
“
通信
”
(Communication)
→
“
ネットワークとダイヤルアップ接続
” (Network and dialup connection)
→
Open the access point
Summary of Contents for FOMA N703iD
Page 110: ......
Page 136: ......
Page 162: ......
Page 180: ......
Page 206: ......
Page 246: ......
Page 260: ......
Page 268: ......
Page 308: ......
Page 354: ......
Page 372: ......
Page 415: ...413 Appendix Using the FOMA Terminal with External Devices Troubleshooting Memo...
Page 416: ...414 Appendix Using the FOMA Terminal with External Devices Troubleshooting Memo...
Page 417: ...415 Appendix Using the FOMA Terminal with External Devices Troubleshooting Memo...
Page 418: ...416 Appendix Using the FOMA Terminal with External Devices Troubleshooting Memo...
Page 419: ...417 Index Quick Manual Index 418 Quick Manual 428...
Page 496: ...Kuten Code List...


