


168
Camera
Photo mode checking screen
1
Photo mode checking screen (P.166)
p
(FUNC) Select any item:
Save
……
Saves the image to the folder specified in
“Select to save”.
Mirror save
……
Saves the mirrored image (inverted
left-right) to the folder specified in “Select to save”.
Compose message
……
“Composing an i-mode mail
message or Deco-mail message using the still image”
→
P.170
Edit image
……
Adds a frame or effect to the image.
“Editing Images”
→
P.275
Set as display
……
Sets the still image to the standby
screen, etc.
■
To specify images for screens such as standby,
dialing or incoming call
Select a screen
Also select the display method for the standby
screen.
■
To specify images for videophone-related
screens (except VP Dialing or VP Calling)
Select a screen Check the image
d
(Set)
“YES”
Change frame
……
“Shooting framed images”
→
P.170
Mirror display
⇔
Normal display
……
Switches the
checking display between the mirror display and the
normal display.
Display size
……
Specifies the display setting for
images smaller than QCIF (176 × 144).
Actual size
(default)
……
Displays the image in the
actual size.
Fit in display
……
Enlarges the image to the
display size.
Select to save
(default: “Camera” of Phone)
……
Sets
the folder to save the shot image.
File restriction
(default: File unrestricted)
……
Specifies
whether to allow the redistribution of the shot image.
“File restriction”
→
P.167
Cancel
……
Deletes the photographed image and
returns to the photo mode shooting screen.
Shooting continuously
<Continuous shooting>
Default setting
Size: Screen (240 × 345) Shot interval: 0.5
seconds Shot number: 5
You can shoot up to 20 still images continuously.
There are two types of continuous shooting: A-
Continuous shooting (Auto) and M-Continuous
shooting (Manual).
●
A-Continuous shooting enables you to set the
number of images and the interval. Once you release
the shutter, the FOMA terminal automatically shoots
images at the set interval.
●
M-Continuous shooting enables you to shoot images
for the set number, releasing the shutter for one by
one.
●
You can shoot the images in the following image size:
CIF (352 × 288), Screen (240 × 345), Stand-by (240
× 320), QCIF (176 × 144) or SubQCIF (128 × 96).
●
You can enjoy the continuously shot images as an
animation after putting them into the Original
animation.
●
Folding the FOMA terminal terminates the continuous
shooting.
1
Photo mode shooting screen (P.166)
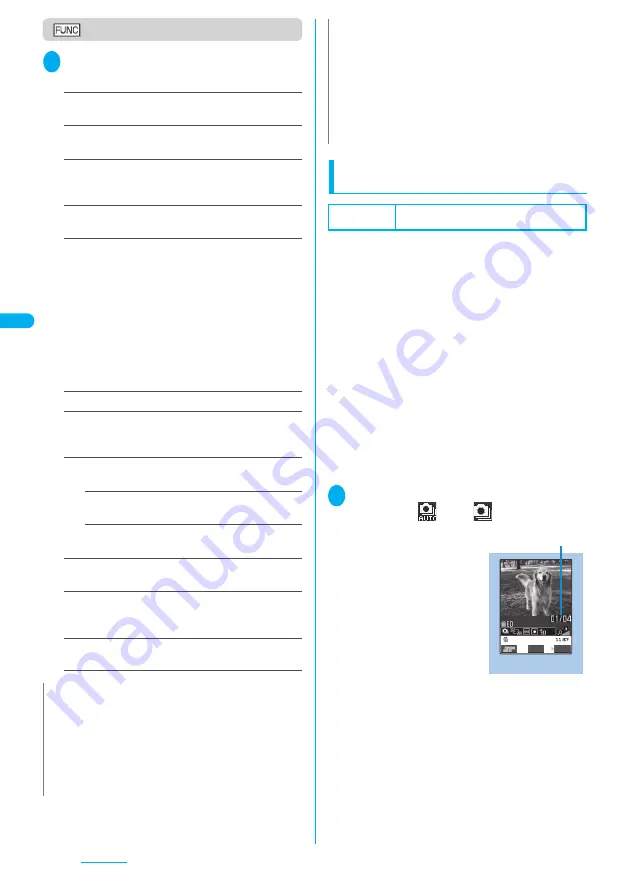
1
“
” or “
”
The “Continuous shooting screen” appears.
N
<Edit image>
z
Selecting “Edit image” changes the display to the Normal
display.
z
You cannot edit the SXGA image (1,280 × 960).
<Set as display>
z
You cannot set the SXGA image (1,280
×
960). If the file size
exceeds 100K bytes, the image cannot be set other than
stand-by screen and wake-up display.
z
The still images to be set to the stand-by screen are saved to
the folder set in “Select to save”. However, when set to
“microSD”, the images are saved to the Camera folder under
My pictures of the FOMA terminal (Phone) (the images is not
saved on the microSD memory card).
<Mirror display>
z
Images shot by the front camera are displayed mirrored
(inverted left-right). Selecting “Normal display” means what
you see is what you get.
N
Continuous shooting
(Ex. manual)
FUNC
Record
Shot number/Max. shot count
Function menu P.167
Summary of Contents for FOMA N703iD
Page 110: ......
Page 136: ......
Page 162: ......
Page 180: ......
Page 206: ......
Page 246: ......
Page 260: ......
Page 268: ......
Page 308: ......
Page 354: ......
Page 372: ......
Page 415: ...413 Appendix Using the FOMA Terminal with External Devices Troubleshooting Memo...
Page 416: ...414 Appendix Using the FOMA Terminal with External Devices Troubleshooting Memo...
Page 417: ...415 Appendix Using the FOMA Terminal with External Devices Troubleshooting Memo...
Page 418: ...416 Appendix Using the FOMA Terminal with External Devices Troubleshooting Memo...
Page 419: ...417 Index Quick Manual Index 418 Quick Manual 428...
Page 496: ...Kuten Code List...


