45
[Default] 0000/00/00 [
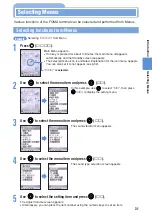
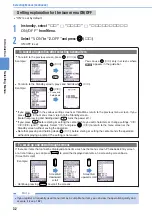
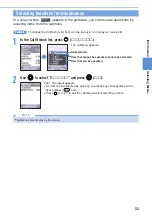
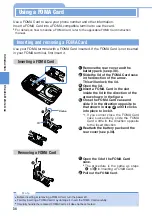
日
day] --:--
Set Clock
Setting the Date and Time
Introduction
C
hecks
Before
Use
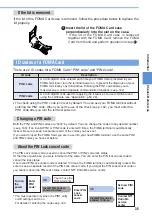
Set the date and time. If you do not set the date and time, following functions are not
available, including:
•
Standby screen (seasonal image, calendar) (see p.144)
•
Auto Power On (see p.173)
•
Auto Power Off (see p.174)
•
Alarm Time (see p.174)
•
Schedule (see p.177)
•
Software Update (see p.272)
•
Executing i-
α
ppli DX (see “Application” p.63)
•
Auto Start of i-
α
ppli (see “Application” p.71)
•
Using
Memory Stick Duo (see “Application” p.280)
In addition to the above, when the date and time are not set, they are not displayed for
the redial data item, call history item, recorded message and the title or shooting time
of still images taken with the camera, etc.
2
Set the date and time.
You can enter a date from January 1st 2004 to December 31, 2023. When you set the date, the
day of the week is filled in automatically on the Standby screen.
Set the time in 24-hour system (00:00 to 23:59).
1
Select the “
日付
” field and press
(
選択
).
2
Use
to
to enter the current year (4-digits), month (2-digits) and day (2-digits)
and press
(
確定
).
3
Select the “
時刻
” field and press
(
選択
).
4
Use
to
to enter the current hour (2-digits) and minute (2-digits) and press
(
確定
).
• When entering the month, day and time, 1-digit numbers (1 to 9) must be proceeded by a
0 (01 to 09).
• Use
to adjust the amount of time.
• If you make a mistake, use
,
(
),
or
to move the highlight to the
number you want to set again.
3
Press (
設定
).
The date and time are set and the clock starts from 00 second of the input date and time.
△ △
•
Temporarily removing the battery for replacement does not cause the date and time data to be erased.
However, if the battery is removed from the phone or you leave the battery discharged for more than 1 month,
the date and time data will be lost. In such a case, you must recharge and set the date and time again.
•
If you have made a reservation to Software Update, you cannot change the date and time.
N o t e
1
In standby, select “
設定
”
“
時計・時刻
”
“
日付時刻設定
” from Menu.
▲
▲
Summary of Contents for Foma D900i
Page 1: ...Manual for 04 5 IE ...
Page 25: ...23 Introduction 23 ...
Page 48: ...46 ...
Page 49: ...Basic Operations 47 ...
Page 125: ...Advanced Operations 123 ...
Page 202: ...200 ...
Page 203: ...201 Network Services ...
Page 231: ...Character Entry 229 ...
Page 255: ...Appendix 253 ...

