Max 8/16 and T1/E1 User’s Guide – Chapter 1
Page 9
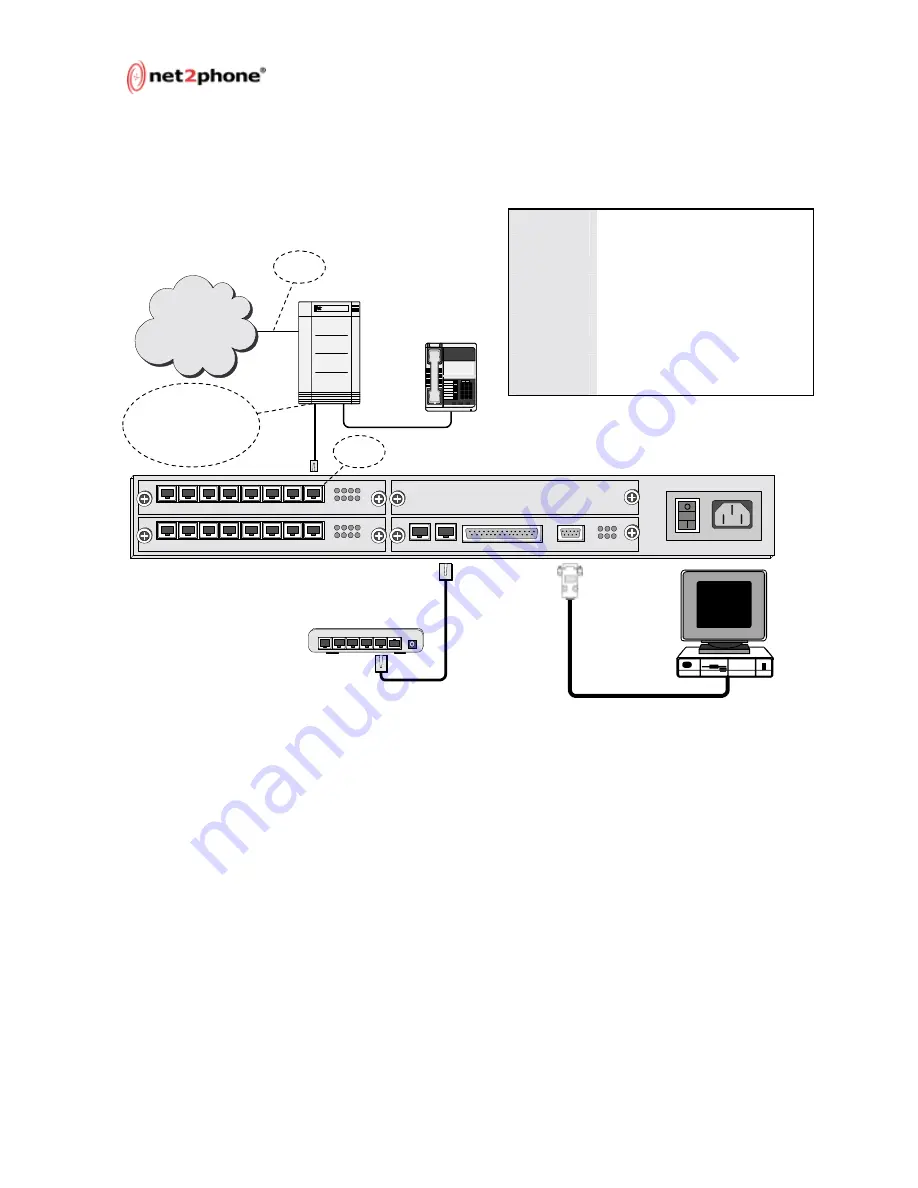
Connecting the Max’s FXO Ports to a PBX
Figure 5 – Connecting the Max’s FXO Ports to a PBX
When you have finished connecting the Max’s FXS and FXO ports as
illustrated above, plug the unit into a power outlet and turn it on.
Your Net2Phone Max 8/16 and T1/E1 hardware setup is now
complete. The next step is to configure the unit to communicate
with your LAN so that you can browse the Max Web Manager.
Connecting the Max to a Fax Machine
Connecting your Max 8/16 to a fax machine is as simple as
connecting the fax machine’s RJ-11 cable to an FXS port on the Max
8/16. To place a fax call, just use the fax machine as usual: dial the
desired number and then send the fax.
If you are connecting the T1/E1 to a fax machine, you must connect
the fax’s RJ-11 cable to an analog line on the PBX. Contact Reseller
Support for more details.
PWR
AC 110-240V
CONSOLE
SERIAL
LAN
E1/T1
MPU
BLK
AVU
1 2 3 4
5 6 7 8
1
2
3
4
5
6
7
8
SYN LRX SRX
OPR LTX STX
AVU
1 2 3 4
5 6 7 8
1
2
3
4
5
6
7
8
Hub
or
Switch
PBX
Switch
Power
4
3
2
1
Uplink
5
Connects to analog line
card, SLIC (SLIB or SLT)
card, FXS card, or station
card of PBX
1
2
3
4
5
6
7
8
9
*
8
#
PBX
Telephone
PSTN
FXO
Port
CO Line
PBX:
Private Branch Exchange
PSTN:
Public Switched Telephone
Network
SLIC/SLIB:
Subscriber Line Interface
Card/Board
SLT:
Single Line Terminal or
Telephone (analog telephone)
Trunk or
CO Line:
Line from Central Office switch


