8-28 System Upgrade
Installing CPU (Model with Water-cooling Kit)
Follow the steps below to install a CPU.
Information provided here is for the 320Fa-M and 320Fa-MR models, which have a water-cooling kit
installed.
1.
Shut down the OS.
The server is automatically powered off.
2.
Unplug the power cords.
3.
Remove the CPU/IO module referring to page 8-14.
4.
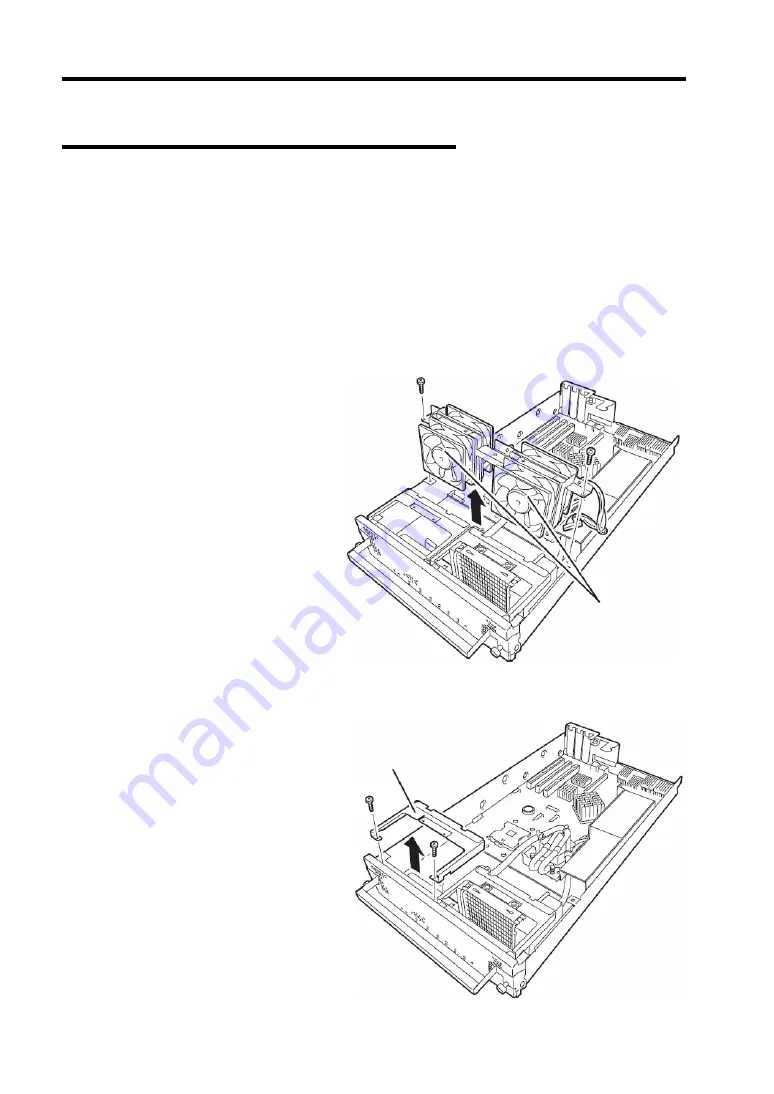
Remove the two screws securing the
cooling fan unit, remove the cable and
then remove the cooling fan unit.
5.
Remove the two screws securing the
water-cooling bracket, and remove the
water cooling bracket.
Cooling fan unit
Water-cooling bracket
Summary of Contents for Express5800/320Fa-L
Page 2: ......
Page 19: ...Precautions for Use 1 3 Rack model Front Rear...
Page 45: ...General Description 2 13 Rack model with the front door open...
Page 48: ...2 16 General Description 27 HCS1 error LED See page 2 29 28 Heat warning LED See page 2 29...
Page 50: ...2 18 General Description Rear View Tower model Rack model...
Page 74: ...2 42 General Description This page is intentionally left blank...
Page 89: ...Windows Setup and Operation 3 15 7 Configure the mirror of the extended volume...
Page 107: ...Windows Setup and Operation 3 33 4 The confirmation dialog box appears Click Yes button...
Page 114: ...3 40 Windows Setup and Operation This page is intentionally left blank...
Page 141: ...System Configuration 4 27 Exit Move the cursor onto Exit to display the Exit menu...
Page 265: ...Installing and Using Utilities 5 65 Sample screen of Server Maintenance Utility...
Page 306: ...6 14 Maintenance This page is intentionally left blank...
Page 400: ...8 44 System Upgrade This page is intentionally left blank...
Page 404: ......
Page 405: ......


