2-36 General Description
5.
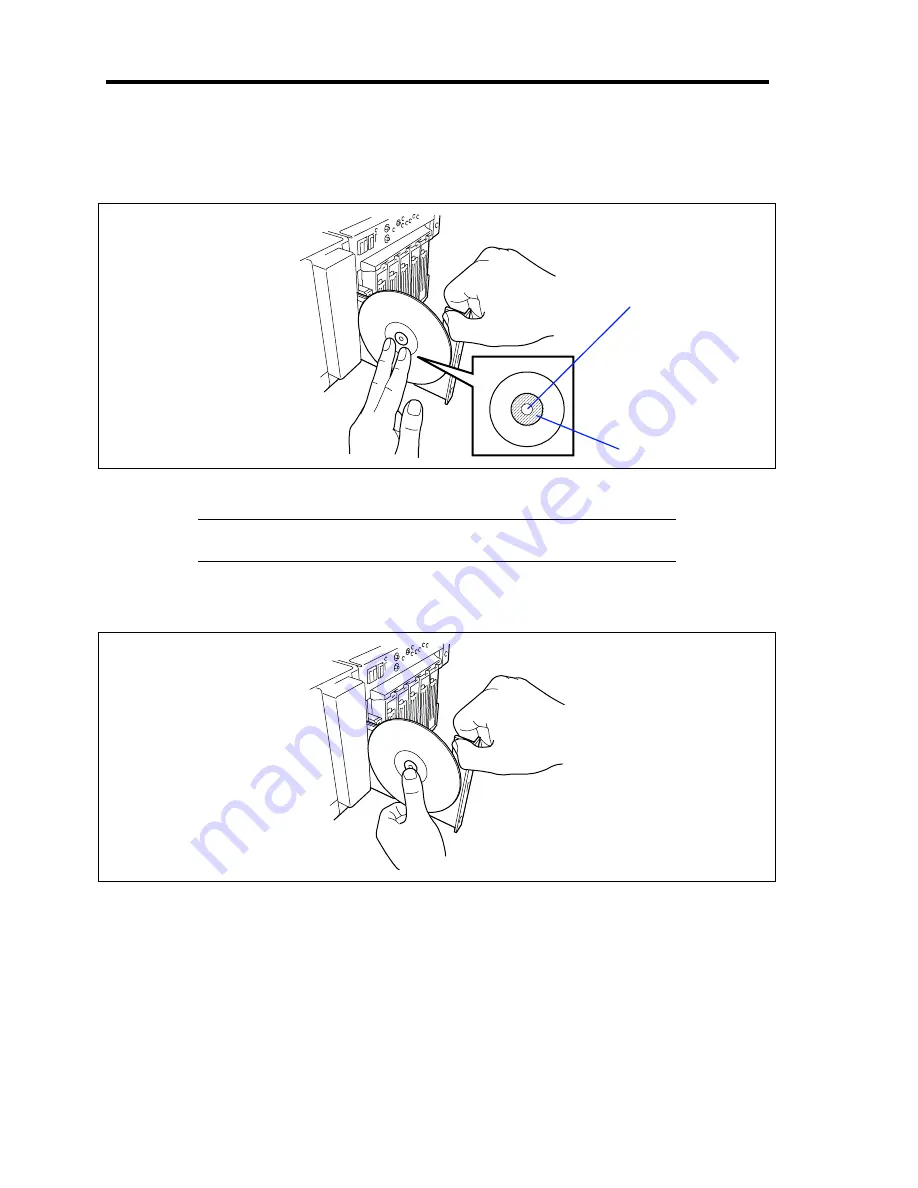
As shown in the figure below, hold the tray with a hand and press the CD-ROM with
fingers of another hand to make the hole of the CD-ROM fit to the rotor at the center of
the tray.
6.
Push the front of the tray lightly to retract it into the drive.
IMPORTANT:
If a noisy sound in driving the CD-ROM drive occurs
after setting a CD-ROM, set it again correctly.
To take out the CD-ROM from the CD-ROM drive, press the Eject button in the similar way in
setting the CD-ROM to make the tray go out.
If the access lamp is lit in orange, the CD is being accessed. Confirm that the access lamp is not lit
before pressing the Eject button.
As shown in the figure below, hold the tray with a hand and take the end of the CD-ROM lightly by
the fingers of another hand with the suppression of the rotor at the center of the tray to remove the
CD-ROM from the tray.
Rotor
Press this part of
CD-ROM.
Summary of Contents for Express5800/140Rc-4
Page 10: ...iv This page is intentionally left blank ...
Page 34: ...1 18 Notes on Using Your Server This page is intentionally left blank ...
Page 93: ...Setting Up Your Server 3 21 21 Install the front bezel Now the installation is completed ...
Page 110: ...3 38 Setting Up Your Server This page is intentionally left blank ...
Page 196: ...5 40 Installing the Operating System with Express Setup This page is intentionally left blank ...
Page 286: ...8 48 Troubleshooting This page is intentionally left blank ...
Page 360: ...9 74 Upgrading Your Server This page is intentionally left blank ...
Page 362: ...A 2 Specifications This page is intentionally left blank ...
Page 400: ...F 4 Product Configuration Record Table This page is intentionally left blank ...


