8-34 System Upgrade
Installing PCI Board
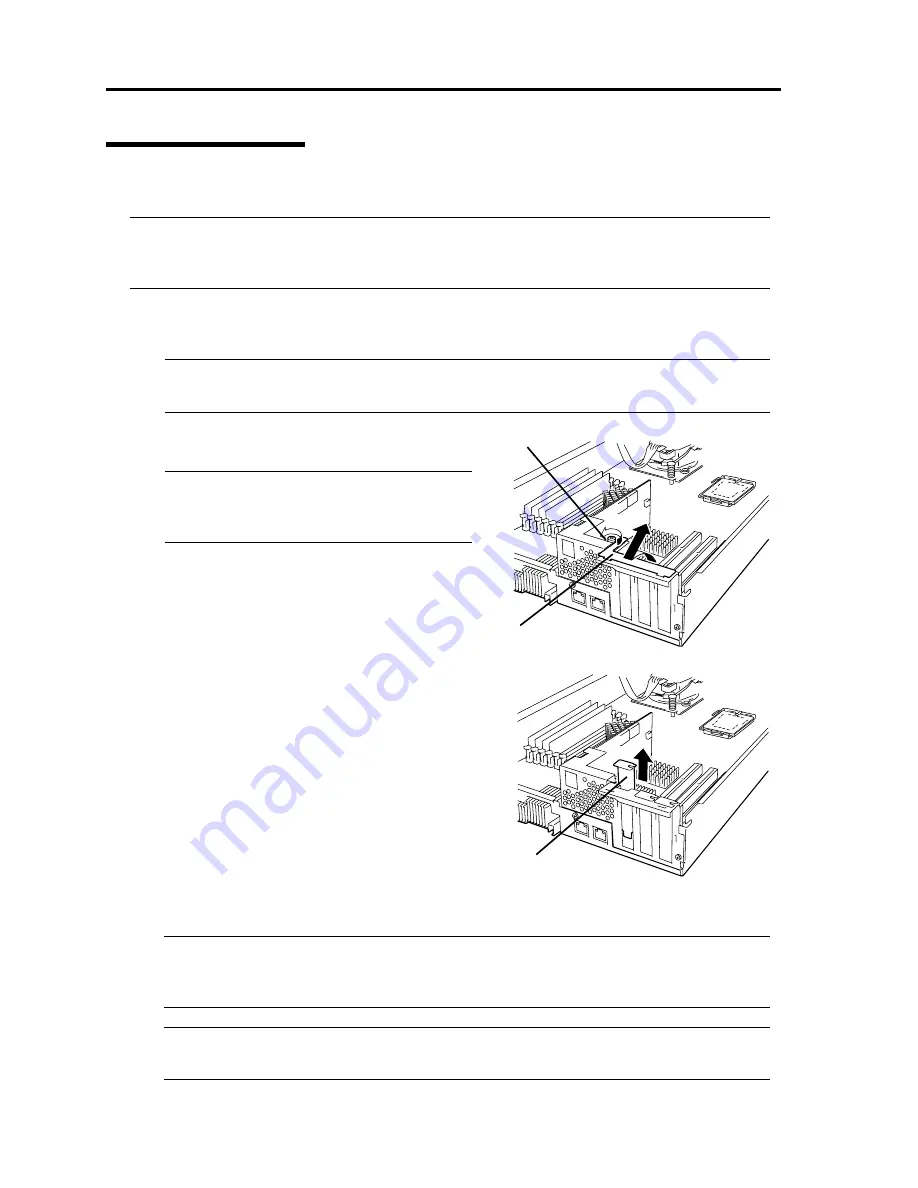
Follow the procedure below to install the board to be connected to the PCI board slot.
TIPS:
To install the PCI board, make sure the shape of the board connector matches with the shape of
the PCI board slot connector.
1.
Remove the CPU/IO module referring to the page 8-14.
2.
Identify the slot to which you want to install a PCI board and remove the connector cap.
IMPORTANT:
Carefully keep the removed connector cap.
3.
Remove the PCI bracket by loosening the screw
and remove the slot cover of an expansion slot.
IMPORTANT:
Keep and store the removed slot cover with
care.
㩷
4.
Remove the connector cap installed in the slot in which the board is installed.
TIPS:
To install the PCI board, make sure the shape of the board connector matches with the shape
of the PCI board slot connector.
IMPORTANT:
Keep and store the removed connector cap with care.
Screw
Bracket
Expansion
slot cover
Summary of Contents for EXP320A
Page 15: ......
Page 22: ...Precautions for Use 1 3 Rack model Front Rear ...
Page 24: ...Precautions for Use 1 5 Water Cooling kit ...
Page 52: ...Precautions for Use 1 33 ء ข Δ ਢ ڼط ข س ऱధჾࢨਚᎽΔ ڇঁܛ অଥཚၴփՈ گ ፂଥ၄ ش Ζ ...
Page 68: ...General Description 2 13 Rack model with the front door open ...
Page 73: ...2 18 General Description Rear View Tower model ᴾ Rack model ...
Page 110: ...Windows Setup and Operation 3 15 7 Configure the mirror of the extended volume ...
Page 128: ...Windows Setup and Operation 3 33 4 The confirmation dialog box appears Click Yes button ᴾ ᴾ ...
Page 164: ...System Configuration 4 27 Exit Move the cursor onto Exit to display the Exit menu ...
Page 225: ...4 88 System Configuration This page is intentionally left blank ᴾ ...
Page 286: ...Installing and Using Utilities 5 61 Sample screen of Server Maintenance Utility ...
Page 327: ...6 14 Maintenance This page is intentionally left blank ...
Page 381: ...7 54 Troubleshooting This page is intentionally left blank ...
Page 424: ...Specifications A 3 ...
Page 425: ......


