Installing and Using Utilities 5-71
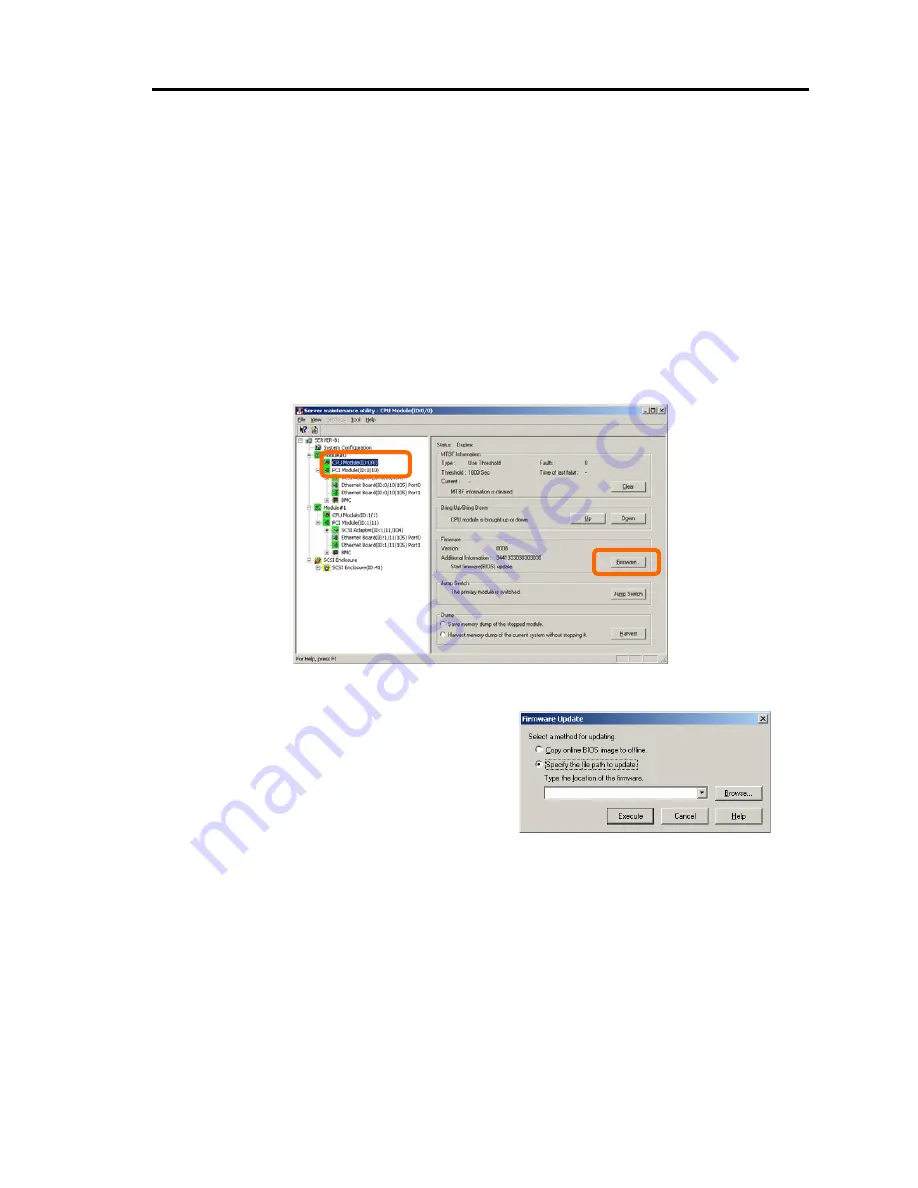
Procedure in Server Maintenance Utility
1.
Save the image data of the update firmware in a desired directory of the server.
Write down the path to the directory in which the image data is saved.
2.
Select the target component with the Server Maintenance Utility.
3.
Check the current state of the target component with the LEDs. If the component is operating,
stop the component. Stop the CPU module and then stop the PCI module.
4.
Click the [Firmware…] button for the target component.
Sample screen of Server Maintenance Utility
[CPU Module]
5.
Select [Specify new firmware for update],
enter the directory where the firmware to
update is stored (the directory you wrote down
in step 1) and the file name of the image data
into the input box, and click the [Execute]
button.
The server will update the firmware.
6.
Check the update result with the event log.
When using the Server Maintenance Utility
screen to check the update result, the tree view status is not updated automatically. Select
“Refresh” from the display menu or use the tool button, to update the tree view status.
7.
After the BIOS update for a single CPU module is completed, click [Jump Switch] in [Jump
Switch].
The module completely updated is started and the module under operation is stopped.
Switching boards should be performed only by “Update Firmware.”
㩷
The keyboard and
mouse may not function for a few minutes while switching boards.
If the module is not switched successfully, by setting “Operation at the time of newer version
BIOS detection” of GeminiEngine Monitor Tool, BIOS may be updated for the rest of the
Summary of Contents for EXP320A
Page 15: ......
Page 22: ...Precautions for Use 1 3 Rack model Front Rear ...
Page 24: ...Precautions for Use 1 5 Water Cooling kit ...
Page 52: ...Precautions for Use 1 33 ء ข Δ ਢ ڼط ข س ऱధჾࢨਚᎽΔ ڇঁܛ অଥཚၴփՈ گ ፂଥ၄ ش Ζ ...
Page 68: ...General Description 2 13 Rack model with the front door open ...
Page 73: ...2 18 General Description Rear View Tower model ᴾ Rack model ...
Page 110: ...Windows Setup and Operation 3 15 7 Configure the mirror of the extended volume ...
Page 128: ...Windows Setup and Operation 3 33 4 The confirmation dialog box appears Click Yes button ᴾ ᴾ ...
Page 164: ...System Configuration 4 27 Exit Move the cursor onto Exit to display the Exit menu ...
Page 225: ...4 88 System Configuration This page is intentionally left blank ᴾ ...
Page 286: ...Installing and Using Utilities 5 61 Sample screen of Server Maintenance Utility ...
Page 327: ...6 14 Maintenance This page is intentionally left blank ...
Page 381: ...7 54 Troubleshooting This page is intentionally left blank ...
Page 424: ...Specifications A 3 ...
Page 425: ......


