Windows Setup and Operation 3-23
(4)
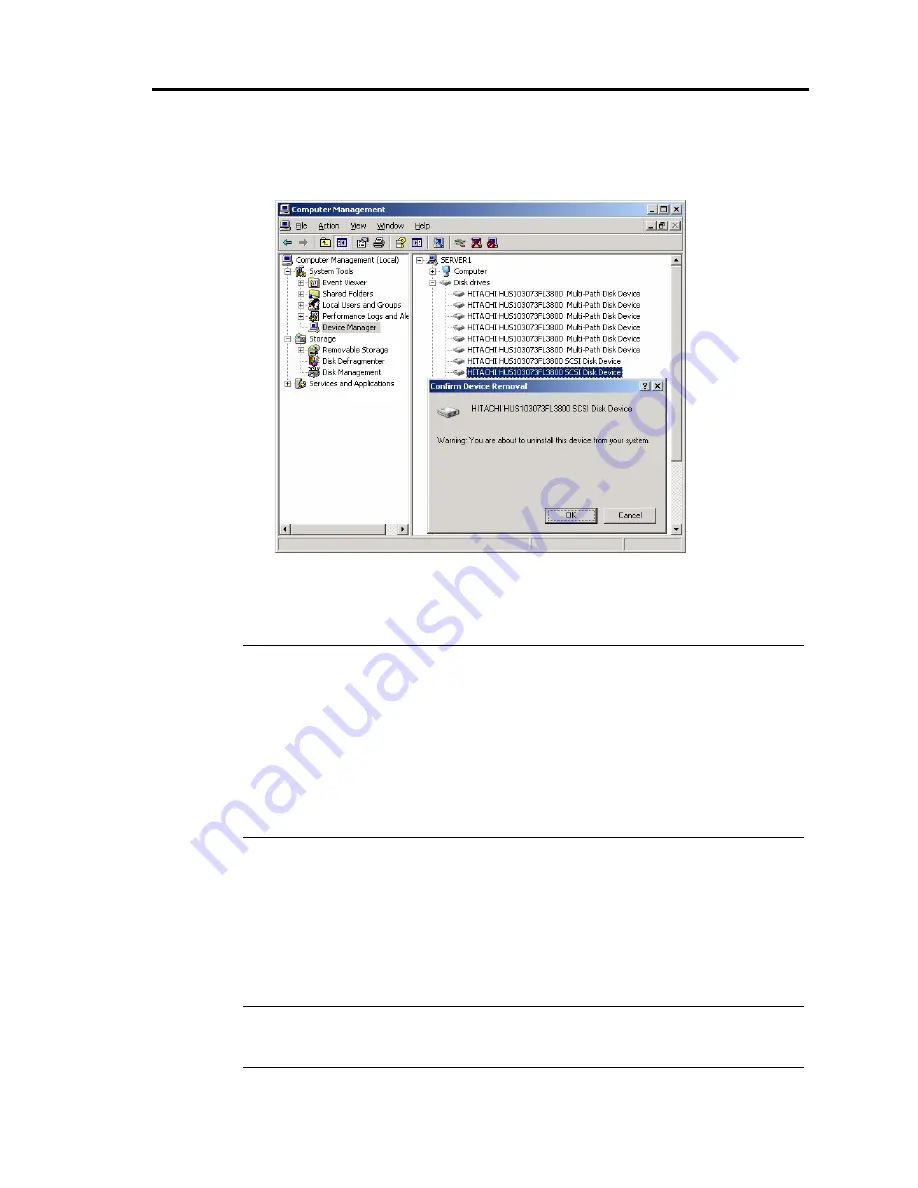
Remove the disk.
Right-click the hard disk to be removed and select
㵰
Remove Disk.
㵱
When the “Confirm Device Removal” message is displayed, confirm the device name
(the hard disk name) and click [OK]. (You do not need to remove the item of
“Multi-Path Disk Device.”)
TIPS:
While the system is in the dual configuration, the FT status LED on the chassis
illuminates green. However, when the removal of the disk to be removed is instructed,
the server judges the dual configuration of the disk is no longer available after
removing one of the logical disks, and the FT status LED may go off. In such a case,
removing the other disk with the same target ID makes the LED illuminate green
again.
If the “Remove Disk” is performed at the same time as the disk access, the disk is
recognized as an error and the LED of the disk may illuminate amber. Replace the
target disk.
After performing the operations above, the status of the disk to be removed, whose
removal is instructed, becomes “Missing” on the [Disk Management] if the disk is
accessed. If the disk still contains a volume, it is recognized as “Failed” or “Failed
Redundancy.” Perform “Delete Volume” to the simple volume in the disk of the
“Missing” status. If the mirror volume is in the “Failed Redundancy” status, remove the
mirror volume on the disk to be removed by performing “Remove Mirror,” and then
select the disk to be replaced and run “Remove Disk.”
TIPS:
To mount the replaced disk, perform “Rescan Disk” on the [Disk Management]
window.
Summary of Contents for EXP320A
Page 15: ......
Page 22: ...Precautions for Use 1 3 Rack model Front Rear ...
Page 24: ...Precautions for Use 1 5 Water Cooling kit ...
Page 52: ...Precautions for Use 1 33 ء ข Δ ਢ ڼط ข س ऱధჾࢨਚᎽΔ ڇঁܛ অଥཚၴփՈ گ ፂଥ၄ ش Ζ ...
Page 68: ...General Description 2 13 Rack model with the front door open ...
Page 73: ...2 18 General Description Rear View Tower model ᴾ Rack model ...
Page 110: ...Windows Setup and Operation 3 15 7 Configure the mirror of the extended volume ...
Page 128: ...Windows Setup and Operation 3 33 4 The confirmation dialog box appears Click Yes button ᴾ ᴾ ...
Page 164: ...System Configuration 4 27 Exit Move the cursor onto Exit to display the Exit menu ...
Page 225: ...4 88 System Configuration This page is intentionally left blank ᴾ ...
Page 286: ...Installing and Using Utilities 5 61 Sample screen of Server Maintenance Utility ...
Page 327: ...6 14 Maintenance This page is intentionally left blank ...
Page 381: ...7 54 Troubleshooting This page is intentionally left blank ...
Page 424: ...Specifications A 3 ...
Page 425: ......


