


9-44 Upgrading Your Server
18.
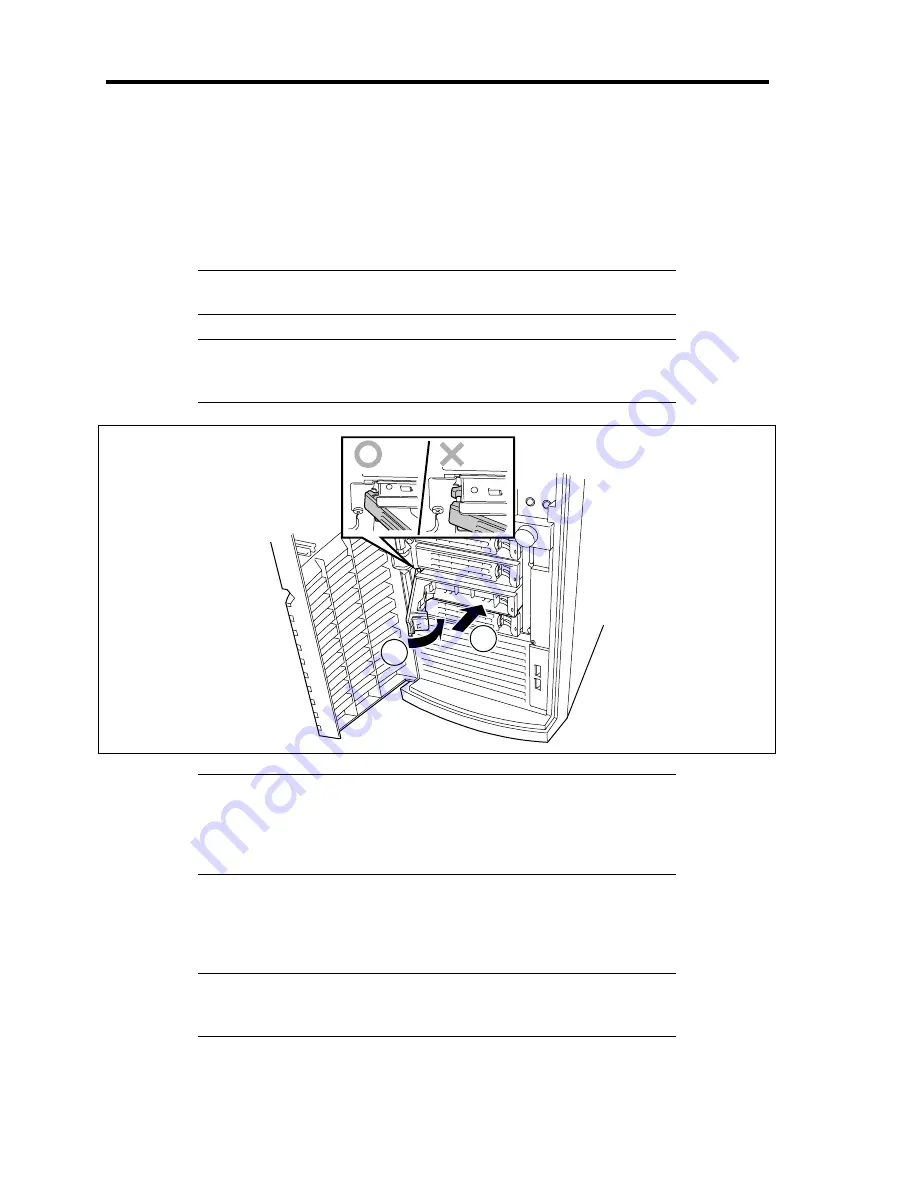
Install the hot-plug SATA hard disk drives in the HDD cage.
Fully open the lever of the hard disk drive and insert the drive into the HDD cage until it
hits the depth of HDD cage.
After the hard disk drive is fully inserted into the cage, close the lever to fix the drive. (A
click occurs when it is locked.)
IMPORTANT:
Use the hard disk drive that is authorized by NEC.
Consult with your service representative for available hard disk drive.
NOTE:
Make sure of the orientation of the hard disk drive tray before
inserting the drive. See the figure below. Also make sure that the hooks
of the hard disk drive are engaged with the frame of the HDD cage.
1
2
NOTE:
The slots of the HDD cage contain trays without hard disk
drive. To install the hard disk drive, first remove the tray according to
the removal procedure described later.
Install a hard disk drive tray to the vacant slot of the cage to keep the
cooling effect of the server.
To remove the hard disk drive carrier, push the green tab on the lever and open the lever
toward you until it stops. Then, the hard disk drive tray is unlocked.
Securely hold the tray and the lever and insert the tray straight into the HDD cage.
IMPORTANT:
Removing more than one hard disk drive while the
server is powered on destroys the logical disk. Remove or replace the
hard disk drive one by one.
19.
Close the front mask.
Summary of Contents for EXP200
Page 162: ...5 56 Installing the Operating System with Express Setup This page is intentionally left blank ...
Page 196: ...6 34 Installing and Using Utilities This page is intentionally left blank ...
Page 208: ...7 12 Maintenance This page is intentionally left blank ...
Page 300: ...10 14 Internal Cabling Diagrams This page is intentionally left blank ...
Page 304: ...A 4 Specifications This page is intentionally left blank ...
Page 370: ...G 4 Product Configuration Record Table This page is intentionally left blank ...


