


•
shorted to positive: disconnect the probe connector and check the sensor correct resistance:
replace the sensor if not OK; if it is OK, restore the cable harness.
•
circuit is open, shorted to negative: check the continuity from probe connector (PIN 3 and
4) towards the probe: if not OK, replace the probe; if it is correct, check the sensor connector
and the Marelli control unit connector. If not OK, restore. If OK, and with key set to ON and
sensor connector disconnected, check if there is battery voltage at PIN 4: se non ok verificare
cavo rosso/nero (lato cablaggio) tra connettore sonda e relè iniezione secondario (n°37 dello
schema elettrico, posizione lato sinistro anteriore del motociclo, primo relè a sinistra vicino
alla bobina, VERIFICARE comunque l'identificazione del relè con il colore dei cavi), se pre-
senti anche errori bobine e iniettori verificare il relè stesso e la sua linea di eccitazione e
potenza; if there is voltage at PIN 4, check the white cable ground insulation, cable harness
side (PIN 3): if it is not OK, restore the cable harness. If OK, check continuity of the white
cable, cable harness side (between PIN 3 of the sensor connector and PIN 11 of the BLUE
connector) and restore the cable harness.
LOGIC ERRORS
Left lambda sensor P0134-
voltage without variation.
Error cause
•
An abnormal behaviour of the voltage at PIN 22 of the BLUE connector has been detected:
the voltage, that should vary over time, keeps a constant value instead.
Troubleshooting
•
check circuit continuity of the lambda sensor connector (PIN 1 PIN2) toward the probe:
replace the probe if there is no continuity; if there is continuity, check the sensor connector
and the Marelli control unit connector: If not OK, restore. If OK, check continuity between
the BLUE connector PIN 22 and PIN 32 and restore the cable harness.
ELECTRICAL ERRORS
Right lambda sensor P0136
- Shorted to positive.
Error cause
•
Excessive voltage (battery voltage) has been detected at PINS 21 and 31 of the BLUE
connector.
Troubleshooting
•
shorted to positive: con chiave ON, scollegare il connettore del sensore e misurare la ten-
sione al PIN 1 lato cablaggio (cavo viola/giallo): if there is voltage (5 or 12 V), restore the
cable harness; it there is no voltage, measure voltage at PIN 2, cable harness side, (brown
cable) and if there is voltage, restore the cable harness; if there is no voltage, replace the
lambda sensor.
Right lambda sensor heating P0141
- shorted to positive / open circuit, shorted to negative.
Error cause
Stelvio 1200 NTX MY11
Electrical system
ELE SYS - 115
Summary of Contents for Stelvio 1200 MY11 2011
Page 1: ...SERVICE STATION MANUAL B043090 Stelvio 1200 NTX MY11 ...
Page 4: ......
Page 6: ...INDEX OF TOPICS CHARACTERISTICS CHAR ...
Page 54: ...INDEX OF TOPICS SPECIAL TOOLS S TOOLS ...
Page 61: ...INDEX OF TOPICS MAINTENANCE MAIN ...
Page 72: ...INDEX OF TOPICS ELECTRICAL SYSTEM ELE SYS ...
Page 133: ...INDEX OF TOPICS ENGINE FROM VEHICLE ENG VE ...
Page 146: ...INDEX OF TOPICS ENGINE ENG ...
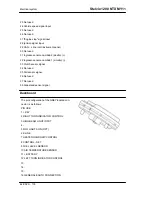
Page 147: ...Gearbox Diagram key 1 Ball bearing Stelvio 1200 NTX MY11 Engine ENG 147 ...
Page 255: ...INDEX OF TOPICS POWER SUPPLY P SUPP ...
Page 267: ...INDEX OF TOPICS SUSPENSIONS SUSP ...
Page 295: ...INDEX OF TOPICS CHASSIS CHAS ...
Page 326: ...INDEX OF TOPICS BRAKING SYSTEM BRAK SYS ...
Page 356: ...INDEX OF TOPICS BODYWORK BODYW ...