2-11
1
2
Basic Operation
s
4
5
6
Setting a Media
13
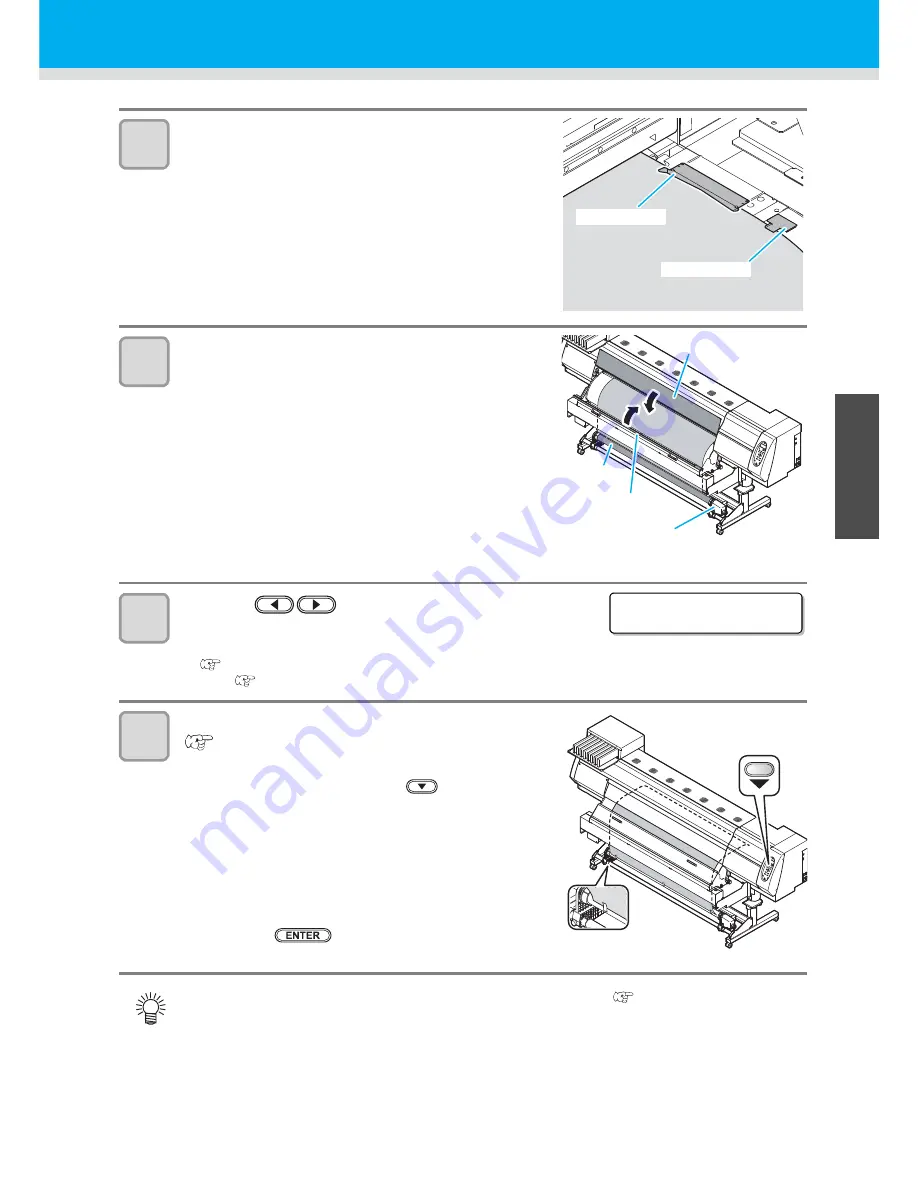
Hold the media with the media guide gently.
• If the printing result indicates that drying is not enough, use
the media guide to improve adhesion of the media to the
platen.
• Use the media guide with it hit slightly against the sheet
holder.
• Make the media pass around the center of the claw of the
media guide.
14
Prepare for the take-up device.
(1)
Set an empty core of the roll media on the take-up
device.
(2)
Close the front cover.
(3)
Close the shading cover.
15
Press the
key to detect the media width.
• Detects the media width.
• When [MEDIA RESIDUAL] of the machine setup is "ON"
(
P.3-14), the screen for entering media remaining amount is displayed after detecting the media
width.(
P.2-12)
16
Fix the media on the take-up device.
(
P.2-12)
(1)
Feed the media up to the core of the roll media of the
take-up device by pressing the
key.
• Check the media end is not caught into the slot on the
post-heater, and then feed the media.
(2)
Fix the middle of the media with adhesive tape.
(3)
In the same manner, fix the left side and right side of
the media.
• Make sure that the there is no slack or wrinkle on the
media in such condition that the roll media is pulled to
right and left evenly, and then stick the tape.
(4)
Press the
key.
• Depending on the media to use, attach/ remove the antistatic sheet. (
P.1-18)
• If media floats at the detecting position, it may not be detected correctly.
• When you print, be sure to use the take-up device.
Media guide
Media press
Front cover
Paper core
Take-up
device
Shading cover
MED I A DE T ECT
[ < / > ]
Summary of Contents for JV400-130SUV
Page 1: ...MIMAKI ENGINEERING CO LTD URL http eng mimaki co jp D202394 17 Original instructions ...
Page 58: ...2 28 ...
Page 73: ...3 15 1 1 3 Convenient use 5 6 9 Press the key several times to end the setting ...
Page 100: ...3 42 ...
Page 162: ...5 20 ...
Page 179: ...Function Flowchart 6 17 Appendix 6 ...
Page 187: ...Function Flowchart 6 25 Appendix 6 ...
Page 192: ...6 30 ...


