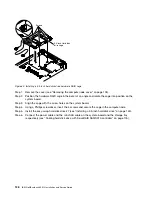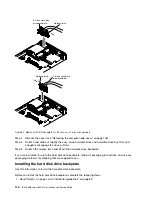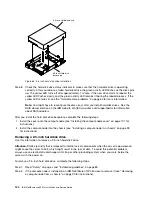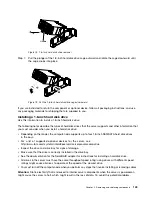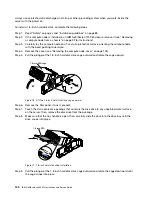
2.5-inch Hard disk
drive backplate
Release latch
1.8-inch solid state
drive backplate
Release latch
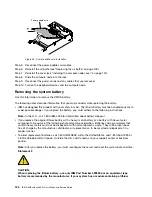
Figure 62. Removal of HDD backplate for 2.5-inch and 1.8-inch respectively
Step 1.
Remove the cover (see “Removing the compute node cover” on page 105).
Step 2.
Unlatch and slide out slightly the easy-swap hard disk drive and hard disk drive bay filler, (just
enough to disengage the drive or filler).
Step 3.
Unlatch the release latch and lift out the hard disk drive backplate.
If you are instructed to return the hard disk drive backplate, follow all packaging instructions, and use any
packaging materials for shipping that are supplied to you.
Installing the hard disk drive backplate
Use this information to install the hard disk drive backplate.
Before you install the hard disk drive backplate, complete the following steps:
1. Read “Safety” on page v and “Installation guidelines” on page 89.
140
IBM NeXtScale nx360 M4 Installation and Service Guide
Summary of Contents for NeXtScale nx360 M4
Page 1: ...IBM NeXtScale nx360 M4 Installation and Service Guide Machine Type 5455 ...
Page 6: ...iv IBM NeXtScale nx360 M4 Installation and Service Guide ...
Page 34: ...20 IBM NeXtScale nx360 M4 Installation and Service Guide ...
Page 58: ...44 IBM NeXtScale nx360 M4 Installation and Service Guide ...
Page 94: ...80 IBM NeXtScale nx360 M4 Installation and Service Guide ...
Page 192: ...178 IBM NeXtScale nx360 M4 Installation and Service Guide ...
Page 538: ...524 IBM NeXtScale nx360 M4 Installation and Service Guide ...
Page 562: ...548 IBM NeXtScale nx360 M4 Installation and Service Guide ...
Page 722: ......
Page 730: ......
Page 737: ......
Page 738: ...Part Number 00KC216 Printed in China 1P P N 00KC216 1P00KC216 ...

