


SEQ P10: Pattern/RPPR 10–1: Pattern Edit
265
SEQ P10: Pattern/RPPR
Here you can record and edit patterns, assign patterns to
tracks of a song, and make RPPR (Realtime Pattern Play/
Recording) settings. You can also convert drum track
patterns for use in Program mode or other modes.
• You can use preset patterns P00–522, and user patterns
U00–99.
Preset patterns provide patterns that are suitable for
drum tracks; you can select these patterns from any
song.
There are one hundred user patterns for each song; you
can create and store your own patterns as desired.
• You can create the desired performance data for a track
by using the menu commands Put To Track or Copy To
Track
to place or copy patterns into a track. For more
information, please see “Put To Track” on page 290.
• The RPPR function lets you assign patterns to different
keys and then trigger these patterns by pressing notes on
the keyboard of the KYBD-61/73/88, etc., and record the
result onto the track in realtime. For more information,
please see “10–3: RPPR Setup” on page 267.
• You can create user drum track patterns.
User patterns in Sequencer mode can be converted using
the menu command Convert to Drum Trk Pattern. For
more information, please see “Convert to Drum Trk
Pattern” on page 291.
Note: User patterns in Sequencer mode are not saved
internally; you must save them on a USB storage device, and
load them each time after powering-on. If you convert user
patterns to user drum track patterns, they will be preserved
in internal memory even when the power is turned off,
meaning that you can manage them along with programs
and combinations.
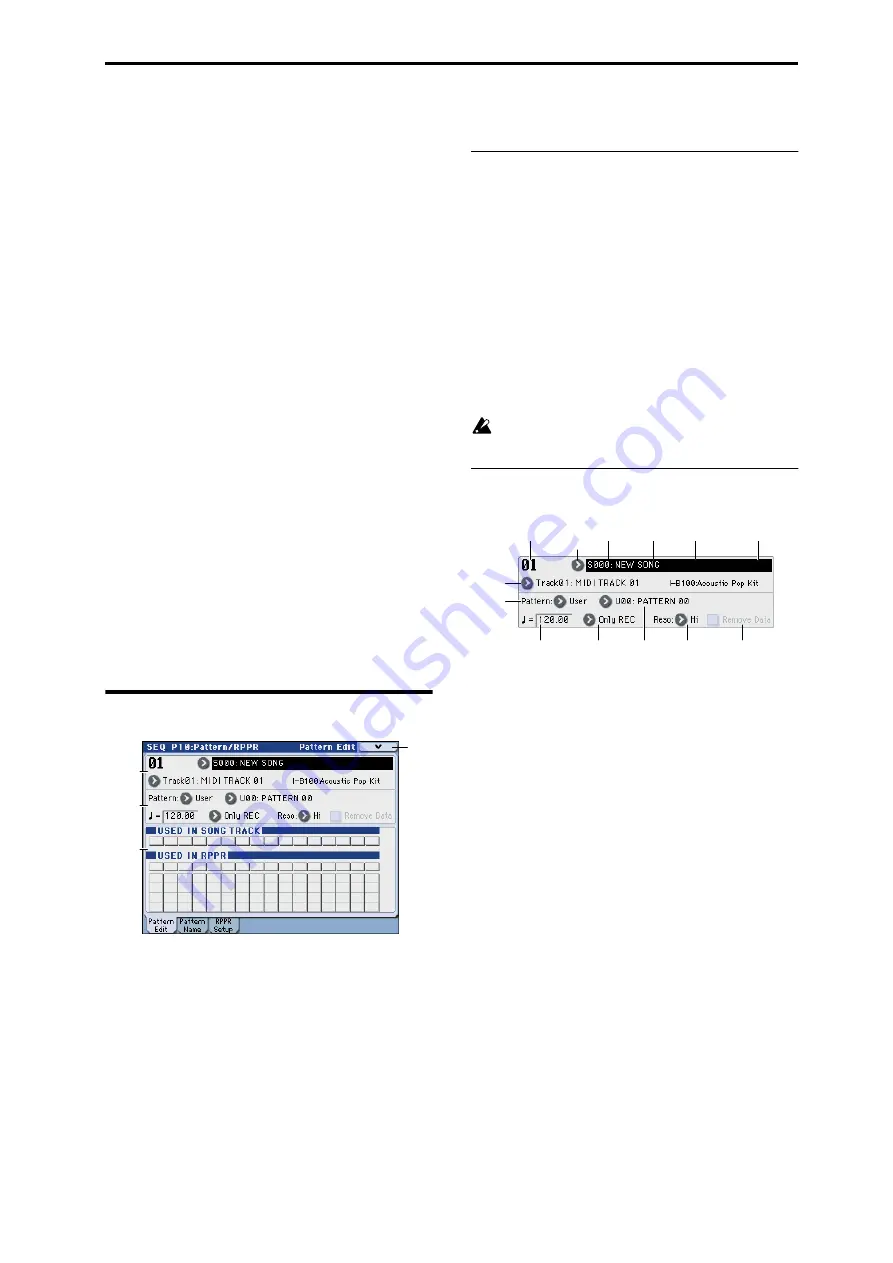
10–1: Pattern Edit
Here you can record and edit patterns, and assign them to
tracks of a song. The following types of pattern operations
are available.
• User patterns can be recorded in real-time (as well as
recorded from performances generated by the KARMA
function), step-recorded, or created using the Get From
MIDI Track command or Copy Pattern command. You
can also copy a preset pattern to a user pattern and edit
it. (You can’t directly edit a preset pattern.)
• Preset patterns and user patterns can be placed in or
copied into a track.
• You can convert user patterns to drum track patterns.
10–1a: Location, Song Select, Track
Select
Location
[01...99]
Displays the current measure location of the selected
pattern.
Song Select
[000...127: name]
Selects a song.
The user pattern will be created in the song you select.
Track Select
[Track01...16, Master Track]
Selects the track that will be used to record/play the pattern
data. The pattern data will be recorded/played using the
settings of the track you select. The area at the right displays
the program bank, number, and name for the selected track.
Settings of Master Track will be ignored. The most
recently selected Track 01–16 will be used.
10–1b: Pattern, Pattern Select, Tempo,
Metronome, Reso, Remove Data
How to record a user pattern
1. Use Song Select to select the song in which you want to
create a user pattern.
2. Use Track Select to select the sound that you will
record.
The pattern you record will sound according to your choice
in Track Select.
3. Use Pattern Bank and Pattern Select to select User pat-
tern and the desired pattern number.
4. Select the menu command Pattern Parameter, and in
the dialog box, specify the number of measures and
time signature of the pattern.
5. Check the tempo in “
”.
6. If you want to record in realtime, set Reso to specify the
resolution, and press the SEQUENCER REC/WRITE
switch and then the START/STOP switch to begin
recording.
When you finish recording to the end of the measures
specified by Pattern Parameter, you will return to the first
measure, and can continue recording while adding more
material. For more information, please see “Loop All
Tracks” on page 204.
If you want to perform step recording, select the menu
command Step Recording (Loop Type) to open the dialog
box, and record. For the procedure of step recording, please
see “Step Recording” on page 279 and “Step Recording
(Loop Type)” on page 289.
7. After recording, use the menu commands as desired to
edit the pattern or the events in the pattern.
10–1c
10–1b
10–1a
10–1
Menu
Location
Song Select
Popup
Meter
Tempo
Tempo Mode
Pattern
Bank
Track
Select
Resolution
Tempo
Metronome
Pattern
Select
Remove
Data
Summary of Contents for M3
Page 1: ...4 E ...
Page 306: ...Sequencer mode 296 ...
Page 364: ...Sampling mode 354 ...
Page 430: ...Media mode 420 ...
Page 534: ...Effect Guide 524 ...
Page 646: ...Appendices 636 ...


