Ch.3 Settings
< 61 >
DRYPRO MODEL 771 INSTALLATION MANUAL Ver.1.00 2003.10
S10 DICOM SCU /.
CH 1 CS-1
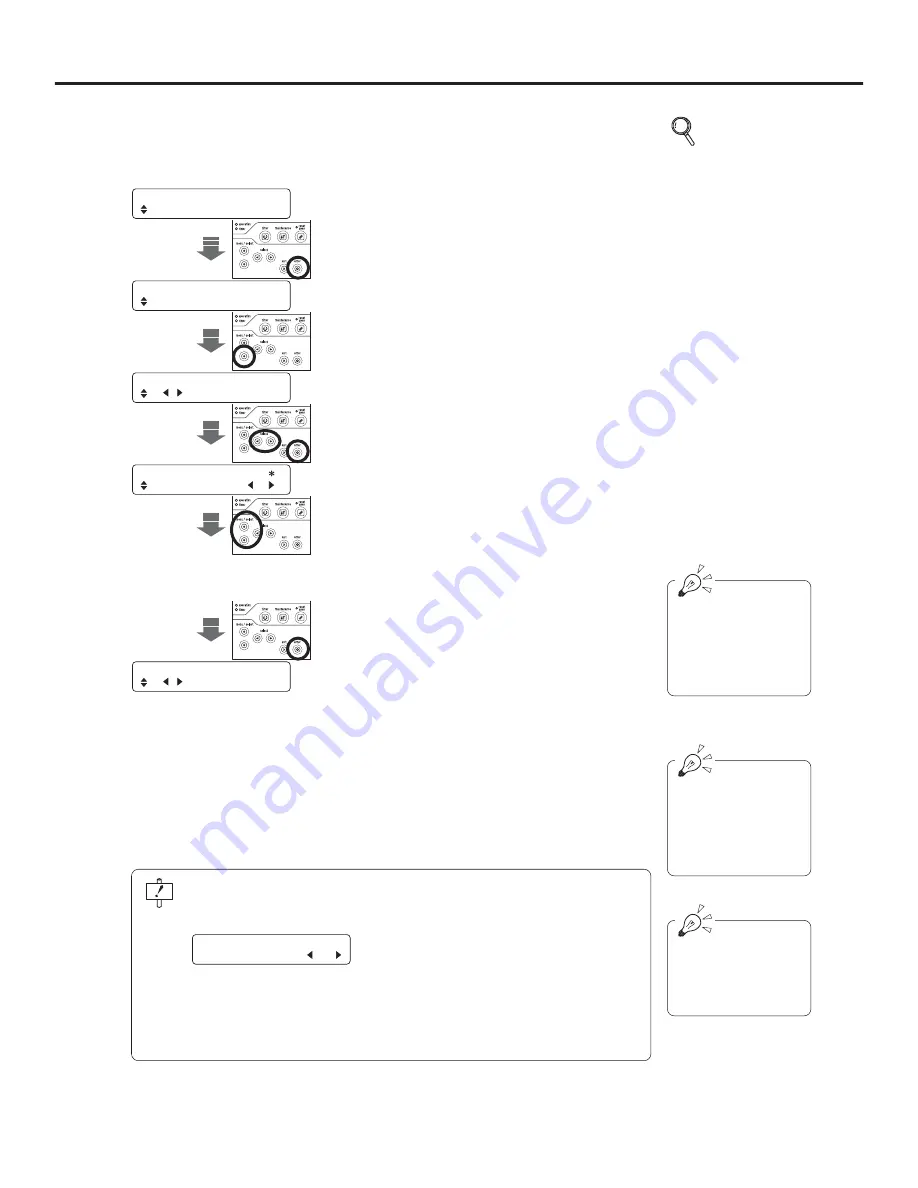
1
Start up the service maintenance mode.
2
Select "U80 SERVICE MODE" and press the
[enter] key.
• The message "S00 DICOM SCP" will be displayed.
U80 SERVICE MODE /.
S00 DICOM SCP /.
3
Press the lower [menu/select] key once.
• The message "S10 DICOM SCU" will be displayed
in the message display window.
4
Use the [select] key to choose the diagnostic
device for which settings are to be made.
• The channel will be switched.
5
Press the [enter] key.
• The setting item input screen will be displayed.
.
.
.
.
S11 CHANNEL USE .
ON
p.38 Starting up the
Service
Maintenance
Mode
6
Input the necessary characters or digits in each
of the setting windows.
•
Items for setting may be selected using the
[menu/select] key.
•
The example at left shows the channel number
input screen ("S11 CHANNEL USE").
7
Press the [enter] key after completing all input
and settings.
• The setting will be saved, and the DRYPRO 771
will automatically shutdown so that the settings
become valid. Press the operation switch to
restart. "DICOM SCU" screen will be displayed
when the restart completes.
.
.
.
.
S10 DICOM SCU /.
CH 1 CS-1
Pressing the [mode]
key will switch the input
mode between
alphabetical characters
and numerical digits.
The cursor will flash
below the position for
input. The cursor may
be shifted by using the
[select] key.
In alphabet mode,
press and hold the
[Shift] key to input lower
case characters.
When [exit] key is pressed in the "DICOM SCU Setting", a confirmation screen will be
displayed. Select "YES" or "NO" for the register of the changed data using [select]
key [
[
][
\
].
When "YES" selected
: DRYPRO 771 automatically shuts down to enable the
setting. Press operation switch to restart.
When "NO" selected
: Display returns to the maintenance menu without
registering the changes to the setting (data).
Data was changed
Save the data? YES
Summary of Contents for DRYPRO 771
Page 10: ...Preface 8 DRYPRO MODEL 771 INSTALLATION MANUAL Ver 1 00 2003 10...
Page 26: ...Ch 1 Before Installation 24 DRYPRO MODEL 771 INSTALLATION MANUAL Ver 1 00 2003 10...
Page 54: ...Ch 2 Unpacking and Installation 52 DRYPRO MODEL 771 INSTALLATION MANUAL Ver 1 00 2003 10...
Page 82: ...Ch 4 Checking the Image 80 DRYPRO MODEL 771 INSTALLATION MANUAL Ver 1 00 2003 10...
Page 96: ...Ch 4 Checking the Image 94 DRYPRO MODEL 771 INSTALLATION MANUAL Ver 1 00 2003 10...


