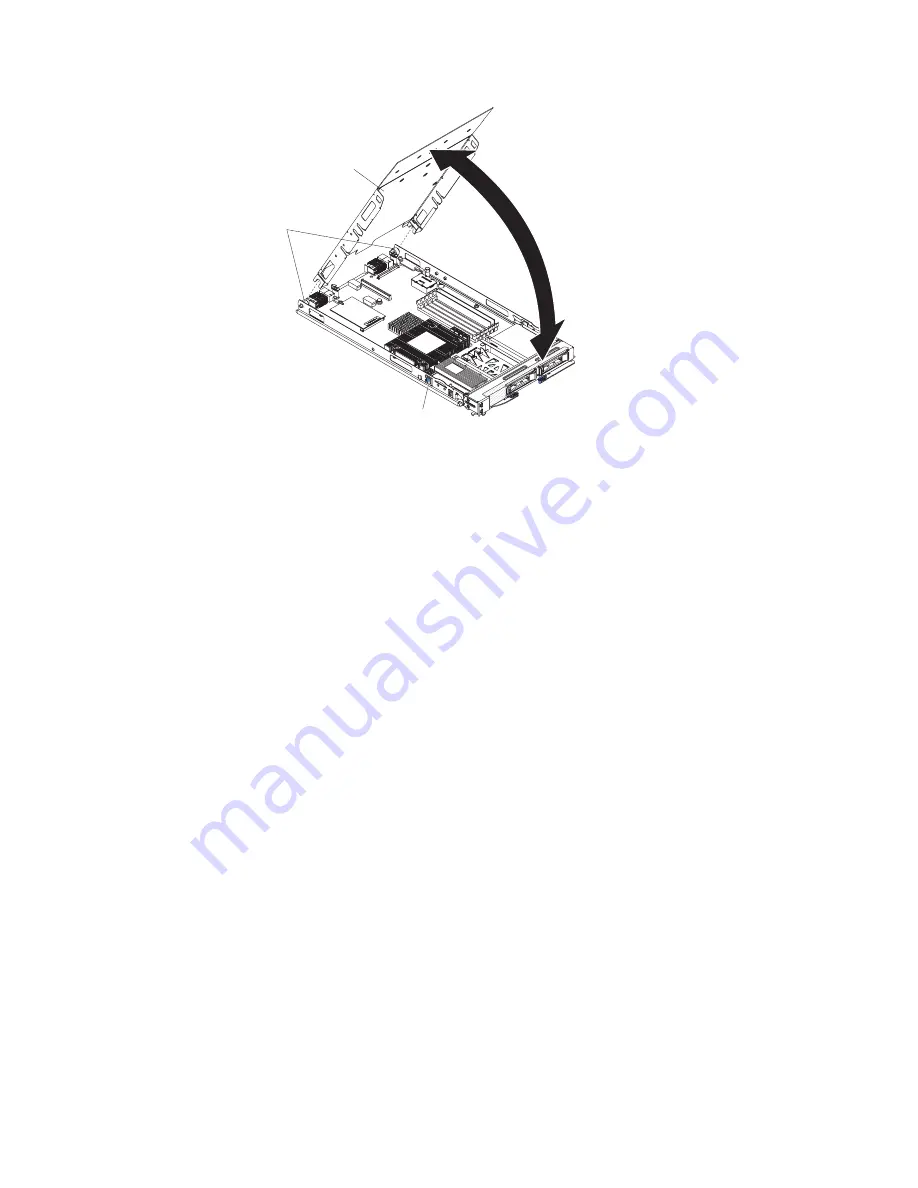
Blade server
cover release
Cover
pins
Blade server
cover
Attention:
You cannot insert the blade server into the BladeCenter unit until the
blade server cover is installed and closed. Do not attempt to override this
protection.
1.
Before you begin, read “Safety” on page v and “Installation guidelines” on
page 31.
2.
Lower the cover so that the slots at the rear slide down onto the pins at the
rear of the blade server. Before you close the cover, make sure that all
components are installed and seated correctly and that you have not left loose
tools or parts inside the blade server.
3.
Pivot the blade server cover to the closed position until it clicks into place.
4.
Install the blade server in the BladeCenter unit (see “Installing the blade server
in a BladeCenter unit” on page 34 for instructions).
Removing an optional expansion unit
Use these instructions to remove the optional expansion unit from the blade server.
To remove the optional expansion unit, complete the following steps.
Note:
1.
The following illustration shows how to remove an optional expansion unit
from a blade server.
2.
The illustrations in this document might differ slightly from your hardware.
Chapter 5. Removing and replacing blade server components
37
Summary of Contents for BladeCenter HS12 Type 1916
Page 1: ...BladeCenter HS12 Type 8014 8028 or 1916 Problem Determination and Service Guide...
Page 2: ......
Page 3: ...BladeCenter HS12 Type 8014 8028 or 1916 Problem Determination and Service Guide...
Page 36: ...24 BladeCenter HS12 Type 8014 8028 or 1916 Problem Determination and Service Guide...
Page 186: ...174 BladeCenter HS12 Type 8014 8028 or 1916 Problem Determination and Service Guide...
Page 190: ...178 BladeCenter HS12 Type 8014 8028 or 1916 Problem Determination and Service Guide...
Page 198: ...186 BladeCenter HS12 Type 8014 8028 or 1916 Problem Determination and Service Guide...
Page 203: ......
Page 204: ...Part Number 60Y1601 Printed in USA 1P P N 60Y1601...


