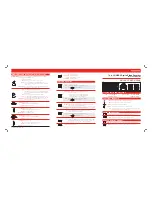
Tools Panel
The Tools panel contains the following function buttons:
Screen Division. Click the Screen Division button to switch between 4, 9, and
16 screen divisions. Depending on the amount of chosen cameras, the Search
window will display the appropriate screen division to accommodate all chosen
camera inputs. (e.g. if 5 cameras are chosen, a 9-camera screen division will be
displayed)
Panorama. Click the Panorama button to view the video segment frame-by-frame
in the multiple screen division
Expand. Click the desired camera on the display screen during the playback and
click the Expand button to enlarge the image to fit the display window
Zoom In / Zoom Out / Drag. Click the Zoom button to switch between the
Zoom In, Zoom Out and Drag functions. The user can zoom in or out of a still
image or video during playback and drag the enlarged image on the display
screen.
Refresh. Click the Refresh button to refresh the timeline to display the recently
recorded video.
Print. Click the Print button to print the still image on the connected printer.
Audio Setup. Click the Audio Setup button to mute/adjust the audio volume
Backup. Click the Backup button to save the video/still image on the local or
remote media.
Bookmark. Click the Bookmark button to save the exact time of the video re-
cording, so that it can be quickly located on the timeline later.
Full Screen. Click the Full Screen button to display a single camera, selected
screen division or still image in the full screen mode with no Graphic User Inter-
face (GUI)
Video Recording Playback
To playback the video recording in the Search mode, do the following:
1.
In the Time panel, choose the date from the Calendar window
2.
Set the time of the recording in the Time panel Clock window
OR
Set the time of the recording by clicking inside of the timeline bar to set the timeline
marker (the vertical blue line) to the start of the video recording to be played back.
102
i³Server
XML to PDF by RenderX XEP XSL-FO Formatter, visit us at
http://www.renderx.com/