


1.
Click Copy To and choose a desired cameras from the list
2.
Click All Cameras to apply the same schedule to all available cameras
Schedule Setup - Advanced Mode
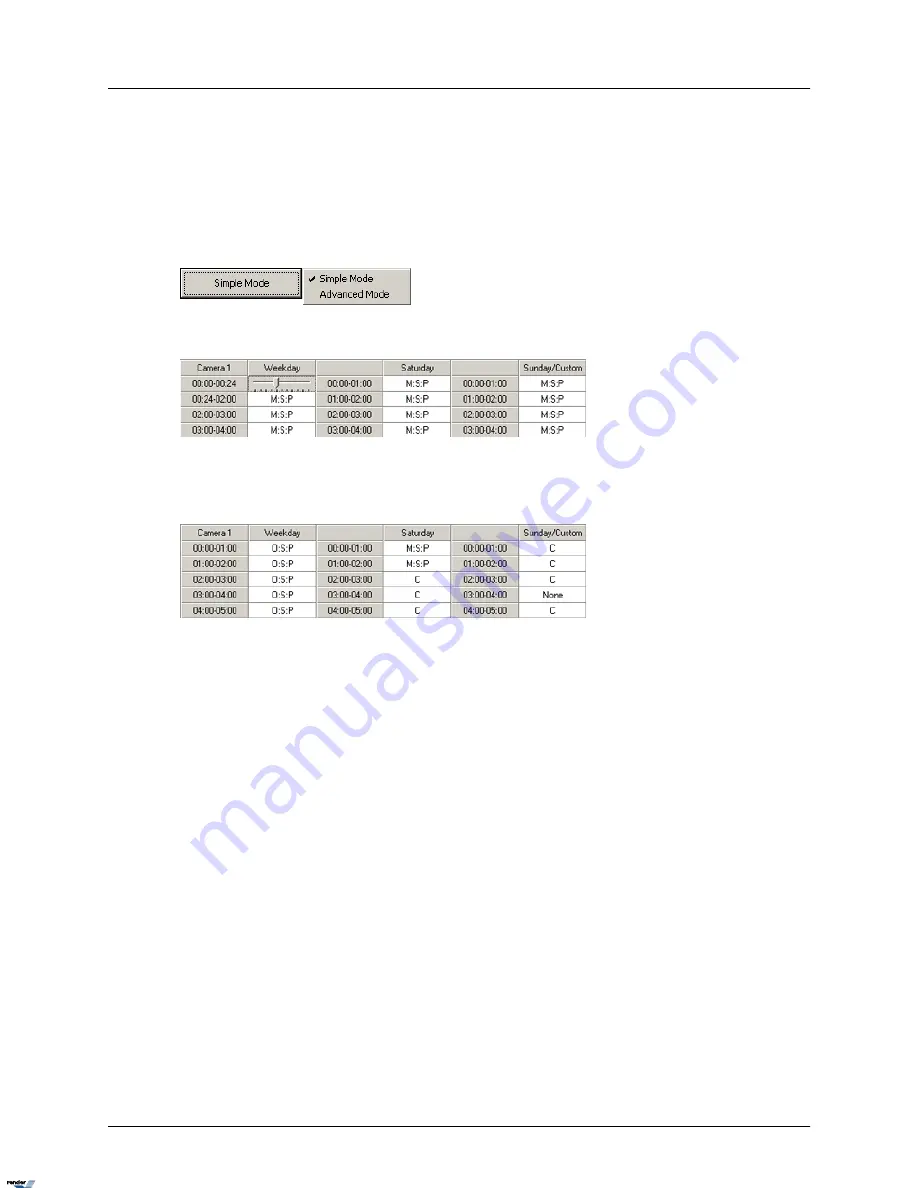
To switch to the Advanced Mode, click Simple Mode and choose Advanced Mode.
In Advanced Mode, the time can be adjusted up to the minute:
Example
The recording for Camera 1 based on the snapshot below is as follows:
•
Weekdays (12:00AM - 4:59AM) - based on Object/Sensor and Prealarm
•
Saturdays (12:00AM - 1:59AM) - based on Motion, Sensor and Prealarm
•
Saturdays (2:00AM - 4:59AM) - continuous recording
•
Sundays and custom holidays (12:00AM - 2:59AM) - continuous recording
•
Sundays and custom holidays (4:00AM - 4:59AM) - continuous recording
Notice that there is NO recording on Sundays and custom holidays 3:00AM-3:59AM. It is highly
recommended not to leave any gaps in the video-recording schedule.
Related Topics: Camera Setup | Sensor Setup | Motion Setup | VideoLogix™
Screen Division
In the Screen Division setup, the main screen display is configured. Each screen division can be
configured separately.
To configure the screen division setup, do the following:
1.
Click the desired screen division icon
2.
In the Camera Selection menu, choose all cameras that will be displayed on the selected
screen division. The cameras can be chosen sequentially or randomly.
30
i³Server
XML to PDF by RenderX XEP XSL-FO Formatter, visit us at
http://www.renderx.com/


