173
Copy recorded images
Step 1
Click the [Control] tab on the top page (
☞
of the operation window.
Step 2
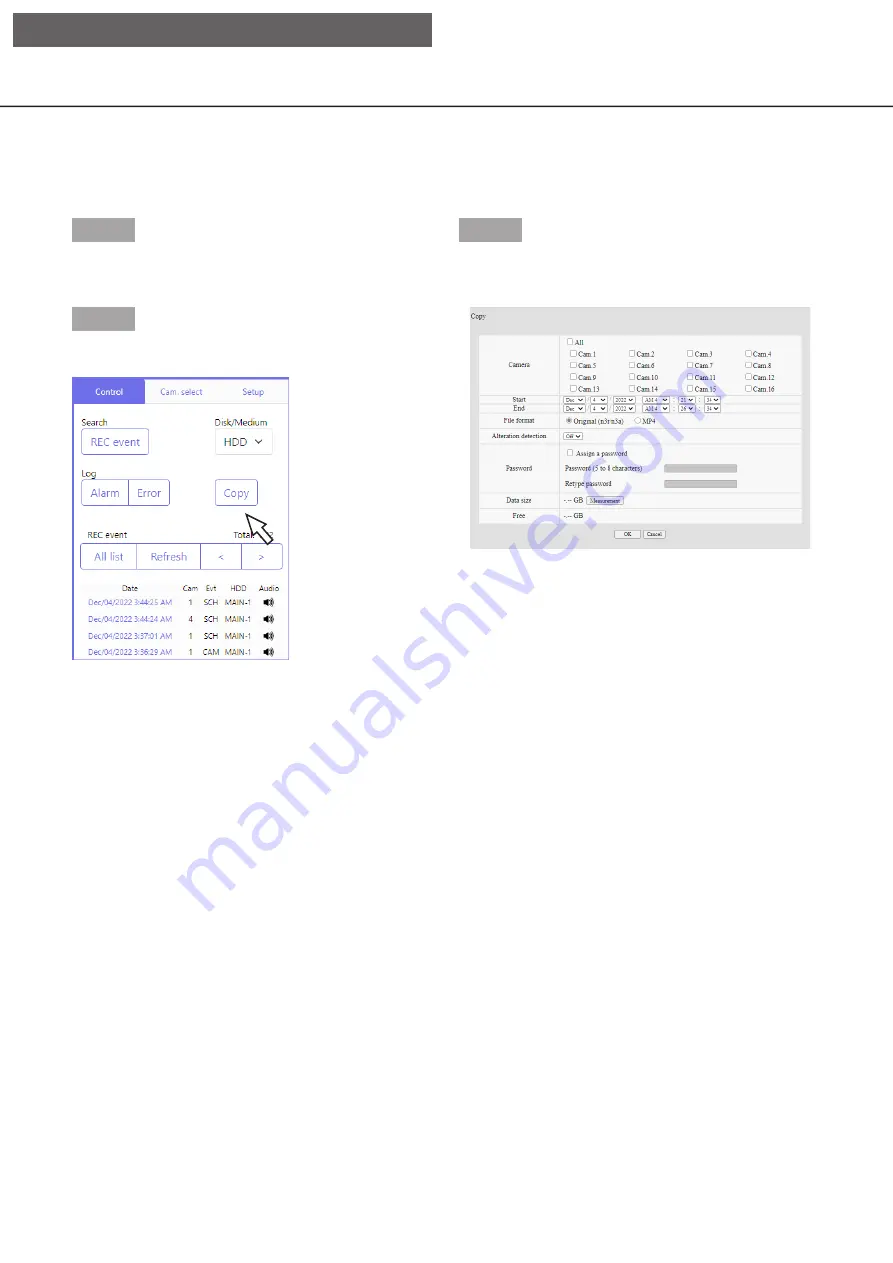
Click the button in the [Copy] box.
→
→
The "Copy" window will be displayed.
Step 3
Specify the detailed conditions of recorded images to
be copied. Specify the information to be set as
conditions.
[Camera]
Select the camera you wish to copy. Mark the
checkbox next to the desired camera. When the
checkbox for [All] is marked, the checkboxes of all
cameras can be marked.
[Date & time range]
Designate the start point (start date & time) and the
end point (end date & time) of recorded images to be
copied. Click the [
▼
] button, and then designate date
& time.
[File format]
Select the file format (Original (n3r/n3a)/MP4) of the
recorded data to be copied. Mark the checkbox
corresponding to the desired file format.
[Alteration detection]
Determine whether or not to attach the alteration
detection code to the recorded images to be copied.
When the alteration detection code is attached, it is
possible to check if the copied recorded images have
been altered or not when playing the copied recorded
images using the viewer software. Click the [
▼
]
button, and then select "On" or "Off".
Copy the recorded image on the recorder to an external storage device (external HDD, USB memory stick).
Refer to page 142 for further information about the copy function. Refer to page 178 for information on how
to play copied images.
[Operation via PC web browser]


