


4-15
4.7 Circulation Unit Replacement Procedure
1
Perform “Ink drainage” and then “Pressure relief”.
2 Turn off the power supply.
3
Perform “4.1.3 Approach to the parts on the rear side of the equipment”.
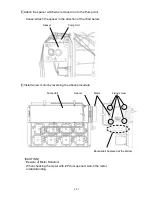
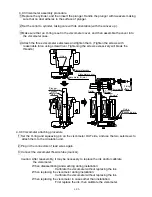
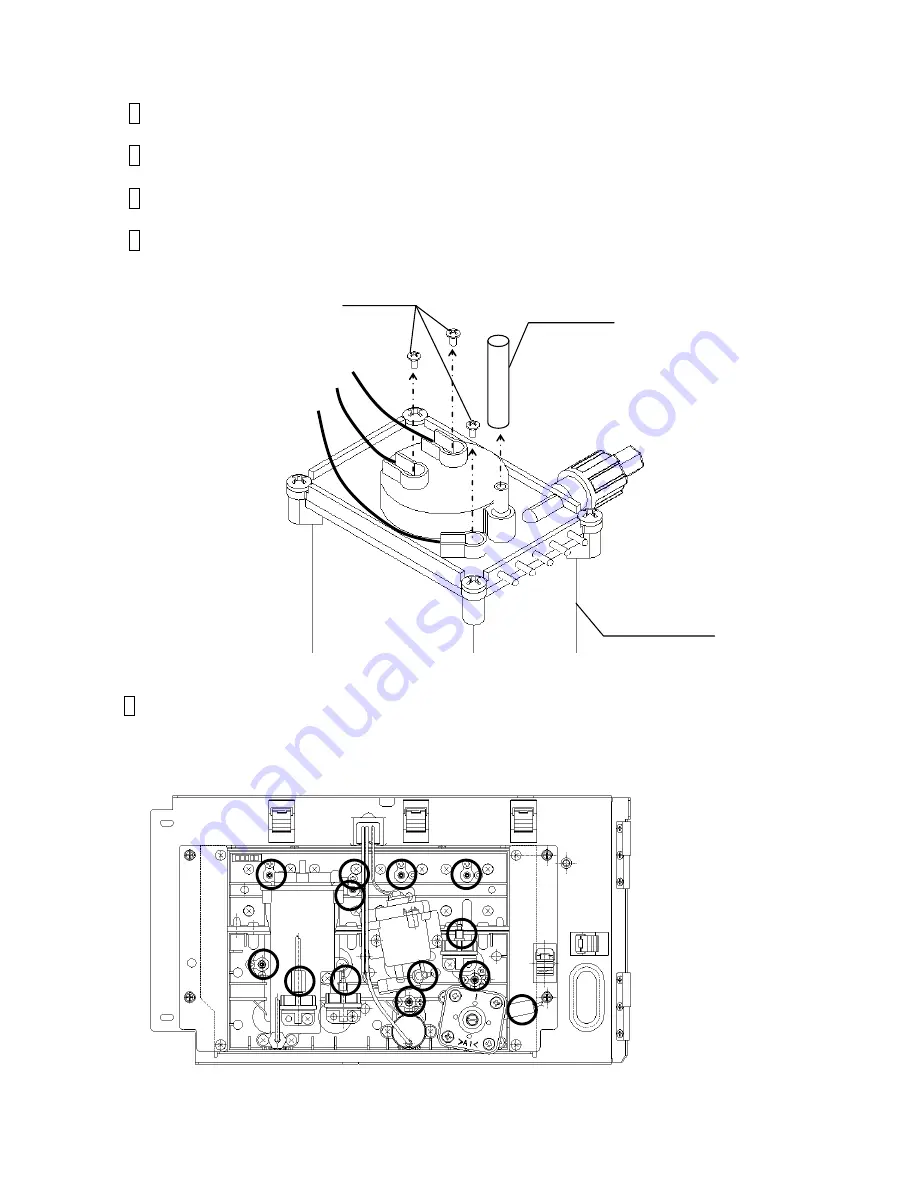
4 Remove the wire connecting part screws (3 positions) of the liquid level
sensor in the main ink tank and the exhaust tube.
5 Remove the plumbing tubes (13 positions) that are connected to the
circulation unit.
"Caution" Take care about an ink drip.
Fixing screw
Exhaust tube
Black
White
Blue
Main ink tank
Summary of Contents for IJ RX2
Page 1: ...Service Manual HITACHI Printer Model RX2 Revision Feb 2014 Version A ...
Page 13: ...1 8 2 External views Rear side 1 2 2 Main body internal ...
Page 14: ...1 9 1 2 3 Print head ...
Page 101: ...3 26 Circuit diagram of EZJ127A ...
Page 102: ...3 27 Circuit diagram of EZJ127B ...
Page 116: ...3 41 Circuit diagram of EZJ129 ...
Page 164: ...4 40 5 Reset the time of the R air filter to 0 on the Parts usage time management screen ...
Page 247: ...7 Attached Drawing 7 1 Circulation System Diagram Circulation System Diagram 7 1 ...
Page 249: ...7 3 7 2 2 Electrical Connection Diagram RX2 B Basic model 7 3 ...


