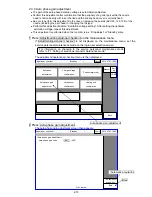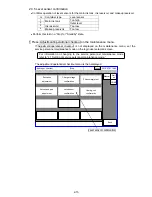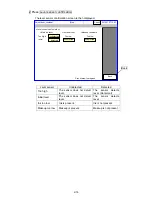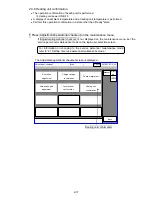
2-12
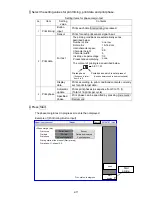
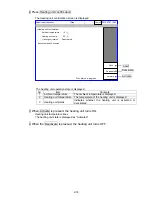
Example of [Print timing: Sensor]
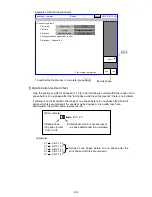
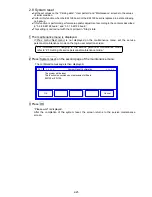
To quit before the process is complete, press Abort.
5 Determination method of test.
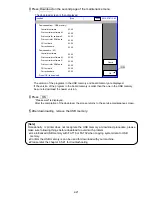
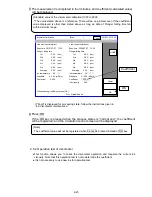
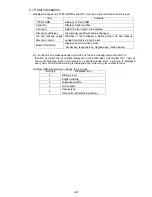
View the printing results for phases 0 to 15 (f), and if printing is normal within the range of one
p
hase before to one phase after the “print phase which is set at present”, there is no problem.
If printing is not normal within the range of one phase before to one phase after the print
phase which is set at present, the nozzle may be clogged or ink quality may have
deteriorated. Clean the nozzle, replace ink, etc.
(Example)
:
5 7
■■ A B C 1 2 3
6 7
■■ A B C 1 2 3
7 7
■■ A B C 1 2 3
8 7
■■ A B C 1 2 3
9 7
■■ A B C 1 2 3
:
[Print contents ]
■
■
A B C 1 2 3
Printed phase
Printed phase which is set at present
(16 phase in total
(
a phase determined to be suitable
)
from 0 to f)
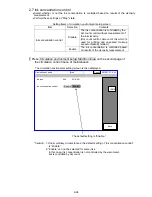
Specify phase.
[Ready ]
Adjust./oper. checkout
<Phase margin test>
Abort
Proc. status: In progress
Print timing
Print data
Print phase
Printing starts upon signal from sensor.
Print phase:
X
-phase (0-f)
Button input
Sensor
For test
Data to be displayed
Automatic update
Specified phase
2015.07.07 12:45
Com=0
Dec.
Inc.
Abort
Range of one phase before to one phase after the
print phase which is set at present
Summary of Contents for IJ RX2
Page 1: ...Service Manual HITACHI Printer Model RX2 Revision Feb 2014 Version A ...
Page 13: ...1 8 2 External views Rear side 1 2 2 Main body internal ...
Page 14: ...1 9 1 2 3 Print head ...
Page 101: ...3 26 Circuit diagram of EZJ127A ...
Page 102: ...3 27 Circuit diagram of EZJ127B ...
Page 116: ...3 41 Circuit diagram of EZJ129 ...
Page 164: ...4 40 5 Reset the time of the R air filter to 0 on the Parts usage time management screen ...
Page 247: ...7 Attached Drawing 7 1 Circulation System Diagram Circulation System Diagram 7 1 ...
Page 249: ...7 3 7 2 2 Electrical Connection Diagram RX2 B Basic model 7 3 ...


