


___________________________________________________Chapter 6 – Testing and Repair, Page 6-31
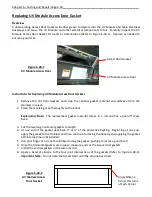
Main Electrical Raceway Ventilation Fan – Cont.
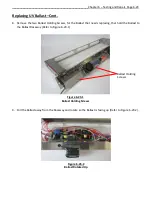
3.
Gain access to the fans, either the Raceway Fan or the Electrical Compartment Fan.
4.
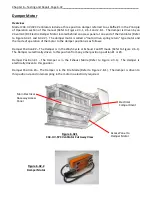
Unplug the electrical connections at the top left corner of the fan (Refer to Figure 6-31-2).
5.
Remove the two holding nuts and slide out the fan.
6.
Before installing the new fan check the Ventilation Snorkels for any obstructions.
7.
Important Note:
When installing a new fan in the raceway, the label on the fan faces away from you
as the air is pushed into the raceway. When installing a new fan in the Electrical Compartment, the
label on the fan faces you as the air is pushed up and through the discharge Ventilation Snorkel.
Torque the nuts to 7-9 in-lbs.
8.
Plug in the electrical connection.
9.
Turn on the power to the Command Center and the UV Lamps.
10.
Push the
START FAN
button and check the Ventilation fan for proper air flow direction.
11.
If operating properly reinstall the Main Electrical Access Panel and the Electrical Compartment Cover
Plate and torque the screws to 7-9 in-lbs.
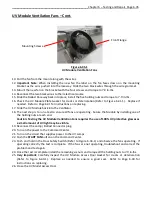
Figure 6-31-2
Typical Main Electrical
Raceway Ventilation Fan
Electrical Connections
Front Flange


