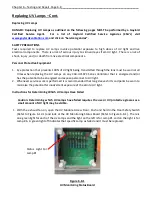


Chapter 6 – Testing and Repair, Page 6-22___________________________________________________
Replacing UV Ballast –Cont.
Instructions for Replacing UV Ballasts
To replace UV Lamp Sockets carefully use the following step by step instructions.
1.
Turn off all power to the Gaylord Command Center.
2.
Turn off all circuits that supply power to the UV Lamps.
3.
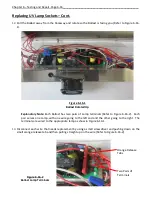
Open the UV Module Access Door.
4.
Disconnect the Lamp / Ballast Connector plug (Refer to Figure 6-9-1 and 6-9-2).
5.
Remove the eight nuts that hold the Module in place.
6.
Carefully slide out the UV Module and place on a work bench.
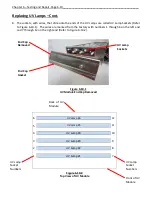
7.
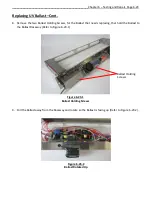
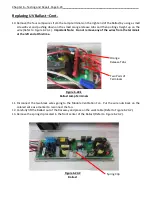
Next the Ballast Raceway must be removed. Using a wrench, remove the five nuts that hold the
raceway to the face of the Module (Refer to Figure 6-22-1). Gently pull the Ballast Raceway off the
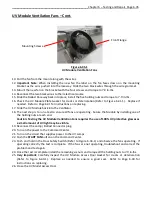
Module as shown in Figure 6-22-2.
Five Nuts that
Hold the Ballast
Raceway to the
Face of the
Module
Figure 6-22-1
Removing Ballast Raceway
Ballast Raceway
Figure 6-22-2
Ballast Raceway Removed from Module
Ballast #3
Ballast #2
Ballast #1


