


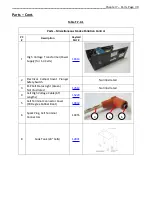


___________________________________________________Chapter 6 – Testing and Repair, Page 6-53
Testing Plunger Safety Switch – Cont.
Testing for Mechanical Failure
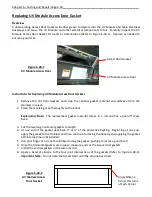
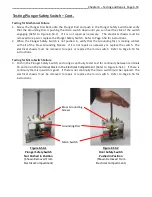
1.
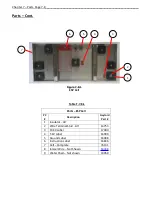
Screw the Plunger Disc back onto the Plunger Rod and push in the Plunger Safety Switch and verify
that the Grounding Disc is pushing the micro switch down until you can hear the click of the switch
engaging (Refer to Figure 6-53-1). If it is not repair as necessary. The electrical chassis must be
removed to repair or replace the Plunger Safety Switch. Refer to Page 6-54 for instructions.
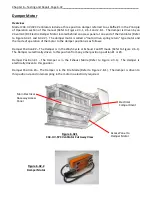
2.
When the Plunger Safety Switch is not pushed in, verify that the Grounding Disc is making contact
with all of the brass Grounding Screws. If it is not repair as necessary or replace the switch. The
electrical chassis must be removed to repair or replace the micro switch. Refer to Page 6-54 for
instructions.
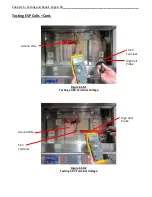
Testing for Micro Switch Failure
3.
Push in the Plunger Safety Switch, and using a continuity tester test for continuity between terminals
X3 and X4
on the terminal block in the Electrical Compartment
(Refer to Figure 6-54-1). If there is
continuity the micro switch is good. If there is not continuity the micro switch must be replaced. The
electrical chassis must be removed to repair or replace the micro switch. Refer to Page 6-54 for
instructions.
Grounding Disc
Micro Switch
Figure 6-53-1
Plunger Safety Switch
Not Pushed In Position
(Shown Removed From
Electrical Compartment)
Figure 6-53-2
Door Safety Switch
Pushed in Position
(Shown Removed From
Electrical Compartment)
Brass Grounding
Screws


