Garmin AT
Rev --
8-22
GX Service Manual
© 2004 Garmin AT
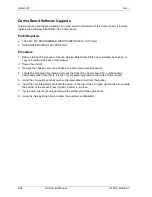
NAV Board Software Upgrade
This procedure describes the loading of a newer version of software for the NAV board.
Parts Required
•
139-0235-022 GX NAV SOFTWARE
Note:
If the unit’s current software version is less than 2.1, the unit must be sent into the factory for all
upgrades.
Procedure
1. Before starting this procedure, fill out a Service Data Sheet if this has not already been done. A
copy is located at the back of this manual
2. Power the unit off and insert software card into the database card slot.
3. Put the unit into test mode by powering the unit back on while holding the outermost two
smart
keys
down. The screen should read:
Application card detected Reload?
4. Turn the small knob to select
YES
and press
ENTER
. The screen will display
Please
Wait...Software is being updated.
5. When it is done, it will go through its normal self-test. If a memory failure is reported, disregard it.
6. Power the unit off when self-test is done.
7. Remove the software card.
8. Turn the unit back on in test mode by pressing the outermost two
smart keys
while turning power
on as above.
9. Turn the large knob counterclockwise 6 clicks until
SYSTEM INITIALIZATION
screen appears.
10. Press the
SEL
button.
ALL
will appear on the screen. DO NOT press
ENTER
at this point or all
user waypoints will be lost.
11. Turn the small knob until
USER NVRAM
appears on the screen.
12. Press
ENTER
. When NVRAM reset is complete, Hexadecimal numbers should appear on the
screen in the bottom left and bottom right corners. These are checksums The same checksums
should show on both sides. If it doesn’t show the same checksums at the bottom corners of the
screen, try loading software again. If that fails, perform the Complete Initialization procedure. If
that doesn’t resolve the problem, replace the NAV board (see NAV Board Replacement
procedure) and perform the Complete Initialization procedure. Return the unit to the factory if that
fails to correct the problem.
13. Press
SEL
to go back to the Reset screen. DO NOT press
ENTER
at this point or all user
waypoints will be lost.
14. Turn the small knob 2 clicks until
EEPROM
shows on the screen.
15. Press
ENTER
.
16. The same checksums should show as above. If it doesn’t show the same checksums at the
bottom corners of the screen, try loading software again. The new software version should also
show on the system screen in the normal mode. If that fails, perform the Complete Initialization
procedure. If that doesn’t resolve the problem, replace the NAV board (see NAV Board
Replacement procedure) and perform the Complete Initialization procedure. Return the unit to the
factory if that fails to correct the problem.
17. Turn the large knob clockwise to
Install Options
. Press
ENTER
.
Summary of Contents for APOLLO GX SERIES
Page 8: ...Garmin AT Rev viii GX Service Manual 2004 Garmin AT This Page Intentionally Left Blank...
Page 12: ...Garmin AT Rev 1 4 GX Service Manual 2004 Garmin AT...
Page 24: ...Garmin AT Rev 2 12 GX Service Manual 2004 Garmin AT...
Page 26: ...Garmin AT Rev 3 2 GX Service Manual 2004 Garmin AT...
Page 27: ...2004 Garmin AT GX Service Manual 4 1 Chapter 4 Antenna Installation Guides...
Page 28: ...Garmin AT Rev 4 2 GX Service Manual 2004 Garmin AT...
Page 32: ...Garmin AT Rev 5 4 GX Service Manual 2004 Garmin AT...
Page 96: ...Garmin AT Rev 7 58 GX Service Manual 2004 Garmin AT...
Page 98: ...Garmin AT Rev 8 2 GX Service Manual 2004 Garmin AT Figure 8 1 GX55 Assembly Board Locations...
Page 122: ...Garmin AT Rev 8 26 GX Service Manual 2004 Garmin AT...
Page 130: ...Garmin AT Rev 9 8 GX Service Manual 2004 Garmin AT...
Page 140: ...Garmin AT Rev 10 10 GX Service Manual 2004 Garmin AT Figure 10 5 Comm Board Block Diagram...
Page 152: ...Garmin AT Rev 10 22 GX Service Manual 2004 Garmin AT...
Page 158: ...Garmin AT Rev 11 6 GX Service Manual 2004 Garmin AT...
Page 160: ...Garmin AT Rev 12 2 GX Service Manual 2004 Garmin AT...
Page 162: ...Garmin AT Rev 13 2 GX Service Manual 2004 Garmin AT...
Page 165: ......
Page 166: ......


